Page 3 of 18

WordPress – An easy to understand Ajax Example

WordPress – An easy to understand Ajax Example
27

Since one of my WordPress plugins seems to have been ghosted by it’s developer, I had to develop my own plugin. Not a big deal, just a lot of work.

For this I wanted to use Ajax calls to retrieve data.
Reading up on WordPress and using Ajax, I found it difficult to find a complete and working example.
Even the WordPress Codex example produced a “400 (Bad Request)” (you can see this in the console of your web browser).

So, once I figured it all out, and got it to work, I decided to dedicate a short article on a quick and easy working example on how to get started with Ajax in WordPress by using PHP, JavaScript and jQuery.

I hope others benefit from this, potentially saving you a lot of time to get started.

MacOS – ToggleTheme – Single click Toggle Theme

MacOS – ToggleTheme – Single click Toggle Theme
2

As a hobby developer, when testing dark theme vs light theme under MacOS X, I have those moments where I have to switch back and forth between both themes quite often.
Going into the System Preferences to toggle theme, choosing the Appearance option, and then selecting the desired theme, does indeed work, but I wanted just a “one click” theme toggle.

To help myself with that, I created a small application that does exactly this: it toggles to “the other” theme, with just a simple click.
So when Dark Theme is active, it switches to the Light (Aqua) Theme. If however the Light Theme is active, it switches to Dark Theme.

The application is super simple, and has no interface. Just start the App and it changes theme and then closes itself.
Normally, this App would just sit in your Applications directory, with the optional shortcut in your Dock or even on the Touch Bar (if your Mac has one).

ApplePi-Baker 2.1.6 Update – Bug fix release

ApplePi-Baker 2.1.6 Update – Bug fix release
15

ApplePi-Baker is build specifically for MacOS, to make backups or restore images (IMG).
Initially intended for Raspberry Pi users, this tool can be used for plenty other applications as well.
For example flashing LibreElec or disk for ODroid, making backups of photography SD cards, etc.
All this is done in the same format as used by the command line tool “dd”.

ApplePi-Baker supports a nice list of compression formats.
For making backups: 7Zip, tbz, tgz, tlz, txz and Zip.
For doing restores: 7Zip, bzip, gzip, ISO, Jar, lzip, rar, tar, tbz, tgz, tlz, txz,xz and Zip.

Besides supporting compression, ApplePi-Baker can also resize a Linux partition to make it fit on your target disk (depending on the amount of used data in the partition of course) or minimize your backup to what is really used on the disk.
Note: Resizing only works for regular MBR disks with a standard partition table.

After some major changes in ApplePi-Baker 2.1.x, I’ve released version 2.1.6 today which fixes some minor issues.

To list a few:

  • Access Violation error when showing advanced view when there were no supported drives available
  • During resize (shrink or expand partition), ApplePi-Baker couldn’t find the temporary file on occasion (thanks Loe and Wolfgang!)
  • ODroid resize issue resolved (thanks Götz!)
  • Improved stability for partition resize (shrink/expand)

At this moment one bug remains open, and that is when there is not enough disk space on your Mac to do a backup and/or resize.

Download the latest version of ApplePi-Baker from the original article: ApplePi-Baker v2 – Backup & Restore SD cards, USB drives, etc.

If you run into any issues, bug, or errors using ApplePi-Baker, then please report these with the original article as well.

ApplePi-Baker v2.1 Update – Faster and Expand or Shrink IMG

ApplePi-Baker v2.1 Update – Faster and Expand or Shrink IMG
50

I’m very excited to announce that ApplePi-Baker now supports shrinking and expanding of Ext2, Ext3 or Ext4 Linux partitions on a Mac!!
This is something I wasn’t able to do before and is commonly seen as a challenge on a Mac (since MacOS does not support these Linux File Systems).

This update can only shrink or expand Linux partitions on a MBR partitioned disks (very common format used for the Raspberry Pi).

Keep in mind: I’ve done quite a lot of successful tests, but by lack of beta testers, I’m still marking it as experimental.

During backup, if the option has been enabled, ApplePi-Baker will locate a Linux partition and if found shrink it to it’s minimal size, and update the IMG file and it’s partition table (the source will not be affected). This will result in a much more compact IMG file, and offers a restore to a device of a different capacity.

On Restore, this same option will expand that Linux partition to the maximum available size on the target disk.
Obviously, the target device needs to be able to accommodate at least the minimum size of the IMG file.

Since quite a bit needs to be done (find partition, check file system integrity, resize partition, etc), this will naturally slow down the backup and restore process, but it will help restoring to different sized target disks/SD-card.

Not only that, version 2.1.0 is much faster than 2.0.0 – I’ve seen speed increases up to 300% during backup.

You can find the latest version of ApplePi-Baker in the original article (please place comments there).


ApplePi-Baker v2 – Backup & Restore SD cards, USB drives, etc.

ApplePi-Baker v2 – Backup & Restore SD cards, USB drives, etc.
892

ApplePi-Baker has become well known amongst Raspberry Pi users, with a Mac running macOS, to backup and restore SD-cards. Users do not just use ApplePi-Baker for this purpose anymore – I have seen users use it for backup and restore of pretty much anything not Raspberry Pi related.

Late 2013, I created ApplePi-Baker for my own use – I just got tired of looking up the proper command-line statements.
This way, ApplePi-Baker became my personal frontend for command-line tools like “dd“, “diskutil“, “mount” etc.

Over time, the use of command-line tools came with some problems; thanks Apple for changing command-line tool output with every new version of macOS. Besides that, having to enter your “sudo” password each time was a pain as well, and came with the occasional problems for a small group of users, so that had to go as well.

About 2 years ago I decided to rebuild ApplePi-Baker from scratch, no longer using any of the command-line tools. This came with quite a few challenges, especially since Apple increased security for macOS, not allowing me to do certain things straight from my program (see also SMJobBless: Elevated Privileges in Lazarus Pascal). I’m not even mentioning the drama when it comes to supporting the different compression formats, signing applications, and 64-bit requirements.

Almost 2 years later, I proudly present ApplePi-Baker v2. – special thanks to Jeff and Mark for testing!

UPDATE: ApplePi-Baker now also support shrinking and expanding of Linux partitions!

MacOS – SMJobBless: Elevated Privileges in Lazarus Pascal

MacOS – SMJobBless: Elevated Privileges in Lazarus Pascal
2

As some of you know, I created ApplePi-Baker a while ago, and with a new version I wanted to get away from using command-line tools like “dd” and “diskutil“. To do this the right way I needed to know how to use SMJobBless, in order to get root access, a.k.a. elevated privileges, privileged helper tool, etc.

Back in the day, we could do this pretty easy in our application, simply by using opening, reading and writing data from/to disks as “files”, with relatively simple code in our applications. These days seem to be gone …

With all kinds of malware trying to “hack” us, companies like Apple and Microsoft keep making it increasingly more difficult to actually get admin (root) access straight from our application (not to mention the seemingly cumbersome signing of applications). Which is all good, just too bad that the now majority of the time I spend on developing an application involves adapting to these limitations, instead of doing the creative thinking towards what the application really is for.

Apple has created a poorly documented mechanism for this, referred to as “SMJobBless” or “Privileged Helper“, and focusses heavily on Objective C and Swift – neither of these I like, let alone working with XCode (yuk!) – I really prefer working in Pascal, and specifically in an awesome IDE provided by Lazarus Pascal.

So in this article, I’m documenting my own findings to get this working with Lazarus Pascal – which took a lot of work and testing.

Keep in mind – I’m definitely not an expert on this topic, and I tried to include as much of what I found out as possible. It appears no-one has done this with Lazarus Pascal yet, so please bear with me, and definitely feel free to post improvements and/or suggestions. I’m sure there may be better ways and I’m always open to improving things, including myself.

MacOS – Organize your Dock – Stack Overlays

MacOS – Organize your Dock – Stack Overlays
12

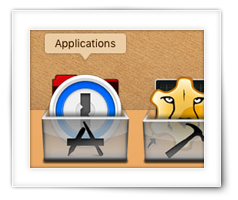
Apple has done a pretty good job with the Dock in MacOS. There is just one thing that I do not like though; the way it stacks icons when you add a folder to your Dock.

A smart guy from Japan (2007 – Yasushi Chida) actually came with a neat idea for that, by introducing “buckets” (or better said: Stack Overlays) placed over the folders in your Dock. All that without the need to install any extra applications!
Unfortunately, his website at Yahoo!/Geocities has been gone for quite a while now.

The few steps you have to take can be a little bit challenging for MacOS beginners (even though it is pretty easy – as usual; once you know how it works). So in the article I’ll show you how to use buckets (a.k.a. Stack Overlays) in your MacOS Dock. This seems to work as of MacOS X Leopard and still works in Mojave (and I do expect this to work in future versions as well).

MacOS – Create a “Sleep” Keyboard Shortcut on a Windows Keyboard

MacOS – Create a “Sleep” Keyboard Shortcut on a Windows Keyboard
14

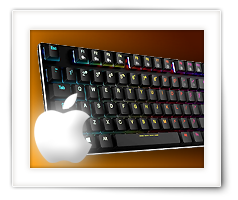
Some of you may be familiar with the problem … no sleep button on your keyboard.

You have a really nice Mac, but you’re using a Windows keyboard since there is no MacOS keyboard that you really like.
I’m using a keyboard from Havit (you can find it here).

One of the things I hate about this setup is that I have no key or key-shortcut to put my computer to sleep.
When you look at the Apple reference, you’ll only find keys that cannot be found on your Windows keyboard, like the Eject key, or the Power key.

So in this article, I’ll show you, without the use of special software, how I have created a keyboard shortcut to put my Mac Pro to sleep, using a Windows keyboard.

Bash Script – Press Any Key To Continue

Bash Script – Press Any Key To Continue
4

In this article I’ll describe what I have used to create a “Press Any Key to Continue” in a Bash script (Linux/MacOS X).

Working with scripts in Bash (Terminal or Shell) isn’t what I do daily. The day I had to create a script to help me do an SVN update followed by a massive recompile. I wanted to see the SVN result first before proceeding with recompile, so I had to add a “Press Any Key To Continue” option in the script.

Since it took me a little effort, I figured; let’s describe this in an article. After all, it may be good reference for myself and for others.
These methods work for Linux and MacOS.

miniWOL v2 – Quick and Easy Wake On LAN Utility

miniWOL v2 – Quick and Easy Wake On LAN Utility
109

Waking up devices that are network connected, can be done with the so called “Wake On LAN” feature provided by certain devices (like for example a NAS, FileServer, or even a PC). A while back I created a simple application for this – miniWOL – keeping in mind that the user may not be too familiar with all the configuration details (see: previous miniWOL versions).

I wanted just a simple menu in the System Tray (Windows: next to the clock, usually the lower-right corner of your screen) or Menubar (MacOS X – top of your screen, Linux often at the bottom of your screen). Well, after a bit of searching I could not find anything suitable or to my liking and I decided to just write something myself.

The old miniWOL has been good so far, and plenty folks seem to have a good use for it privately and professionally. However, Apple had to change a few things (moving to 64 bit, using Cocoa instead of Carbon, and the need to sign and notarize applications – I suspect Microsoft will probably follow soon) so while revamping the Mac version, I revamped the Windows version as well, and added a 64-bit Linux version as well (by request).

Rename My TV Series 2

Rename My TV Series 2
1483

Rename My TV Series, a tool to rename tv series episodes, has been around for a while now, and it’s time for an update (the “old one” can still be found here). So I proudly present: Rename My TV Series 2 (RMTV).

Two of the main reasons for this new version are the needed update of the user interface and support for the new API of TheTVDB.com. But there is more; macOS users wanted a 64 bit version to avoid the 32 bit complaining and having the application signed was on the wishlist for them as well. Support for SSL (since theTVDB.com API requires this), the use of notifications and the support for a dark theme, the merging of 2 episodes, caching results, are a few of other desired or needed items.

I’m still striving to do as much cross-platform development as possible, so macOS, Windows and Linux users can use my tools, which means that this new version will be available for all these 3 platforms.

How to create empty dummy files

How to create empty dummy files
1

Sometimes we need one, a few, or a lot of empty dummy files – just for testing our application, or to hold a space.

Now you could open a text editor and save an empty file, but there are easier ways to make empty dummy files.

In this article I’ll show you how it can be done under Windows (incl. DOS and PowerShell), Linux and macOS.

pfSense 2.x – How to fix Strict NAT for XBox One

pfSense 2.x – How to fix Strict NAT for XBox One
41

I’m always up for playing with new toys, and this time I did build a firewall using pfSense. I wanted to play with OpenVPN and my NetGear R7000 Nighthawk (running Asus xWRT) capped out at 5Mbps. So I migrated to pfSense.

However, doing so, my XBox One decided to not like this and detected STRICT NAT – which results in limitations with online gaming.

In this article I’ll show you how I fixed this with pfSense so NAT now shows as OPEN (keep in mind that I’m NOT an expert).

Note: This may apply to PlayStation 3, PlayStation 4, XBox 360 and other consoles as well.

Lazarus Pascal – Custom Fonts for MacOS Applications

Lazarus Pascal – Custom Fonts for MacOS Applications
4

I’m not sure about other developers, but I occasionally like to use my own custom font for my Lazarus Pascal applications. Typically I do this so I have access to better icons and symbols available in my application, instead of semi blurry bitmap icons. If you use this the right way, your icons and symbols will look much better and will scale really great.

Usually, I use a TTF font for this which I generate at IcoMoon.
IcoMoon is an awesome website where you can compile your own TTF font (or SVG or PNG images of symbols) for use with your website (Tweaking4All uses it as well) or … in your applications.

Since there are plenty examples out there how to do this in Lazarus Pascal for Windows, here an article that shows you how to do this in Lazarus Pascal under macOS.

QNAP – How to set the VNC Password for Linux Station

QNAP – How to set the VNC Password for Linux Station
49

For modern and more powerful QNAP devices, you can now run a complete Linux environment on your NAS. In this case by using Linux Station which basically runs a Ubuntu variant.

Since Linux Station is not really running as a virtual machine, it runs pretty fast. You can even hookup a HDMI monitor and a USB mouse and Keyboard to your QNAP and use it as a workstation. But most of us do not use their QNAP that way. Instead you can access Linux Station through their webbrowser, or … VNC.

VNC access comes with a challenge though. What the heck is the password? No matter what you do in the remote desktop settings, the password is fully ignored.

In this short article I’ll show you how to set a password – albeit in a not so conventional way.

1 2 3 4 ... 16 17 18