Every now and then I find myself in need of converting an image to another format, especially when the application I’m working with does not support the file format I have at hand. Recently I find myself needing to convert several webp formatted files, a format developed by Google as a replacement for PNG, JPEG and GIF. Unfortunately quite a few applications still do not support this new(er) format.
There are a bunch of tools out there that can do this for us, like Pixillion from NCH Software (free version available), or online services like CloudConvert. MacOS however already comes equipped with a suitable tool that can help us with that – and can even handle a batch – called “macOS Preview“.
In this article:
How to convert images, to different file formats, with Preview that comes with macOS – one at a time, or in batch.
Ad Blocking Detected Please consider disabling your ad blocker for our website.
We rely on these ads to be able to run our website.
You can of course support us in other ways (see Support Us on the left).
I’ve been asked several times in the past, on how to take screenshot and annotate them afterwards, or how to do a so called “print-screen” to a printer for a hardcopy.
Some users, use screenshots for illustrating manuals, or articles for their website. Some use it to print error messages or odd things happening on their screen. And as with regular paper, some of us would like to annotate the images – add notes, comments, arrows, numbers or circle the important part of the image.
Annotating images is relatively easy, once you know where to find the tools to do this.
So in this article, for Mac OS X users: How to take screenshots, how to add annotations, and some additional related tips and tricks.
The last few months I’ve spend an absurd amount of time scanning family negatives. Over 12,000!
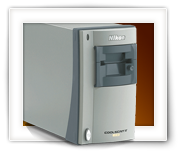
For this I used the excellent Nikon CoolScan LS-50, also known as the Nikon CoolScan V ED. These scanners perform superb, even though Nikon stopped producing them. Even support has been stopped or reduced. If you need one, eBay is the place to go.
In the process of scanning all these negatives, I ran into the problem that it had swallowed the film strip, and the entire scanner refused operation right after that.
This article shows you how you can remedy this with only a phillips screwdriver and some patience …
Please note that this article was written with the LS-50/V ED in mind, but it seems that other Nikon CoolScan models might be fixable in the same fashion (i.e. 4000 [IV] and 5000, and other models that look similar).
For those of us coming from the Windows platform, that have used the Image Resizer PowerToys for Windows XP (yeah I know: from way back in the day), here a free application for MacOS X users to have that same functionality as well.
Simply right click an image, choose the desired size and your images will be resized automatically without modifying the original file.
I’ve expanded the functionality a little bit, by adding the option to convert a Retina image straight to “classic” (50% size reduction) and after resizing the option to automatically attach the resized images to an email, ready to be send to friends and family …
Ad Blocking Detected Please consider disabling your ad blocker for our website.
We rely on these ads to be able to run our website.
You can of course support us in other ways (see Support Us on the left).
While writing an article on how 3D movies work, I couldn’t help thinking back about the red and blue 3D pictures from back in the day (anaglyph). They were considered pretty cool and how difficult would it be to make them yourselves? Sure, you might not want to stare at them the whole day, but cool none the less.
After figuring that out, I was started to wonder if it would be possible and how difficult it would be to create 3D pictures for 3D capable TV’s (see also: How 3D Movies work).
So in this article I’ll show you how to make a 3D picture with your own digital photo camera for either the good old red and blue 3D glasses, or for use on a 3D capable TV in full color.
You might have already seen the previous article I wrote on how to draw a sine of sound wave using Photoshop.
This trick resulted in a pretty nice sine wave, but it wasn’t quite what I was looking for when I was preparing for an article. I needed a fancier drawing of a sound wave.
In this article I’ll show you a neat little trick where we will use Adobe Illustrator to make a fancy sound wave.
While writing an article for Tweaking4All, I ran into exactly this problem: How the heck do I draw a nice sound wave?
Initially I looked at Google Images to see if I could find a suitable sine image. It did come with nice results, but not exactly what I was looking for.
So I decided to give Adobe Photoshop a try …
Ad Blocking Detected Please consider disabling your ad blocker for our website.
We rely on these ads to be able to run our website.
You can of course support us in other ways (see Support Us on the left).
You see it with most websites: the so called favicon. A little icon presented on the tabs of your browser or next to your bookmarks, right next to the title of the page.
This all started with Internet Explorer 4 – way back in the day – using a .ICO file.
New browsers and new standards however bring more to the table than just this old little icon.
In this article I’ll show you a few variations and how to do it and I’ll even explain some of the functions introduced by Apple (like Retina support).
How can we optimize PNG images even MORE …?
You might have looked at some of the PNG optimization tools out there like PNGOUT, although great tools, they can’t quite keep up with JPEG compression when it comes to photographs and other more complex graphics – but you’d like fast loading webpages yet still want to use transparency which is something JPEG and GIF do not [properly] support.
Another trick that will nibble off quite a few bytes is “Posterization” – a function found in Adobe Photoshop and most other graphics programs.
In this article I’ll show you how to use it and how beneficial it can be.
In this article a quick and free trick to optimize PNGs on your Mac …
While developing and maintaining my website, I use several tools to optimize the size of my PNG image files.
So far I think that PNGOUT (for Windows see ardfry.com which also offers an Adobe Photoshop plugin) produces the best results. As a switcher between MacOS X and Windows I noticed the freely available PNGOUT port for MacOS … but unfortunately this is just a command line tool.
I started playing with the Automator included with MacOS X, dabbled with AppleScript and Shell scripts, but never got a really convenient and satisfying thing going … until I bumped into ImageOptim created by Kornel Lesinski.
Ad Blocking Detected Please consider disabling your ad blocker for our website.
We rely on these ads to be able to run our website.
You can of course support us in other ways (see Support Us on the left).


