Having been tinkering with LED strips for quite some years now, I do occasionally get the question: “What do the IP ratings mean?”.
There is a short answer for that question: It indicates its protection level against water and dust.
Obviously this doesn’t say much, and things are a little more advanced that that.
So in this article I’ll go briefly into the details on what kind of IP ratings you can run into and what they mean.
This way you can consider in what kind of environment you’d like to use your LED strip and find a matching IP code.
Ad Blocking Detected Please consider disabling your ad blocker for our website.
We rely on these ads to be able to run our website.
You can of course support us in other ways (see Support Us on the left).
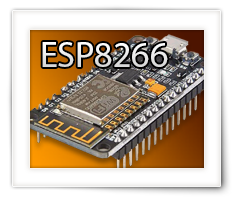
In this article, I’ll show you how I did get started with an ESP8266, as a replacement for an Arduino, and they are dirt cheap!
The ESP8266, appears to have been sold as a shield for an Arduino, to provide WiFi functionality to an Arduino. Pretty cool!
But what is even cooler: For most applications you do not even need an Arduino, as the ESP8266 can run as a standalone microcontroller with WiFi on board, and is even more capable than most Arduinos.
This may sound odd, but after my first experiences with the ESP8266;
I’m beginning to wonder how often I’ll be using my Arduino Uno in the future. The little ESP8266 is so cool, faster, more powerful, and has more memory, at a ridiculous price of about $5. And all this in a smaller package with WiFi included!
With the arrival of support for third party game controllers in macOS Catalina (10.15), we can now connect most certain game controllers to our Mac. In this article we look at Bluetooth enabled XBox One controller.
Once such a controller is paired with your Mac, you can use it with games that support controllers, like certain games on Steam, nVidia Geforce Now, Apple Arcade and potentially many more.
Note: Some of you may have read my older article on how to connect a XBox 350 controller to you Mac (2015). This method, and the XBox 360 controllers, are still working of course, but it is time for an update now that Catalina offers native support for certain controllers. Personally I like the newer XBox One controllers better anyway (especially the Elite models, even though these are not exactly cheap).
In this article you’ll find an interactive table in which you can find the standard resistor values, as used in electronics, and defined by the IEC.
You’ll find the values for the E6, E12, E24, E48, E96 and E192 Series (or “preferred resistor values”) in this table.
This can be useful when trying to find a matching resistor value when having done some [electronics] calculations and you’re looking for a particular value.
Ad Blocking Detected Please consider disabling your ad blocker for our website.
We rely on these ads to be able to run our website.
You can of course support us in other ways (see Support Us on the left).

ApplePi-Baker has become well known amongst Raspberry Pi users, with a Mac running macOS, to backup and restore SD-cards. Users do not just use ApplePi-Baker for this purpose anymore – I have seen users use it for backup and restore of pretty much anything not Raspberry Pi related.
Late 2013, I created ApplePi-Baker for my own use – I just got tired of looking up the proper command-line statements.
This way, ApplePi-Baker became my personal frontend for command-line tools like “dd“, “diskutil“, “mount” etc.
Over time, the use of command-line tools came with some problems; thanks Apple for changing command-line tool output with every new version of macOS. Besides that, having to enter your “sudo” password each time was a pain as well, and came with the occasional problems for a small group of users, so that had to go as well.
About 2 years ago I decided to rebuild ApplePi-Baker from scratch, no longer using any of the command-line tools. This came with quite a few challenges, especially since Apple increased security for macOS, not allowing me to do certain things straight from my program (see also SMJobBless: Elevated Privileges in Lazarus Pascal). I’m not even mentioning the drama when it comes to supporting the different compression formats, signing applications, and 64-bit requirements.
Almost 2 years later, I proudly present ApplePi-Baker v2.  – special thanks to Jeff and Mark for testing!
UPDATE: ApplePi-Baker now also support shrinking and expanding of Linux partitions!
Some of you may be familiar with the problem … no sleep button on your keyboard.
You have a really nice Mac, but you’re using a Windows keyboard since there is no MacOS keyboard that you really like.
I’m using a keyboard from Havit (you can find it here).
One of the things I hate about this setup is that I have no key or key-shortcut to put my computer to sleep.
When you look at the Apple reference, you’ll only find keys that cannot be found on your Windows keyboard, like the Eject key, or the Power key.
So in this article, I’ll show you, without the use of special software, how I have created a keyboard shortcut to put my Mac Pro to sleep, using a Windows keyboard.
If you’ve read the article I wrote a while ago “LEDStrip effects for NeoPixel and FastLED“, then you might have noticed quite a few requests to combine all these effects in one single sketch.
I have seen some users come up with some nice examples, but the challenge remained (for me): how do I instantly toggle from effect to another?
Well, today I’ll have such a sketch available for you; it allows you toggle between effects with a simple switch.
Ad Blocking Detected Please consider disabling your ad blocker for our website.
We rely on these ads to be able to run our website.
You can of course support us in other ways (see Support Us on the left).
When running Windows on your Mac through BootCamp, you might be searching for the CD/DVD Eject button every now and then, and back in the day (2009) I wrote a little application for that for my own use: BootCamp CD Eject.
This application works with all Windows version as of Windows XP – and you can use this without BootCamp as well.
This little application lives in the Windows Systray and allows you to eject a CD/DVD from a menu or through a key combination. There is also a key combination to quickly put your Windows in standby.
I’m posting the application (free!) since I recently ran into some users that actually had a use for it even 7 years after developing it.
We have learnt quite a bit in the past 8 chapters. In this ninth chapter we will start we will combine some of the things we’ve talked about and with that show you how we can read something from the Serial Monitor of the Arduino IDE, so a user can enter text or numbers.
This is the ninth part of a series of articles I’ve written to get beginners started with Arduino Programming in the programming language C, which I’ve written with the intend to teach my 13 year old nephew (Bram) to get started with the Arduino. After all, he wants to build a robot, but without some basic knowledge about programming, he won’t get far ….
Besides an introduction into the language C, the default language used for Arduino Programming, “Arduino Programming for Beginners” will also touch topics like how to setup an Arduino, get a developers environment running, and look at a few basic electronic parts which we connect to our Arduino.
In this eight “chapter” of our articles on how to do Arduino Programming for beginners, we will take a look at arrays – what they are and how we can work with them.
This is the eight part of a series of articles I’ve written to get beginners started with Arduino Programming in the programming language C, which I’ve written with the intend to teach my 13 year old nephew (Bram) to get started with the Arduino. After all, he wants to build a robot, but without some basic knowledge about programming, he won’t get far ….
Besides an introduction into the language C, the default language used for Arduino Programming, “Arduino Programming for Beginners” will also touch topics like how to setup an Arduino, get a developers environment running, and look at a few basic electronic parts which we connect to our Arduino.
Ad Blocking Detected Please consider disabling your ad blocker for our website.
We rely on these ads to be able to run our website.
You can of course support us in other ways (see Support Us on the left).

In this seventh installment of our articles on how to do Arduino Programming for beginners, we will take a look at working with text, or “strings”. So far we have worked with numbers and booleans, and touched on strings even though you might not have noticed it. In this article we will dig into strings, how they work and what we can do with them.
This is the seventh part of a series of articles I’ve written to get beginners started with Arduino Programming in the programming language C, which I’ve written with the intend to teach my 13 year old nephew (Bram) to get started with the Arduino. After all, he wants to build a robot, but without some basic knowledge about programming, he won’t get far ….
Besides an introduction into the language C, the default language used for Arduino Programming, “Arduino Programming for Beginners” will also touch topics like how to setup an Arduino, get a developers environment running, and look at a few basic electronic parts which we connect to our Arduino.
In this article we will talk about Functions. In previous parts we have worked with two functions already (setup and loop), but in this part we will go deeper into using functions and creating our own.
This is the sixth part of a series of articles I’ve written to get beginners started with Arduino Programming in the programming language C, which I’ve written with the intend to teach my 13 year old nephew (Bram) to get started with the Arduino. After all, he wants to build a robot, but without some basic knowledge about programming, he won’t get far ….
Besides an introduction into the language C, the default language used for Arduino Programming, “Arduino Programming for Beginners” will also touch topics like how to setup an Arduino, get a developers environment running, and look at a few basic electronic parts which we connect to our Arduino.
This article just presents the entire content overview of the mini course “Arduino Programming for Beginners” which I wrote for my nephews Bram and Max.
Originally I had placed the full overview with each chapter, but since that list became rather long, I decided to only show an overview of a given chapter with that give chapter.
So on this page an overview of all chapters and paragraphs of the “course”.
Ad Blocking Detected Please consider disabling your ad blocker for our website.
We rely on these ads to be able to run our website.
You can of course support us in other ways (see Support Us on the left).
In this article we will talk about loops. Loops are used for going through programming instructions for a defined or undefined number of times, so that we do not have to write the same statement over and over again. We will look at “for”-loops, “while”-loops and “do … while …”-loops.
This is the fifth part of a series of articles I’ve written to get beginners started with Arduino Programming in the programming language C, which I’ve written with the intend to teach my 13 year old nephew (Bram) to get started with the Arduino. After all, he wants to build a robot, but without some basic knowledge about programming, he won’t get far ….
Besides an introduction into the language C, the default language used for Arduino Programming, “Arduino Programming for Beginners” will also touch topics like how to setup an Arduino, get a developers environment running, and look at a few basic electronic parts which we connect to our Arduino.
In this article we will talk about making decisions (if … then … or switch … case …). Decisions are very important in our program to react to changing data or events, or to go through a list (loop) of data or events. We call that Control Flow – meaning code is being executed in a different order based on conditions.
This is the fourth part of a series of articles I’ve written to get beginners started with Arduino Programming in the programming language C, which I’ve written with the intend to teach my 13 year old nephew (Bram) to get started with the Arduino. After all, he wants to build a robot, but without some basic knowledge about programming, he won’t get far ….
Besides an introduction into the language C, the default language used for Arduino Programming, “Arduino Programming for Beginners” will also touch topics like how to setup an Arduino, get a developers environment running, and look at a few basic electronic parts which we connect to our Arduino.


