Rotate, Crop and Trim a Video with Handbrake
I can happen that we find ourselves recording a video on our cell phone, only to realize that we didn’t hold our cellphone right.
With this I mean; we’ve recorded our video in portrait mode where we would have needed landscape mode, since all TV’s and monitors are … landscape.
Another reason could be that you enabled screen-recording on your phone while holding your phone wrong.
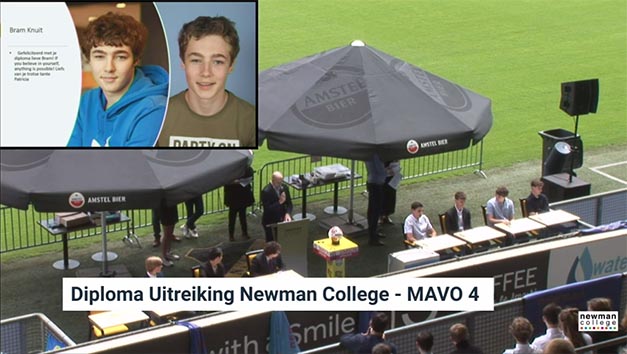
I’ve had that when I wanted to record the graduation of my nephew. The video was streamed live on Vimeo, and I wanted the best resolution when recording this – so I had to hold my phone in landscape mode. This however resulted in a rotated video (your cellphone may record this as if it was a portrait mode recording).

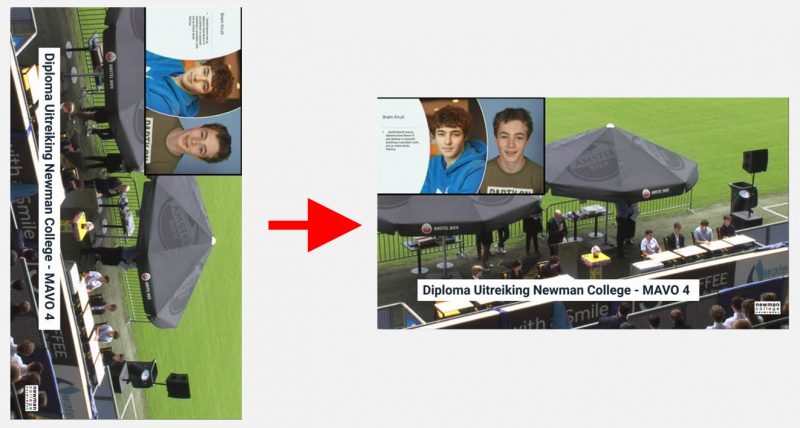
Portrait (left) vs Landscape (right)
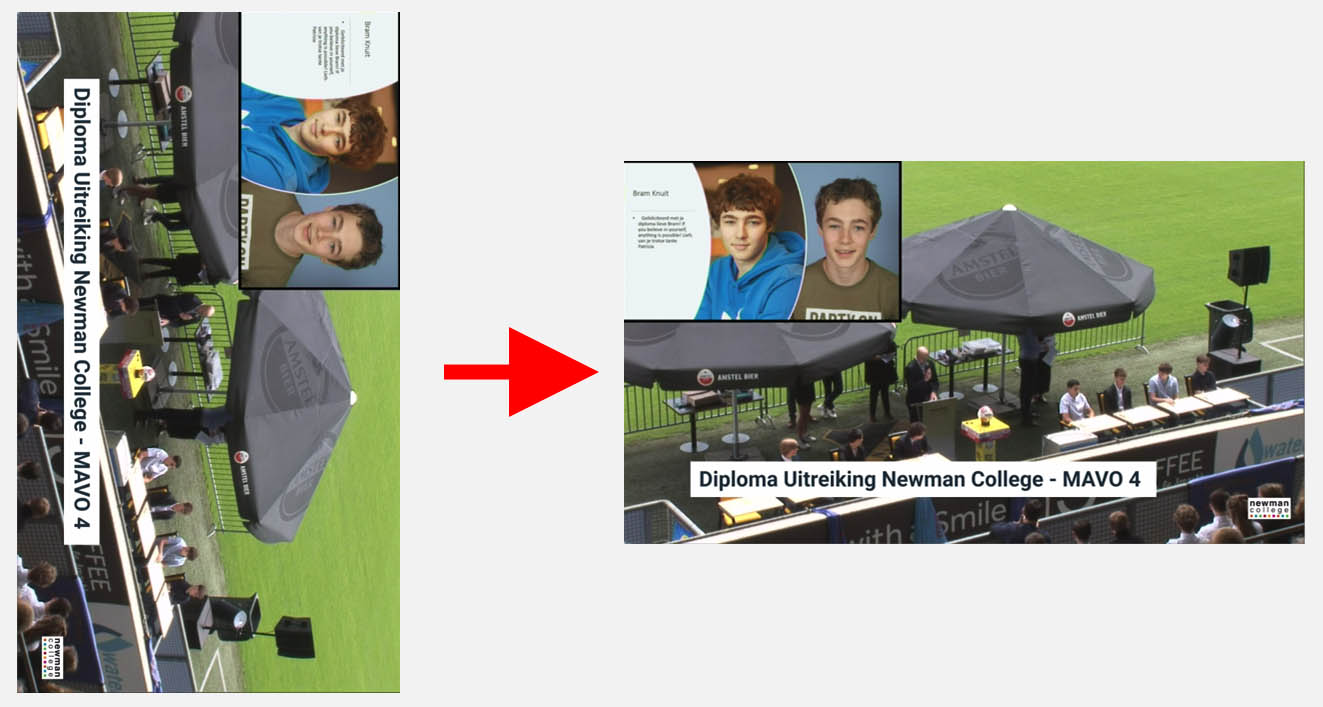
So in this article I’ll show you how I used Handbrake to go from:

Sideways recording …
… to a corrected video like this:
Corrected recording …
In this example I have rotated the image 270 degrees (or: 90 degrees anti-clockwise), cropped the black bars, and trimmed the length of the video to what was relevant.
Note: The example I’m showing is a screen recording which was recorded while the phone was in landscape mode to get the highest resolution.
Ad Blocking Detected Please consider disabling your ad blocker for our website.
We rely on these ads to be able to run our website.
You can of course support us in other ways (see Support Us on the left).
Getting Handbrake
Before we begin, you’ll need to get a copy of Handbrake – which is completely free.
You can download the version for your operating system here.
You can also download HandBrake (older version) straight from Tweaking4All.
Just keep in mind: this version is most likely outdated, and the Linux version is not included.
Download - HandBrake (macOS 64bit)
Download - HandBrake (Windows 64 bit)
Download - HandBrake (Windows 32 bit)
Note: The following steps may or may not be needed for your video. You can skip the steps that are not needed.
Note: For saving the end result, I’d recommend looking at the article “HandBrake – Optimizing Video Encoding (h264)” (applies for h265/HEVC as well).
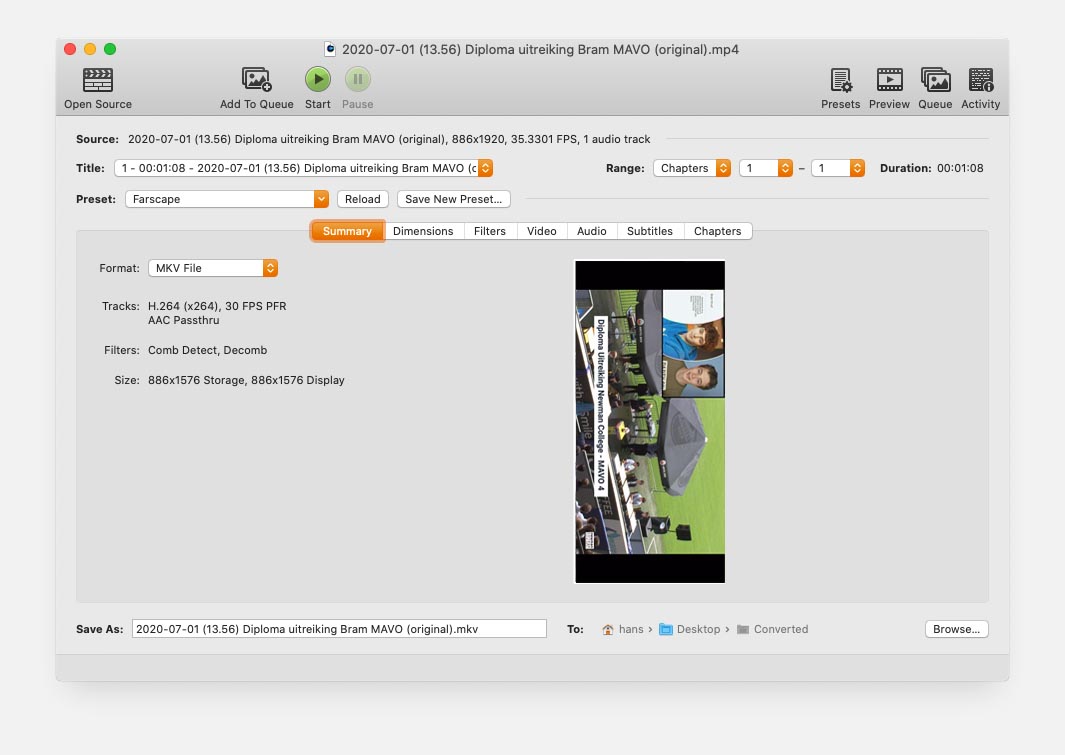
Once installed, start Handbrake and open your video file with it. You should see something like this (using macOS screenshots, but the Windows and Linux version look similar).
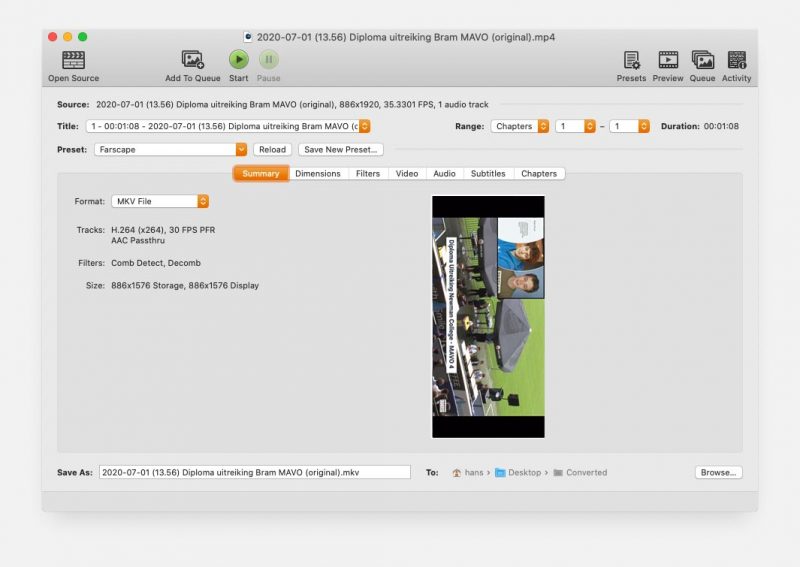
Handbrake – Open the video file
Cropping Video with Handbrake
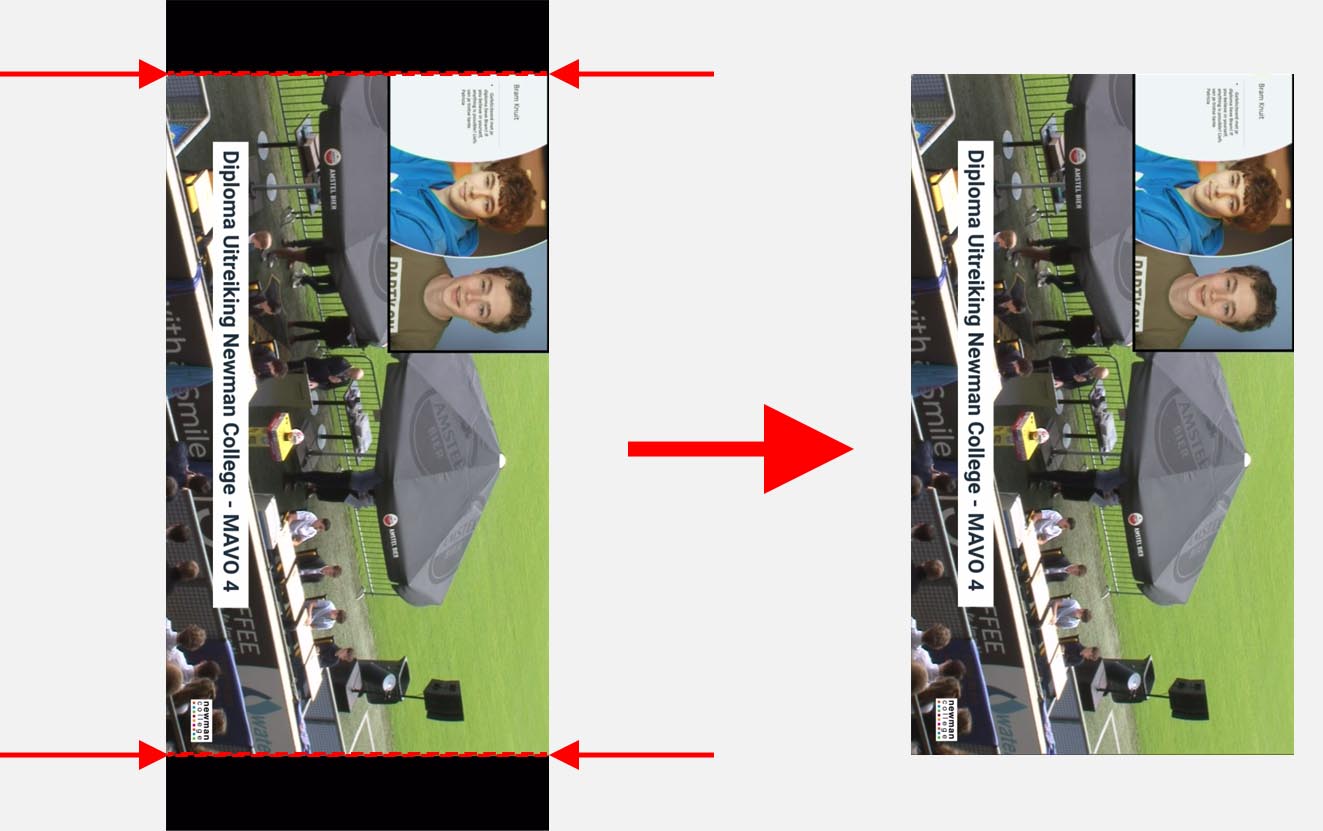
Cropping the video is often used to remove black or uneven borders, but can also be used to “make it fit” better.
Cropping can be done automatically or manually if you like a more refined cropping – you will find the settings under the tab “Dimensions“.
By default, “Cropping” is set to “Automatic”. Select “Custom” if you’d like to fine tune this.
I highly recommend clicking the “Preview” button, especially when selecting “Custom”, so you can see what the effect of the 4 values will be. In the “Preview” window, you can use the slider at the bottom to move to the most suitable spot in the video to determine cropping.

Under the tab “Dimensions” you will find “Cropping”
With this step I removed the black borders:
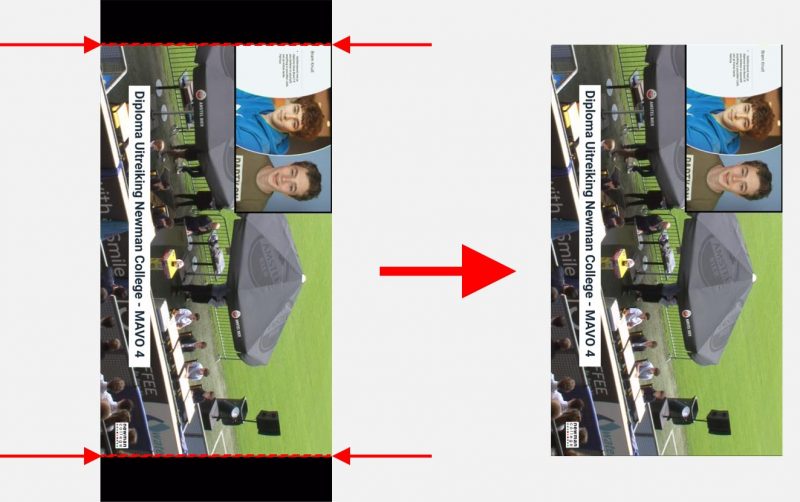
Cropping with Handbrake
Ad Blocking Detected Please consider disabling your ad blocker for our website.
We rely on these ads to be able to run our website.
You can of course support us in other ways (see Support Us on the left).
Rotating Video with Handbrake
As you can see, my video needs rotating, and for this we need to go to the tab “Filters” where you’ll find the “Rotate” option.
Note: for most videos (from a cell phone), I’d recommend disabling all other filters (set them to “Off”).
Caution with the “Flip” function! You will rarely need this as flipping a picture will mirror the picture and this is definitely not the same as rotating it 180 degrees!
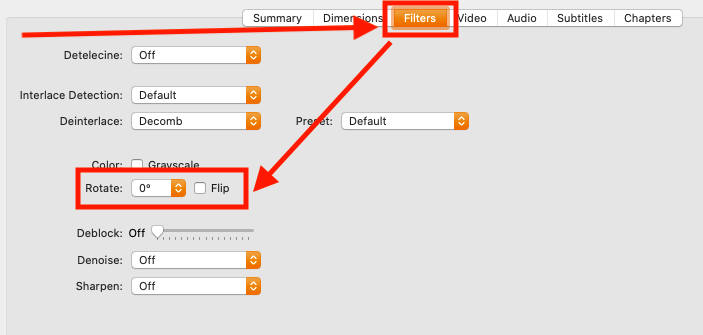
Under the tab “Filters” you will find “Rotate”
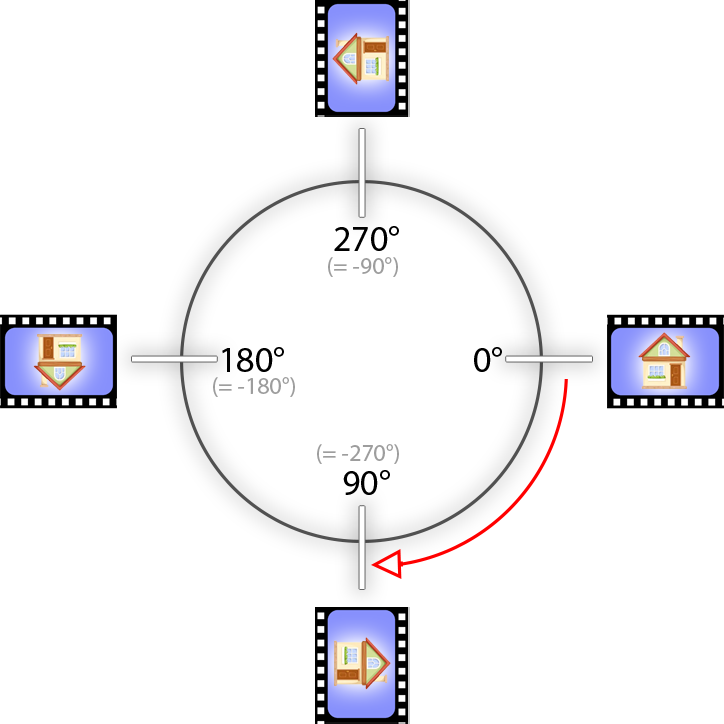
So we can rotate our video … but in what direction?
In the figure below a quick and dirty explanation how these “degrees” work (Note: ” ° ” is the symbol for degrees).
Clockwise rotation is assumed as indicated by the red arrow, and 360 degrees means full circle.
For example: if your video is upside down, you will need a 180 degree rotation.
You can optionally click the “Preview” button, which is helpful to see what the effect of the rotation will be – which I highly recommend if you’re not quite sure what angle to choose.
We now set the desired rotation, by selecting a value from the dropdown menu (even when the “Preview” window is open!).
In my example I will need to rotate my video 270 degrees.
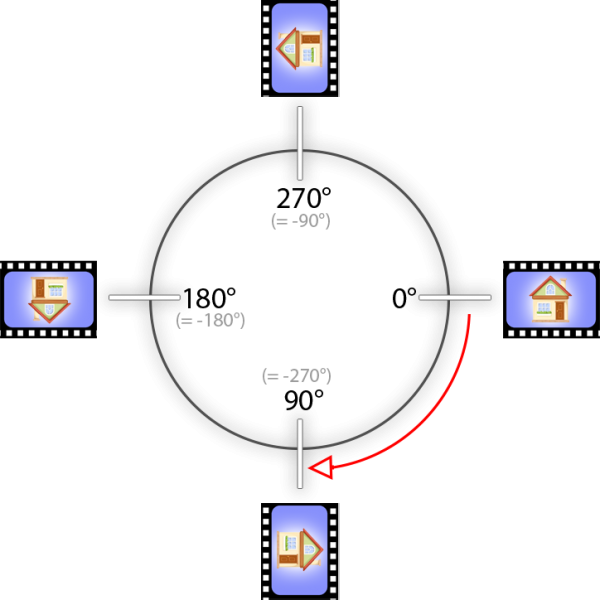
Rotation in degrees
In this step I accomplished this by rotating the video 270 degrees:
Rotated with Handbrake
Trimming Video with Handbrake
In this next step we remove some of the beginning and/or of the end of the video.
In this case, we remove some of the irrelevant video from the beginning and the end.
We can do this with the “Range” settings in the upper right corner.
Here we can select “Chapters”, “Seconds” and “Frames”.
Unfortunately, the “Preview” window is not of much use here.
However when clicking “Live Preview” (in the “Preview” window), the trimmed result will be shown!
This may require playback through an external video player – but Handbrake will inform you about that and this is in general not an issue.
To trim the video, we will need to determine the beginning and the end of the video section we want to keep and enter those values in the “Range”.
You can either work with seconds (easier to follow for us humans) or frames (more accurate), and this works the same way for the beginning and the end.
Using Seconds to Trim
I’d start with this. Simply playback the video and note the second where our important part starts.
Be careful though, it is better to take 1 second before the main event, just so we do not lose any important parts of video.

Trimming with Handbrake
Using Frames to Trim
If you’d like to refine you selection, you can switch to “Frames”, but that will come with some math – we will need to know how many frames go in a second.
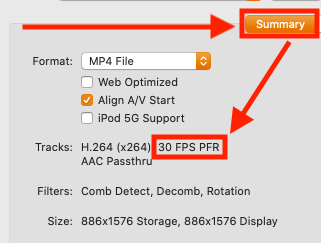
You can find this on the “Summary” tab. Here we see in my example video “30 FPS”, which means 30 frames per second.
So if we like to start out video at 23 seconds (as shown in figure 10), then with frames we would need to set this to 23 (seconds) x 30 (frames per second) = 690 frames.
Handbrake – How many frames in a second?
Don’t forget to set the ending as well (unless you do not want to trim anything from the end of course).
Ad Blocking Detected Please consider disabling your ad blocker for our website.
We rely on these ads to be able to run our website.
You can of course support us in other ways (see Support Us on the left).
Saving the Result with Handbrake
When sharing this video with others I’d recommend the following settings to remain as compatible as possible while maintaining the nicest result.
If you’re more experienced, feel free to use your preferred settings of course.
Once you have done all these settings below, and selected a proper location for the result in the “Save As:” field, you can click the big Start button to start processing yoru video file.
Tab – Summary
Set “Format” to “MP4 file“, and check these options:
- Check “Web optimized“
- Check “Align A/V start“
- Check “iPod 5G Support“
Tab – Dimensions
Leave everything default, with the exception of the settings you just did for Cropping of course.
Tab – Filters
Set everything to “Off“. Keep the desired rotation (or select “o°” if rotation is not needed).
Tab – Video
Do these settings (more details can be found here)
- Video Encoder: H.264 (x264)
- Framerate (FPS): leave this to the default framerate, or set it to the framerate (FPS) mentioned under the “Summary” tab
- Check “Peak Framerate (VFR)“
- Check “Constant Quality“
- Set the “Quality” slider to about 22
- Under “Encoder Options” set the “Preset” to “Fast” (fast, reasonable quality) for very large videos, all the way to “veryslow” (very slow, best quality) for short videos.
- Set “Tune” for “Film“
- Leave “Profile” on “main“
- Leave “Level” at “4.0“
- Check the option “Fast Decode” (good for less capable playback devices)
- Leave “Additional Options” BLANK.
Tab – Audio
For audio you have a few options, I’d recommend leaving those settings alone, unless you know what you’re doing.
For MP4 files (home videos) I usually leave the audio Codec set to “AAC“. Use “AAC Passthru” if the source file uses AAC as well (best audio quality, and faster as no conversion is needed).
And that’s all … 


Comments
There are 6 comments. You can read them below.
You can post your own comments by using the form below, or reply to existing comments by using the "Reply" button.
Wonderful!
Gnaneshwar
Thanks Gnaneshwar!
Hans
Thanks a lot!!
German
German
You’re welcome! Thanks for taking the time to post a “Thank you” …
Hans
Pretty cool! And using a free application. This tutorial will come in handy and meet many people’s basic needs when it comes to editing a video file. Thanks
calande
Thanks Calande for taking the time to post a thank you – glad it will come in handy
I’ll always try to get the most affordable option – preferably free.
Hans