Before we begin …
Verify your local laws!
This article is not intended to promote pirating Copyrighted Materials!
Laws, when it comes to copying Copyrighted materials, differ from country to country. It is your responsibility to be aware of these laws and comply to them. See also our Disclaimer!
The movie industry in general does not want you to copy a DVD for any reason. Fair use proponents however claim that the law leaves room for making a private backup (in the US: DMCA or Digital Millenium Copyright Act). But it’s all a matter of interpretation – so think for yourself before you act!
Other countries, like The Netherlands, are more liberal when it comes to this – Consumers pay a few cents extra for empty media, and for personal use you are allowed to make a copy (see Stichting Thuiskopie).
Now you that you know what your responsibilities are in this matter … let’s continue …
Ripping an Audio CD with iTunes
First of all, we need iTunes, and for Mac users that’s not a problem – so let’s start iTunes.
You can do some presets so you don’t have to do this each time you make MP3’s out of your Audio CD’s.
Preset your MP3 preferences
Doing pre-settings for your MP3’s is optional – iTunes will ask for it when you’re ripping your Audio CD as well. But when you do the pre-settings as described here, it will each time when you want to rip, start with the settings you do here – which can be a time saver.
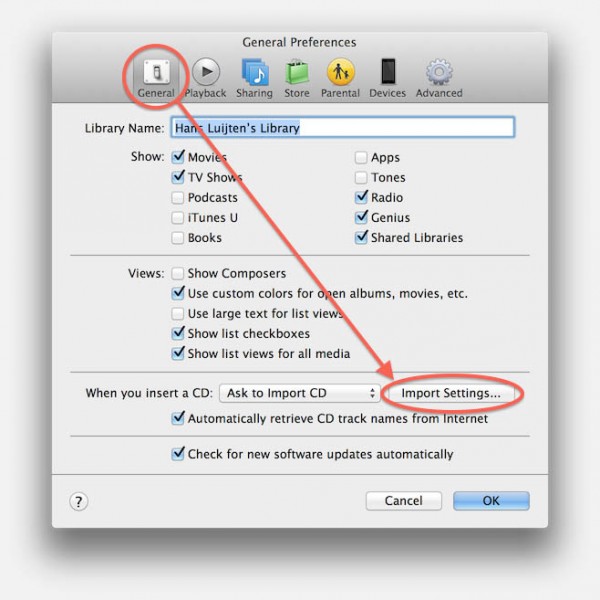
Click the “iTunes” menu (in the top menubar) and select “Preferences“.
Click “General” “Import Settings“.
iTunes – Import Settings
- A window now opens where you can set the details you’d like to use (MP3 in our case) when copying your Audio CD.
Set “Import Using” to “MP3 Encoder“, and “Setting“to “Custom…”.
Note : You can of course take one of the predefined settings as well.
iTunes – Import Settings
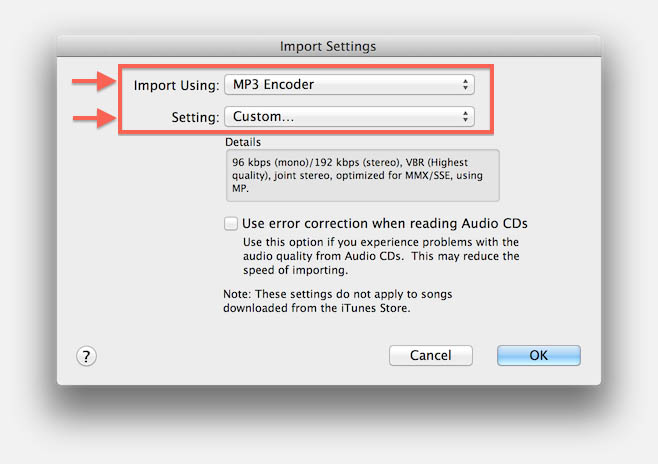
- In case you did click the “Custom…” option in the “Setting” field a new window will have opened.
-
iTunes – MP3 details
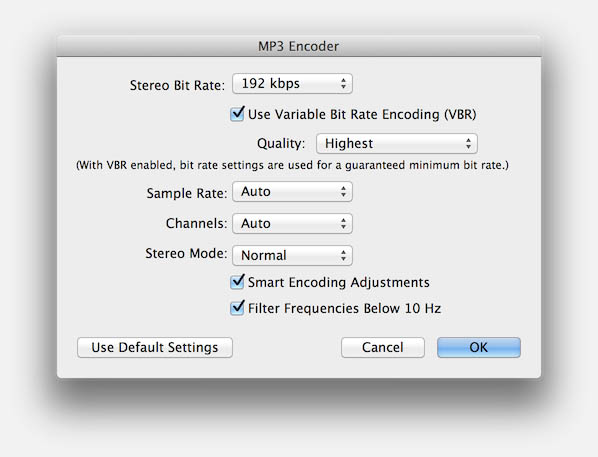
- I typically use the displayed settings, which should be suitable for most cases.
Use a higher bitrate if you need a higher quality, or a lower bitrate (128 kbps or higher) if you need the files to become smaller.
-
My default MP3 Settings
| Option |
Setting |
| Stereo Bit Rate |
192 Kbps (choose higher for higher quality) |
| Use Variable Bit Rate Encoding (VBR) |
check |
| Quality |
Highest |
| Sample Rate |
Auto |
| Channels |
Auto |
| Stereo Mode |
Normal |
| Smart Encoding Adjustments |
check (optional) |
| Filter Frequency below 10 Hz |
check (optional) |
When done click “OK” and “OK” again (you can skip the second “OK” if you still want to set the Album Artwork option in the next paragraph).
Album Artwork
iTunes is very capable of retrieving artwork and other so called meta-data (title, artists, album name, pictures, etc). You will have to enable this option though if you’d like to have iTunes do this for your MP3’s.
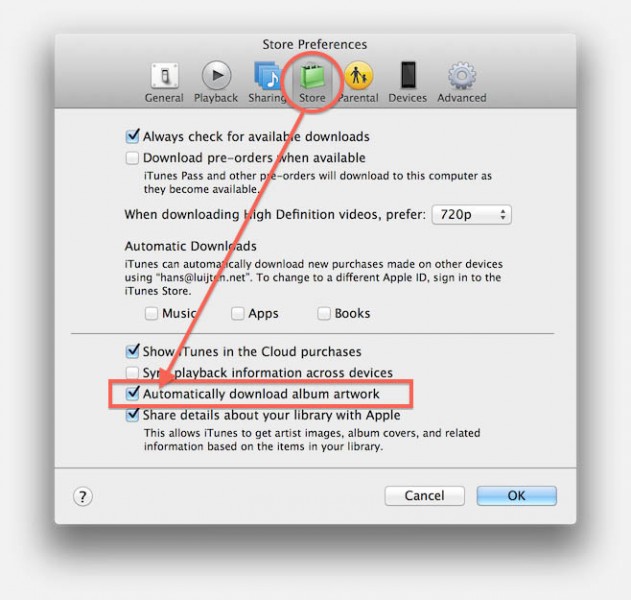
If you’re interested in Art work for your music: Click the “iTunes” menu (in the top menubar) and select “Preferences“, unless the window is still open from the previous paragraph.
Click the “Store” tab and check “Automatically download album artwork” and click “OK” when done.
Note : This option requires the “Share details about your library with Apple” to be checked – how else is iTunes going to get the details (meta-data) of your song(s)?
Have iTunes grab Album Artwork
Step 1 – Insert Audio CD
After a few seconds your Audio CD should show up in iTunes, on the left hand side under “DEVICES” – it might be that iTunes asks you if it should add the CD to your library, in that case select “No“.
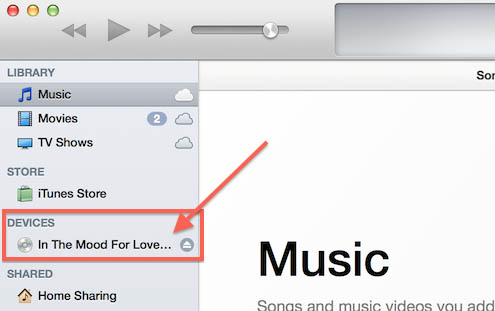
iTunes spotted your CD!
(Sorry – that’s the only CD I had at hand when I was writing this)
Step 2 – Select the desired tracks
Click on the CD Title (as indicated above), and on the right you’ll now see all tracks appear. As you will probably see, all tracks are checked. If needed: Uncheck the tracks you’re not interested in.
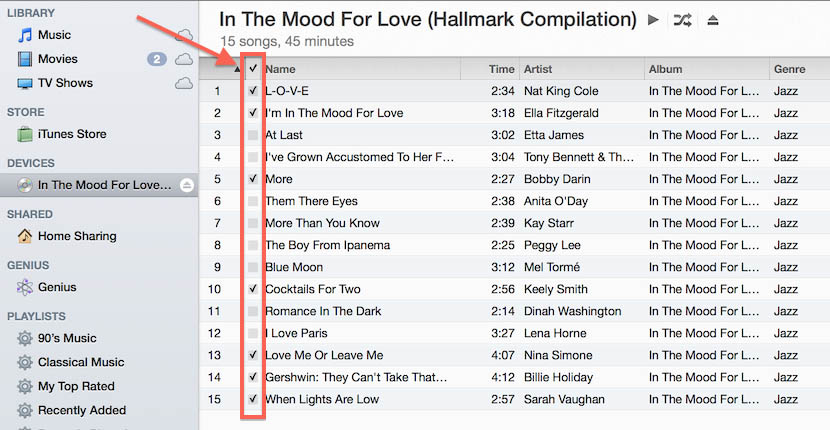
iTunes – Select the tracks you’d like to convert
Step 3 – Start Copying your Audio CD to MP3’s
To start copying your Audio CD, or a selection of song(s) on the CD, to MP3, click the “Import CD” button in the upper right corner.
The import settings window will open, and if you followed the “Preset your MP3” paragraph you can simply click “OK” and the copying or ripping of your Audio CD starts with the settings you’ve made before. It will take a few minutes.
Note : iTunes might ask “Send audio information about this CD to Gracenote?” if you’ve set the option to retrieve album artwork – confirm if you’d like to have iTunes get the artwork. Gracenote is one of the largest music databases around and Apple utilizes it to retrieve music meta-data.
Note : If you did not follow the “Preset your MP3” paragraph, you can follow the instructions for this screen as well.
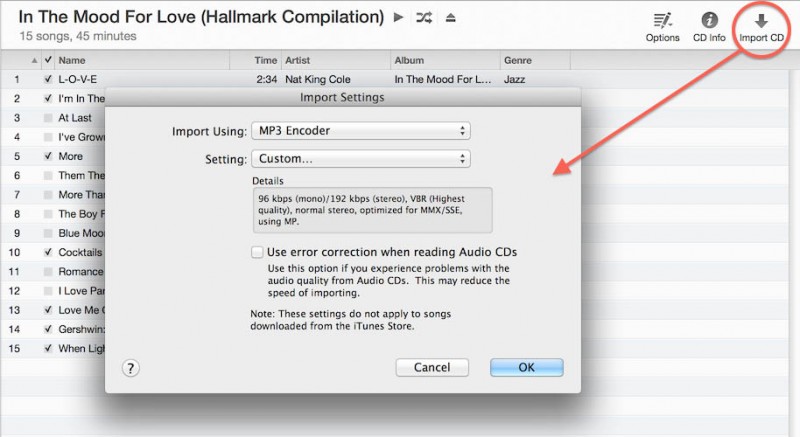
iTunes – Import your CD
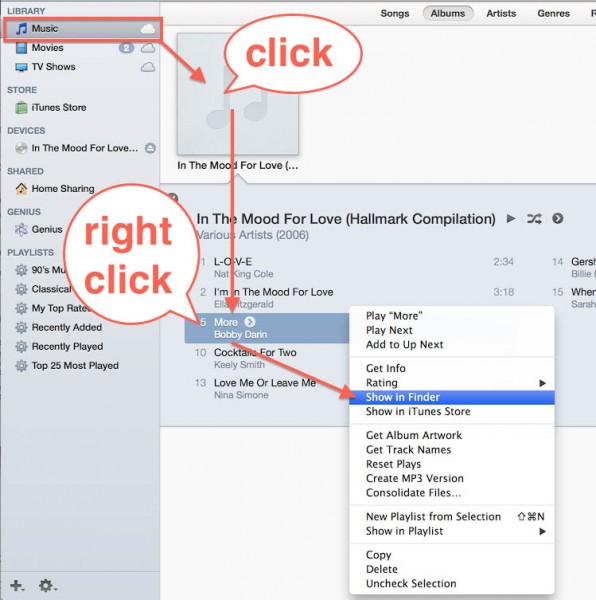
Step 4 – Where did my MP3’s go?
iTunes, infamous for their weird way of storing music on your iPod, iPad, iPhone, etc. actually stores your music nicely on your computer.
To find where the files are, once ripping is completed, do the following;
1. Click “Music” under “LIBRARY“,
2. Click your album,
3. Right click the song you’re looking for,
4. In the menu select “Show in Finder“.
The Finder will now open where the file can be found, typically it’s located in the Music folder of your iTunes.
Tip : The unfortunate thing though is that iTunes uses a weird file naming convention. iTunes uses “Track number – title”, where I prefer “artists – songtitle”. This can be fixed with a commercial add on like TuneUp (abuse the free trial if you’d like).
/Users/<your username>/Music/iTunes/iTunes Media/Music/Compilations/<album title>/<track number and song title>.mp3
iTunes – Where did my MP3 go?
Alternative: XLD or X Lossless Decoder
XLD is much more advanced, and said to be superior to iTunes, when it comes to converting an Audio CD to MP3 … it support more formats, more options to correct for errors (damaged CD’s), convert files in parallel, better file-naming options, etc. but it’s user interface and the amount of options make it seem complex and intimidating.
The retrieval of Meta-data is unfortunately not as good as what iTunes offers, file naming is much better than iTunes as it offers any format you’d like.
XLD is totally free and can be downloaded from the XLD website. As usual, we highly recommend getting XLD there, so you have the latest version, but we also offer a version for download here.
Download - X Lossless Decoder
Ripping a CD however is easy:
1. Download, install and open XLD.
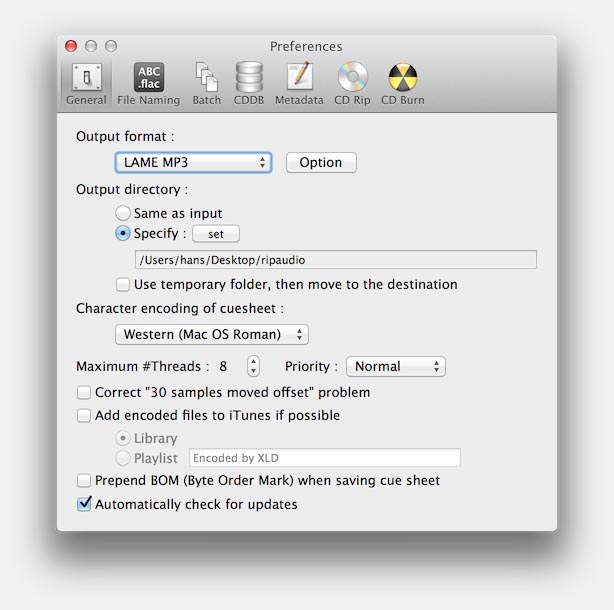
2. On the “General” tab, set “Output format” to “LAME MP3“, click the “Option” button and mimic the settings we used in iTunes.
3. On the same tab you can set the “Output Directory“.
XLD – Ripping to MP3
4. On the “File Naming” tab, you can define the format of the filenames. I prefer “%a – %t” (artists – songtitle).
5. On the “CD Rip” tab you’ll find different ways of ripping, error correction, etc. Unless you run into problems: leave the default settings.
6. When you’re ready to rip, from the menu choose “File” “Open Audio CD” select your CD. A new window will open.

XLD – Content of your Audio CD
Note : If titles and artist names do not make sense or are very generic, consider clicking “Get Metdata”, which takes a few seconds. I found however that the retrieved CD-TEXT data is more accurate, if it exists, specially with compilation CD’s (artist become “various artists” for example). Album art can be retrieved as well, but requires an Amazon access key for which you need to sign up at Amazon Web Services – it is free, but you need to submit credit card info and it’s rather complicated to get going.
7. Deselect the songs you do not want to rip.
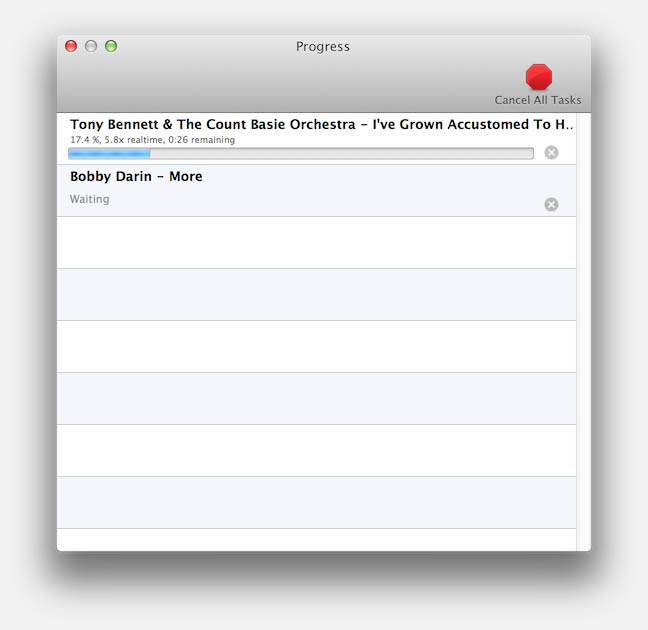
8. Click “Extract” and XLD will extract the songs to MP3’s.
XLD – Extracting MP3’s from your Audio CD
Alternative: Copy Audio CD with Quicktime (AAC)
You Mac comes with QuickTime, and QuickTime actually allows you to rip your music CD – albeit one song at a time – to M4A files (which uses in this case the Apple AAC codec). Obviously not the MP3 format we have been talking about but some MP3 players, iTunes, and some tablets and smartphones can handle this format.
Open your Audio CD with the Finder, right click the song you’re looking for and select “Open With” – “QuickTime Player“.
QuickTime will open and start playing the song you selected.
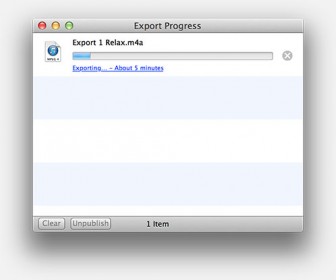
Now click the “File” menu and select “Export“. Set “Format” to “Audio only“, enter a filename and location and click “Export“.
That’s all there is to it … but just one song at a time … and without meta data …
QuickTime Player can rip songs


Comments
There are 4 comments. You can read them below.
You can post your own comments by using the form below, or reply to existing comments by using the "Reply" button.
“Copy” means copy. Not rip. Rename this article.
Bill
Hi Bill,
Thank you for your input.
Ripping is indeed not the same as copying.
However, for the less experienced user, the word “Copy” is rather ambiguous and describes what they want to do … copy their music to their computer. Even though they actually “rip” or “convert” the music to their computer.
Ripping and converting are not always the words less experienced users would be looking for.
hans
GREAT INFO.. THANK YOU. It made copying a cd onto iTunes so simple. Very grateful for the time you put into creating this page!
Carole
Hi Carole!
Great to hear that this was useful for you and to you, and thank you so much for posting a thank-you message!
Happy New Year!
hans