ChameleonPi and Emulators
Let me first say that there are some great alternatives to CHAMELEONPI. Just to name a few very good ones: MAME4All, RetroPie and of course Shea Silverman’s efforts.
Note: ChameleonPi no longer seems to be actively developed, but can still be downloaded.
We will use CHAMELEONPI, as it so nicely combines most common emulators in one single Raspbian based IMG file for the Raspberry Pi. Not only does CHAMELEONPI combine a nice set of emulators, but it also offers a nice menu interface to select your emulator of choice. The interface does not rely on X-Windows and is written in Python.
Oh did I mention the funny screensaver – a slide show of error messages of numerous systems?
Note that CHAMELEONPI will run on all Raspberry Pi Models (Model A with 256Mb RAM, and Model B with 512Mb RAM).
Additional plus for CHAMELEONPI is that the download is smaller than most of the alternatives, still up to a hefty 750Mb, but it beats the 1Gb (and larger) alternatives.
Emulator
An emulator can be seen as software, possibly combined with hardware, that mimics a computer or game system (guest) on a computer (host).
The emulation software translates software and hardware properties of the emulated system which can be resource intense. Emulating older computer systems however can be done however as modern computers are much more powerful than the emulated system.
Installing ChameleonPi
Installation is straight forward, so let’s get started.
Step 1 – Download the latest ChameleonPi IMG file
As an experiment, we will offer this file at Tweaking4All, but the file is rather larger, so if things get out of hand I might remove it again.
We HIGHLY recommend to visit the download page of CHAMELEONPI, where you will find the most up to date file that can be downloaded directly or as a Torrent.
Sometimes the torrent versions lag a little behind the direct download version – so pay attention when making your choice.
The CHAMELEONPI package from the developers website, is typically packed as a .bz2 file which can be extracted as such:
– MacOS X: The system unzip tool can handle this or get a 3rd party application like Keka, The Unarchiver or Entrophy.
– Windows: Download the free 7z application or use WinRar.
– Linux: Either use sudo tar xvjf chameleon.img.bz2 or use “Archive Manager” (Ubuntu – Right click file, select “Extract Here”).
The CHAMELEONPI package from Tweaking4All is compressed as a 7z file, which can be extracted with the following tools:
– MacOS X: The system unzip tool can handle this or get a 3rd party application like Keka, The Unarchiver or Entrophy.
– Windows: Download the free 7z application or use a recent version of WinRar.
– Linux: You’ll need to install 7zip with sudo apt-get install p7zip and extract with 7za e chameleon.v032.7z.
You should now have an .IMG file ready for flashing it on a SD-Card.
Step 3 – Create SD-Card
To create an SD-Card, you can follow the “How to get an Operating System on a SD-Card” article.
Keep in mind that you will need at least a 4Gb SD-Card, but if you’d like to load a lot of ROMs or programs on it then better go got an 8Gb SD-Card.
Short version:
MacOS X users: I created ApplePi-Baker, a free tool that makes this process super simple.
Windows users can use a tool like Win32 Disk Imager or WinFlashTool.
Linux users will have to resort to the “dd” command line tool.
Starting ChameleonPi
Now that we have an SD-Card ready, insert the SD-Card into your Raspberry Pi.
Connect at least a keyboard and HDMI capable monitor. A mouse is optional.
When starting the first time, an Ethernet connection is recommended as well – so we can upload ROMs and programs for the emulators.
Fire up your Raspberry Pi by connecting a suitable power supply to the micro USB connector (at least 1 Amp!) and pretty soon you’ll see the loading screen followed by the emulator selection screen:

Chameleon Pi – Loading Screen

Chameleon Pi – Start Screen
Ad Blocking Detected Please consider disabling your ad blocker for our website.
We rely on these ads to be able to run our website.
You can of course support us in other ways (see Support Us on the left).
ChameleonPi Basics
A few steps we should pay attention to before be use ChameleonPi on a daily basis.
Tip : When rotating through the emulators on the main screen, pausing at a particular emulator will show additional options below the name of the emulated device.
Tip : Some of the emulated machines offer more than one alternative to emulate – if the default emulator does not work as expected, consider trying the alternative emulator.
Carles mentions on his web, I like his sense of humor, that the IBM PC emulator might crash every now and then when running Windows 3.x – a pretty realistic feature  .
.
Expanding the ROMs partition (one time only)
The IMG file of Chameleon Pi assumes a 4Gb SD-Card.
The image is slightly smaller than 4Gb, probably to make sure that it will fit on any 4Gb SD-Card.
This means that not your entire SD-Card is being used, and when you’ve used a 8Gb or 16Gb SD-Card then you most certainly have unused space.
The unused space can be used for the partition that is being used for storing ROMs en we can expand that partition.
To resize the ROMS partition:
In the ChameleonPi main screen press “O” to go to the Options Screen.
The options screen opens, where we select “Resize roms partition” and press ENTER.
This will take only a few seconds.
Terminal Access
For terminal/shell access press “T” in the main screen and Terminal will open.
To close the terminal, simply type “exit” and press ENTER to return to the main screen.
SSH Access
SSH access, secure access from another computer, is by default enabled as well, however: you will need the IP-Address of your Raspberri Pi (see next paragraph).
To open an SSH session read the “How to use SSH” article which focusses just on that for Windows, MacOS X, Linux and Cross-platform through Google Chrome.
The default username an password are:
   Username:   zx
   Password:   spectrum
Obtaining IP Address of Raspberry Pi
The easiest way to find the IP-Address is by opening the terminal (press “T” in the main menu) and enter: ifconfig and press ENTER.
You should get an answer back, something like this:
1
2
3
4
5
6
7
8
9
10
11
12
13
14
15
16
| zx@rpichameleon ~/images $ ifconfig
eth0 Link encap:Ethernet HWaddr b8:27:eb:a8:34:bf
inet addr:192.168.1.124 Bcast:192.168.1.255 Mask:255.255.255.0
UP BROADCAST RUNNING MULTICAST MTU:1500 Metric:1
RX packets:43606 errors:0 dropped:0 overruns:0 frame:0
TX packets:28948 errors:0 dropped:0 overruns:0 carrier:0
collisions:0 txqueuelen:1000
RX bytes:4451889 (4.2 MiB) TX bytes:18126845 (17.2 MiB)
lo Link encap:Local Loopback
inet addr:127.0.0.1 Mask:255.0.0.0
UP LOOPBACK RUNNING MTU:16436 Metric:1
RX packets:42 errors:0 dropped:0 overruns:0 frame:0
TX packets:42 errors:0 dropped:0 overruns:0 carrier:0
collisions:0 txqueuelen:0
RX bytes:2804 (2.7 KiB) TX bytes:2804 (2.7 KiB) |
Look for the lines that have “inet addr:” in it (lines 3 and 11 in this example).
You can ignore the one with “127.0.0.1” in it (line 11), but the other one (line 3) gives you the IP-Address of your Raspberry Pi, which is 192.168.1.124 in this example. Keep in mind though that the IP-Address of your Raspberry Pi will most likely be different.
Basic Controls
Once you see the start screen, you can use the arrows keys (left and right) to rotate through the list of available emulators. Pressing ENTER to select.
The ChameleonPI Main Menu uses the following keys:
Chameleon Pi – Keys
| Key |
Function |
(Arrow Left)
(Arrow Right) |
Rotate through the menu of available emulators |
| ENTER |
Select default (1) emulator of displayed system |
| 1, 2, 3, … |
Select alternate emulator (see display) |
| Q |
Quit (shutdown Raspberry Pi) |
| E |
Open Browser – Emulator Online Forum |
| C |
Open Browser – ChameleonPi Online Forum |
| W |
Open Browser – Emulator Website |
| T |
Open Terminal (type ‘exit’ to close terminal and return to the menu) |
| O |
Configuration (Options) screen of ChameleonPi |
CTRL+Alt+Del,
CTRL+Alt+Esc,
Esc |
Return to main menu from any of the emulators.
One or the other should work (depends on emulator
which one will work). |
Please note that every Emulator has it’s own settings and particular keys.
Ad Blocking Detected Please consider disabling your ad blocker for our website.
We rely on these ads to be able to run our website.
You can of course support us in other ways (see Support Us on the left).
Supported Emulators
Below you’ll find a list of emulated devices, including some sources for ROMs or Applications, and some details to get started – in order of appearance.
Note that websites listed may disappear over time. The best and most reliable source I have found was The Internet Archive and Gamulator.com.
ROMs, websites, and CopyRight
I have provided a few websites where you can find ROMs for several of these emulated computers.
A few things you will need to keep in mind though:
- ROMs, like any other software, are subject to CopyRight – so check your local laws before copying ROMs from any of these websites.
- Some of these websites are loaded with Advertisements, and some of them can be offensive and NOT be suitable for children!
- Some ROMs are classified as “Abandonware” – but this doesn’t mean that CopyRight does not apply!
ChameleonPi v0.32 Device List
| Device |
ROMs |
Format |
Unzip |
Download |
Emulator Details |
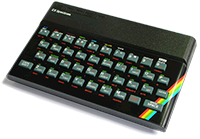
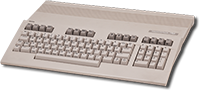
| ZX-Spectrum
|
spectrum |
.z80 (ROMs)
.tap (Tape)
.tzx (Tape)
.mdr (MicroDrive) |
YES |
|
Emulates the famous Sinclair ZX-Spectrum computer, a.k.a. “Speccy”. The ZX-Spectrum was Sinclairs’ successor to the ZX-81. You can choose from the following emulators:
- FUSE
Press F1 to select a ROM (File-Open). F1 – “File” – “Exit” will close the emulator.
- Unreal Speccy
Press Esc to select a ROM (Open File). Esc – “Quit” to close the emulator.
|
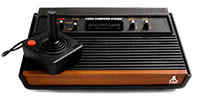
| Atari 2600
|
atarivcs |
.bin (ROMs) |
YES |
|
Emulates the famous Atari 2600 game console using the Stella Atari Emulator.
- Stella
Pressing Esc brings you to the menu to select a ROM, change settings, or exit the emulator. Stella cashes occasionally, with bad roms, freezing the system in a black screen.
|
| ScummVM

|
scummvm |
(none specific) |
YES |
|
Emulates so called SCUMM games by Lucas Art and Sierra (Script Creation Utility for Maniac Mansion) with ScummVM. These are so called point-and-click adventures seen on numerous platforms including PC, C64, Mac, Amiga, Atari ST, etc.
- ScummVM
Games need to be added manually in the menu. F5, during game play, brings you to the menu – sometimes this doesn’t work and you will have to exit the game, which often also quits the emulator.
|
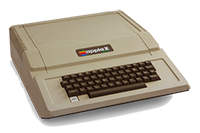
| Apple ][
|
appleii |
.dsk (Disk) |
YES |
|
Emulates an Apple II computer, the first commercially very successful and widespread computer of the Apple empire (for those who could afford it), using LinApple.
- LinApple
Press F1 for Help, F2 for reset, F3/F4 for place the .dsk file as a disk for drive 1/2. First place a “disk” in drive 1 (F3, select ROM) and use F2 to start. Press F10 to close the emulator.
|
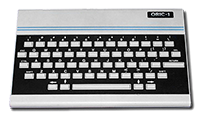
| Oric-1
|
oric |
.tap (Tape) |
YES |
|
Emulates an Oric-1 computer using Oricutron.
- Oricutron
Press F1 to open the menu and select a ROM (select [Parent] – [Games] to get the ROMs directory). Here you can select a tape and return to the emulator where you type CLOAD"" to start a game. I recommend making a sub-directory “oric-1” in the “oric” ROMs directory since this directory can also be used for the Oric-Atmos.
|
| Arcade Machines
|
mame/rom |
.zip |
NO |
|
Emulates the classic coin operated Arcade Games like the ones you could find in Arcade’s, Bars, etc … using AdvMAME or RetroArch.
- AdvMAME
Seems the AdvMAME configuration is geared towards Joystick control, but this can be fixed by opening the file “advmenu.rc” with a text plain editor (ROM share or ROM partition), look for the line that says “device_joystick raw” and change it to “device_joystick auto” (line 11) and save the file. Esc to leave the emulator. Press “5” or “6” to insert coins, Press “1” for start (or “2” for 2 players), “p” for pause.
- RetroArch
RetroArch has a much nicer menu but I noticed that not all ROMs work that well. Use Up and Down arrow to select a ROM and press ENTER to start the selected ROM. Press “p” for pauze, Right Shift button to insert a coin, Press ENTER for Fire or start, “x” and “z” for primary and secondary fire. Close the emulator or the ROM selection menu with with Esc.
|
| IBM PC (DOS/Win3.x)
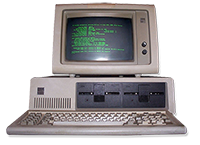 |
dos |
(none specific) |
YES |
(any DOS application
even Windows 3.x)
|
Emulates first IBM PC generations computers, emulating DOS and even Windows 3.x, either through DOSBOX or RPIx.
- DOSBOX
Use CTRL+F9 to close DOSBOX, your ROMs directory will be mounted as the C: drive. Type “INTRO” in DOS to get help pages. DOSBOX works pretty good with the ancient DOS games.
- RPIx
I can say much here – I did not get RPIx to work.
|
| Commodore 64
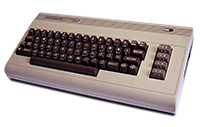
|
c64 |
.d64 (Disk)
.tap (Tape)
.t64 (Tape)
.g64 (ROM?) |
YES |
|
Emulates the Commodore 64 computer using VICE. The Commodore 64, my third computer, was one of the most significant computers I’ve ever owned.
- VICE
F12 gives you access to the menu where “Autostart image” will start loading the ROM (use arrow left to go one directory up). The Esc key acts as the RUN/STOP key. To map the Joystick to the keyboard: Press “F12” – “Machine Settings” – “Joystick settings” – “Define keysets” and assign keystrokes to Keyset 1 or Keyset 2. Set “Joystick device in port x” to the NumPad or the Keyset you just defined. After changing the Joystcik keys you’ll need to restart the ROM. Use “F12” – “Quit Emulator” to close the emulator. Disabling “True drive emulation” under “Drive” can speed up loading times significantly.
|
| Commodore VIC-20
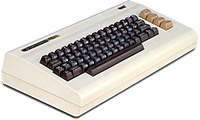
|
vic20 |
.d64 (Disk)
.tap (Tape)
.t64 (Tape)
.g64 (ROM?) |
YES |
|
Emulates the Commodore VIC20 computer using VICE. The Commodore VIC was the predecessor of the successful Commodore 64.
- VICE
F12 gives you access to the menu where “Autostart image” will start loading the ROM (use arrow left to go one directory up). The Esc key acts as the RUN/STOP key. To map the Joystick to the keyboard: Press “F12” – “Machine Settings” – “Joystick settings” – “Define keysets” and assign keystrokes to Keyset 1 or Keyset 2. Set “Joystick device in port x” to the NumPad or the Keyset you just defined. After changing the Joystcik keys you’ll need to restart the ROM. Use “F12” – “Quit Emulator” to close the emulator. Disabling “True drive emulation” under “Drive” can speed up loading times significantly.
Note: The VIC20 files use the same extensions as the Commodore 64 files!
|
| Commodore 128
|
N/A |
.d64 (Disk)
.tap (Tape)
.t64 (Tape)
.g64 (ROM?) |
YES |
|
Emulates the Commodore 128 computer using VICE. The Commodore VIC was the sucessor of the successful Commodore 64.
- VICE
F12 gives you access to the menu where “Autostart image” will start loading the ROM (use arrow left to go one directory up). The Esc key acts as the RUN/STOP key. To map the Joystick to the keyboard: Press “F12” – “Machine Settings” – “Joystick settings” – “Define keysets” and assign keystrokes to Keyset 1 or Keyset 2. Set “Joystick device in port x” to the NumPad or the Keyset you just defined. After changing the Joystcik keys you’ll need to restart the ROM. Use “F12” – “Quit Emulator” to close the emulator. Disabling “True drive emulation” under “Drive” can speed up loading times significantly.
Note: The Commodore 128 files use the same extensions as the Commodore 64 files!
Note: There is no directory for the Commodore 128, it can use the “c64” directory or (recommended) create a “c128” directory.
|
| Oric Atmos
|
oric |
.tap (Tape) |
YES |
|
Emulates an Oric Atmos computer using Oricutron. The Oric Atmos, succesor of the Oric-1, was a direct competitor of the famous ZX-Spectrum.
- Oricutron
Press F1 to open the menu and select a ROM. Here you can select a tape and return to the emulator where you type CLOAD"" to start a game. I had to go into the “Hardware Options” (“F1” – “H”) to disable the disk drive for anything to work. I’d recommend making a sub-directory “oric-atmos” in the “oric” ROMs directory (since this directory is also used for the Oric-1).
|
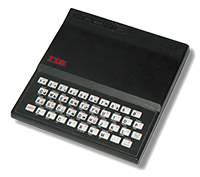
| Sinclair ZX-81
|
zx81 |
.p (Program) |
YES |
|
Emulates the Sinclair ZX-81 computer using SZ81. The ZX-81 was my second, which my uncle in Germany gave me, was very affordable, very limited (pressing a key would temporary witch of your screen!) but oh-so creatively used.
- SZ81
Press “F1” for menu and keyboard layout. In this menu click the TAPE icon, select your ROM, click the “J” on the virtual keyboard, press ENTER, Esc to exit the menu, clear the line, press “R” for RUN and press ENTER to start the program. Close the emulator by pressing “F1” and clicking the [X] icon in the upper left corner.
|
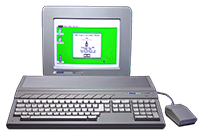
| Atari ST
|
atarist |
.st (Disk image) |
YES |
|
Emulates the Atari ST computer using HAtari. The Atari ST and TT series were computers I owned next to my beloved Amiga 500 (and later Amiga 4000) mostly because my best friend at the time, Casper, had one as well.
- HAtari
Press “F12” to access the menu where you can mount floppies and enable “Fast floppy access” to speed up loading. A mounted floppy (drive A or B through an .st file) can be opened with a double click. Look for a folder called “AUTO” or a file with the “PRG” extension. In some cases you’ll need to check “Reset machine” before leaving the menu with the “OK” button. Close the emulator with “F12” – “Quit”.
|
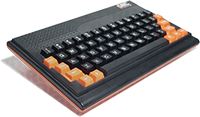
| Amstrad CPC 464
|
amstrad |
.dsk (Disk)
.tap (Tape) |
YES |
|
Emulates the Amstrad CPC 464 computer using either the Caprice or Arnold emulator.
- Caprice
Caprice starts with a nice menu and shows the available programs. Select the ROM you want and press ENTER. “F10” brings you back to the ROMs menu. “F5” resets the Amstrad. Esc exits out of the ROMs menu. Once you see the Amstrad screen type “cat” and press ENTER. Look for the file with the extension “.BAS”. Not type “run” followed by a double quote (“) and the name of the filename (extension not needed). For example: run"elite if the file was ELITE.BAS.
- Arnold
Arnold appears the same way Caprice. Dee the description of “Caprice”.
|
| Sega Genesis
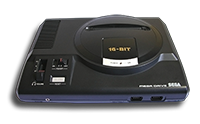
|
megadrive |
.bin (CD image) |
YES |
|
Emulates the game console Sega Genesis (megadrive) using the dgen emulator.
- dgen
A nice menu will display the available roms. Simply select which one you’d like and press ENTER. “F12” for screenshot, “ENTER” to pauze or select, Esc to exit the emulator and go back to the ROM selection and Esc again to exit the ROM selection menu.
|
| MSX
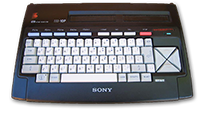
|
msx |
.rom (ROM) |
YES |
|
Emulates a MSX computer, at the time carried by multiple brands including Philips and Sony, using the OpenMSX emulator. Both MSX-1 and MSX-2 series are supported.
- OpenMSX
From the ROM selection menu, select your ROM and OpenMSX emulator will start it right away. Esc exits the ROM selection menu. “F11” is mute, “ALT”+”F4” quits the emulator (more info). It seems that both MSX-1 and MSX-2 ROMs work very well. You might run into a “No cartridge found.” error occasionally which is not an emulator failure.
|
| Atari 800
|
atari800 |
.rom (ROM) |
YES |
|
Emulates the Atari 800 computer using atari800. Although not very popular in Europe, my neighbor (Christ and his son Frank) had one!
- atari800
Press “ALT”+”C” to enter Cartridge Management, select “Insert Cartridge” and select your ROM file. You’ll need to select the cartridge type and I always start by testing them one at a time, starting with “Standard 8 KB cartridge”. Executing a Warm Start (reset) by pressing F5 is sometimes needed. F9 exits the emulator.
|
| Super Nintendo
|
snes |
.smc (ROM) |
YES |
|
Emulates the Super Nintendo game console using RetroArch.
- RetroArch
A nice menu allows you to select a ROM. Esc exits the emulator and returns to the ROM selection menu. Press Esc again to exit the ROM selection menu as well.
|
| NES
|
nes |
.nes (ROM) |
YES |
|
Emulates the Nintendo Entertainment System (NES) game console using RetroArch.
- RetroArch
A nice menu allows you to select a ROM. Esc exits the emulator and returns to the ROM selection menu. Press Esc again to exit the ROM selection menu as well.
|
| GameBoy
|
|
.gb (GameBoy)
.gbc (GameBoy Color) |
YES |
|
Emulates the handheld Nintendo GameBoy using gnuBoy or VisualBoyAdvance. Every kid in those days needed to own one of these – and so did I. Simple games but highly addictive!
- gnuBoy
A nice menu allows you to select a ROM. Esc exits the emulator and returns to the ROM selection menu. Press Esc again to exit the ROM selection menu as well.
- VisualBoyAdvance
See description of gnuBoy.
|
Some example screenshots of a few emulators running:
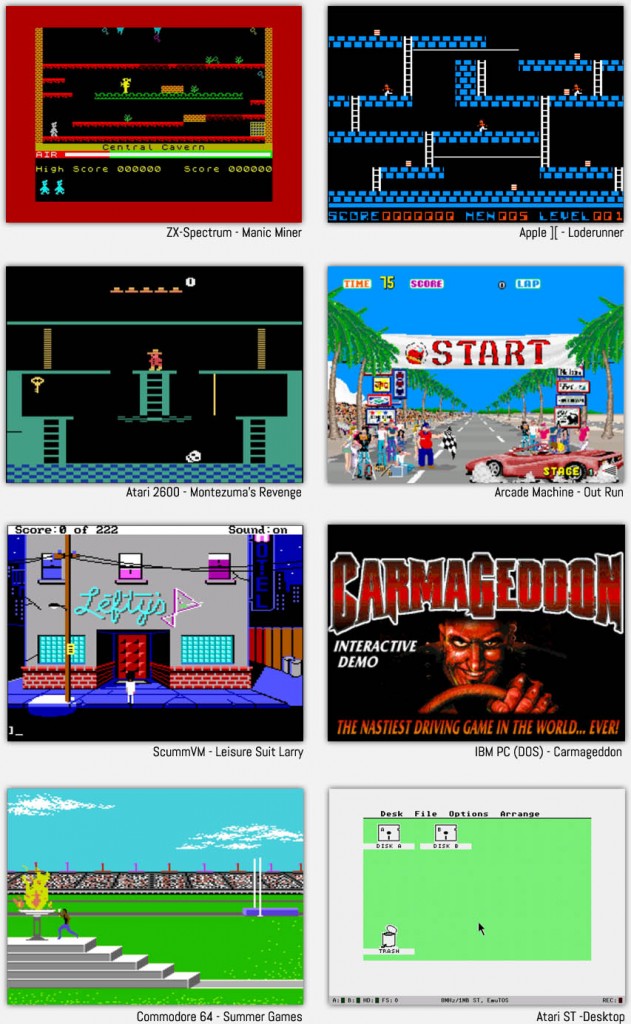
ChameleonPi – Example Screenshots
How to Install ROMs or Applications
There are 4 ways to get ROMs and Applications to work.
Note : as of this point forward, a “ROM” will be used to indicate a ROM or Application for the device you want to emulate.
The first 2 options are the options I’d recommend.
Consider the last 2 options for a more advanced setup (ie. multiple devices sharing roms) or if your SD-Card does not have enough storage space (USB stick might be a good alternative, although SD-Cards are not really all that expensive anymore).
Copy directly to the SD-Card (recommended)
With this method, you’ll have to insert your SD-Card into your computer’s SD-Card reader.
You’ll find a partition called “ROMS” with a ROMs directory for each device emulated (and even a few directories of not yet supported emulators like Amiga and Mac).
Each of these directories is used straight forward, by dumping ROM files in the appropriate directory.
The Arcade Machines (“mame” directory) is an exception, as it has a lot of subfolders, but for the basic ROMs you’ll only need the “rom” sub-directory.
Copy to the SD-Card over a network (recommended)
With this method, we will copy ROMs over the network to a shared directory which actually resides on the SD-Card.
On your computer you’ll have to look on the network for a computer called “rpichameleon” (make sure ChameleonPi is showing it’s main menu before trying).
You will have to connect to this computer’s shared directory “roms” with username “zx” and password “spectrum“.
Under MacOS X for example: smb://zx@rpichameleon/roms .
Under Windows for example by mapping a drive letter to \\rpichameleon\roms with these user credentials.
In this share you’ll find the individual ROM directory.
Each of these directories is used straight forward, by dumping ROM files in the appropriate directory.
The Arcade Machines (“mame” directory) is an exception, as it has a lot of subfolders, but for not too complex ROMs you’ll only need to copy the zipped ROMs into the “mame/rom” sub-directory.
Shared ROMs folder in your network (advanced)
This will read ROMs or Applications from a network shared directory on your computer or NAS.
The shared directory should be called “CHAMELEONPIROMS” with permissions set for Guests to access this directory.
When ChameleonPi (on boot) finds this share, it will mount it as “/roms”.
You will need to create a folder suitable named for the emulated device (or just copy the structure of the SD-Card).
USB Stick (not recommended)
With this method, ROMs and Applications will be read from a USB stick. Keep in mind though that not all USB storage devices will work with the Raspberry Pi unless you find a means to provide additional power to the storage device like a powered USB hub – specially with USB harddrives.
During startup, ChameleonPi will try to mount USB sticks as /roms/USB/Vol1, /roms/USB/Vol2 etc.
On your USB stick you will need to create a folder suitable named for the emulated device (see the “rom” directory on the “ROM” partition of your SD-Card for examples).
Sample Pack of ROMs
While testing all the emulators, I picked up some random ROMs online.
I compressed all of these in one single file so you can download it for testing your ChameleonPi setup.
Download - Roms Sample Pack
Ad Blocking Detected Please consider disabling your ad blocker for our website.
We rely on these ads to be able to run our website.
You can of course support us in other ways (see Support Us on the left).
Auto Execute additional Scripts
You might have seen the files AUTOEXEC.system and AUTOEXEC.launcher in the ROMs directory.
These 2 files can be used to start particular applications or functions automatically:
AUTOEXEC.system
This script will be started, when you start your Raspberry Pi.
This makes it a good place for mounting shared directories etc.
AUTOEXEC.launcher
Whenever the ChameleonPi menu is started, this script will be started.
Adding more Emulators …
I’m sure Carles is not at the end of his experiments to get other emulators to go – I did find some non-functional emulators like for the classic Mac’s (needs XWindows), Amiga (crashes), XBox (missing binary), etc.
If you’re up for trying some things yourself then please go ahead … (be sure to give Carles the info – he might want to include it in his next ChameleonPi version)
Some of the basic steps can be found with two examples (Commodore PET and Atari 800) in this article by Stefano Paganini.
Step 1 – Create a directory for the emulator in the /opt/ directory
For example: mkdir /opt/newcomputer .
Step 2 – Download, Compile and Install the new emulator
Next step is to download, possibly compile, and install the new emulator. The instructions for this takes some homework, as it’s different for each computer.
Make sure to install the emulator in the directory (/opt/newcomputer) you just created.
Step 3 – Find and place a PNG image of the “new computer”
Next you’ll have to go find/create a PNG image of the new computer/device you’re adding. The background should be transparent and you can find some examples in /opt/selector/imatges/ – this is also the location where you’ll copy your new PNG. The suggested width is 600 Pixels.
File 1: /opt/selector/select.sh
In this file we need to add a new entry in the case-statement (around line 18) for our new emulator.
Look for the last entry that is smaller than 50, which should be number 21, which is the last emulator in the menu (GameBoy in v0.32).
In version v0.32 just before the commented out “#v0.2” as shown below.
1
2
3
4
5
6
7
8
9
10
11
12
13
14
15
16
17
18
19
| ....
19)
/opt/selector/listfiles_sdl.sh "RETROARCH SNES " "/roms/snes/" "retroarch -L /opt/ra_cores/pocketsnes-libretro/libretr$
_main ;;
20)
/opt/selector/listfiles_sdl.sh "RETROARCH NES " "/roms/nes/" "retroarch -L /usr/lib/libretro-fceu.so " "/opt/selector/$
_main ;;
21)
/opt/selector/listfiles_sdl.sh "GNUBOY " "/roms/gameboy/" "/opt/gnuboy-1.0.3.orig/sdlgnuboy --scale=4 " "/opt/$
_main ;;
#v0.2
# 10)
# cd /opt/simcoupe
# ./simcoupe
# _main ;;
.... |
In the example above we will add our new computer as such (highlighted lines: 13 – 15).
Line 13 adds a new menu entry and change the current directory to /opt/newcomputer.
Line 14 starts the executable or script for the emulator (you can add parameters if needed).
Line 15 basically says: go back to the main menu after the emulator was closed.
1
2
3
4
5
6
7
8
9
10
11
12
13
14
15
16
17
18
19
20
21
22
23
| ....
19)
/opt/selector/listfiles_sdl.sh "RETROARCH SNES " "/roms/snes/" "retroarch -L /opt/ra_cores/pocketsnes-libretro/libretr$
_main ;;
20)
/opt/selector/listfiles_sdl.sh "RETROARCH NES " "/roms/nes/" "retroarch -L /usr/lib/libretro-fceu.so " "/opt/selector/$
_main ;;
21)
/opt/selector/listfiles_sdl.sh "GNUBOY " "/roms/gameboy/" "/opt/gnuboy-1.0.3.orig/sdlgnuboy --scale=4 " "/opt/$
_main ;;
23) cd /opt/newcomputer/
./exec_new_emulator
_main ;;
#v0.2
# 10)
# cd /opt/simcoupe
# ./simcoupe
# _main ;;
... |
File 2: /opt/selector/machines.con
In this file we need to add out new computer as well, at the end of the list (you’ll recognize the GameBoy again as the last one), in the format:
ComputerName|computer.png|1- emulatorname|http://emulatorwebsite.com/|http://chameleon_website_link_machine|http://chameleon_website_link_emulator
Field one is the name of the computer, for example: Commodore 64.
The second field is the name of the PNG of our new computer.
The first link points to the website of the emulator – I’d recommend pointing it to a documentation, help or Wiki page of the emulator.
The last 2 links might not exist of course, since this depends on the info available on Carles’ website.
http://chameleon_website_link_machine would be the link to the page that contains info of the emulated machine.
http://chameleon_website_link_emulator would be the link to the page with emulator information.
If these last 2 links do not exist on Carles website, which is likely, then consider using:
http://chameleon_website_link_machine → Wiki page of the emulated machine.
http://chameleon_website_link_emulator → Link to the emulator website.
An example based on the Commodore 64 entry might make sense:
Commodore 64|c64.png|1- VICE|http://viceteam.org/|http://chameleon.enging.com/?q=commodore64|http://chameleon.enging.com/?q=vice
And that’s all there is to it. Might sound simple, but getting an emulator to run can be quite a challenge!


Comments
There are 8 comments. You can read them below.
You can post your own comments by using the form below, or reply to existing comments by using the "Reply" button.
Doesn’t run on PI 2 :(
Kokovec
Crap!
I have not tested it on the RPI2. Did you download the latest version?
I’m in the middle of moving from the U.S. to Europe, so I’m not able to test much for the next few weeks …
hans
doesnt work on RPI2 or RPI zero, no activity from the PI at all, card is good and PI are good
john jones
Thanks John for the heads up!
I have not tested this on either, and considering the differences, it doesn’t really surprise me.
I do not have a RPI Zero available for testing, but since ChameleonPi has not been updated since I posted this article, I would assume this will never work on either of them … unfortunately.
hans
my assumption is its the boot loader, is it possible to have this as just the files, not a disk image, I can try this using a bootable image with the files copied ??
I am quite eager to try this emulation software
cheers bud
jj
john jones
Thanks John!
Well, you could try copying the files related to Chameleon Pi to a “clean” Raspbian install …
So create a clean Raspbian SD card for RPI2 or RPI Zero, make sure it runs.
Then copy the Chameleon files to that new SD card, or bluntly copy all files without overwriting. Worth a try.
Let me know if that worked. I don’t have the means to test this just yet
hans
will do bud, I shall try when I get home and let you know how it all goes,
john jones
UPDATE:
Removed and/or updated a few links, as some appeared dead links.
Hans