Whenever creating a website, I typically first play at home on a testserver. Once I’m satisfied, I transfer the content to a production server.
In the past this was rather straight forward since I had developed the website from scratch. But when I started playing with WordPress this seemed a bit more cumbersome.
In this article I’ll show you a simple guide on how to copy or move your WordPress site to another server or to another domain in 5 steps.
Copy or Move WordPress from one server to another
The following procedure to copy or move a WordPress site has been used by myself. I have used different types of local servers. I used a Windows based WampServer, and currently am running MySQL and Apache on my NAS (QNAP – see these instructions on how to set MySQL, Apache, and phpMyAdmin up on your QNAP).
I used this method to copy to and from these local servers to and from my web-servers (including but not limited to Tweaking4All and WeetHet).
It can also be used as a backup and restore mechanism, although some of the WordPress plugins out there might do a good job at it as well.
Step 1: Copy (export) the database
WordPress is fully database driven and MySQL is typically the database of choice. Most web-servers also have phpMyAdmin installed which will make exporting the database much easier.
Go to the phpMyAdmin of your “Source” server and select the database used by the WordPress setup that you’d like to copy.
After clicking the correct database, click the Export tab.
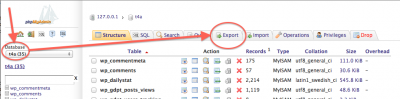
phpMyAdmin – Export the WordPress Database
You do not need to do any settings in the upcoming screen, the default settings work very well. Just scroll down and click the “Go” button at the bottom of the page.
Tip:
Depending on the size of your database this process might take a little bit – if your Internet connection is rather slow, then you might want use the gzipped or zipped option.Windows, MacOS and most Linux distro’s support ZIP and GZIP decompression. Tools like WinRAR and 7Zip (for Windows) or Keka (MacOS X) can be useful in this as well.
Don’t forget to decompress the file after download completed.
A file dialog will appear and – depending on your browser – have a suggested filename (database name followed by “.sql“). Click “Save” to download and save the file.
Pay good attention to your browser to see when the download completed.
The downloaded SQL file is actually a text file with SQL statements to created and populate tables.
Step 2: Modify the SQL statements to match the new location
Open the downloaded SQL export with a plain text editor (Windows: Notepad or Notepad++, MacOS X: TextWrangler, Linux: VI or Nano). Use the Search and Replace function of this editor to replace text occurrences of the “old” web-server with the “new” web-server.
For example;
We have the old web-server “http://www.myoldserver.com” and the new web-server “http://www.newwebserver.com“. In that case search and replace each occurance of “www.myoldserver.com” with “www.newwebserver.com”. Also do a search and replace of “oldwebserver.com” with “newwebserver.com” just in case there is a reference without the leading “www”.
Once you’ve completed the search and replace, save the file.
Step 3: Import the database
The next step is to import the SQL data to your new location. For this, open the phpMyAdmin of your destination server – make sure a same named database exists (so if the database was called “wordpress” on the old server, then make sure you have a database named “wordpress” on your new server as well!).
Select the target database.
Click the “Import” tab and click the “Choose file” button. A file dialog will open where you select the SQL file you just edited.
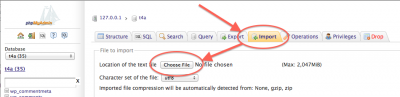
phpMyAdmin – Import the WordPress database
Once you selected a file, click “Open” and then the “Go” button at the bottom of the page.
Importing consists of two phases; uploading the file and executing the SQL statements, so it might take a little bit before it completes.
Step 4: Copy the files …
After uploading the database files, it’s time to copy the files from the “old” server to the “new” server. I typically use Filezilla for FTP purposes – it’s free and available for multiple platforms like Windows, Linux, and MacOS X. Alternative FTP applications would work just fine as well of course.
Copy every single file located in the WordPress directory of the “old” web-server to the WordPress directory on the “new” web-server.
Can’t see wp-config.php?
One funny little thing I ran into was that I could not see “wp-config.php” on the “old” web-server. This indicates by the way that other files are not visible as well, that are critical to your WordPress setup. I found that using SFTP instead of regular FTP resolves this issue.
Step 5: Edit “wp-config.php”
The final step is to edit the “wp-config.php” file (again with a plain text editor).
With WordPress 3.x I only needed to update the database username and password (in case your database has a different name and/or location then you need to update those fields as well).
1
2
3
4
5
| /** MySQL database username */
define('DB_USER', 'myusername');
/** MySQL database password */
define('DB_PASSWORD', 'mysecretpassword'); |
It appears that older WordPress setups (you’ll see it in you wp-config.php file if this is relevant for you) need the following lines to be updated as well:
1
2
| define('WP_SITEURL', 'http://www.newwebserver.com');
define('WP_HOME', 'http://www.newwebserver.com'); |
Both adjustments of course matching the info of your new web-server.
That’s all there is to it – you can test your new/copy server now. Go through a few pages and make sure everything is there and functional. Specially missing images or sudden jumps to the original website indicate that you over looked something.
Other common issues
Missing images:
You didn’t copy the “wp-content/upload” folder properly, or some of the links in you SQL file were not updated.
Jumps to the original website:
Either some links in the SQL file were not updated, or ( ) you created a theme with absolute links (to pages, posts, CSS files or image files).
Articles, Pages, or Categories not opening:
You failed in copying the (hidden) .htaccess file.
FeedBurner?
Incase you’re moving from one domain to another: don’t forget to update services like FeedBurner …


Comments
There are 2 comments. You can read them below.
You can post your own comments by using the form below, or reply to existing comments by using the "Reply" button.
THANK YOU!!! Works perfectly!
getintopcpw
Awesome!
Thanks for taking the time to write a thank-you note!
hans