Unfortunately, creating a ringtone for an iPhone can be surprisingly daunting … and in my opinion that doesn’t exactly match the Apple philosophy … oh well. It’s even more difficult than with the good old flip-phone, so much for “smart” phones.
After writing an article how to do this under MacOS X, utilizing iTools and QuickTime, I of course had to write an article for Windows users as well.
In this article: How to make a ringtone for your iPhone, from an Audio file (WAV, MP3, etc) or a Video file (AVI, MP4, etc), trimmed to the desired length and uploaded to your phone using totally free tools.
MP3 or Movie Audio as Ringtones for your iPhone
Audio and music files are widely available:
These Audio files (MP3 songs for example) however, are often longer than desired so they would need some trimming.
Tools we are going to use
Both tools, iTools and WavePad, should be downloaded and installed.
iTools
For the quick transfer for to our iPhone, we will utilize iTools, a free and must have tool for iPhone users.
iTools can be download from Tweaking4All, but as usual we highly recommend going to the developers’ website for the most recent version. The version we offer here works just fine with iOS 7 (older version are supported as well).
Download it and install it.
Download - iTools (Windows)
WavePad
For editing (trimming) Audio files and extracting Audio from Movies, we’ll be using WavePad, which is a free application (for home use) and offers quite a lot of options to play with. One of the options we will use is to extract movie audio, so we can take a movie fragment (audio) as a ringtone. On the Mac we were able to use QuickTime for this, but QuickTime under Windows does not have the trim option and QuickTime is not by default installed, so we diverted to this more capable tool.
WavePad is in my opinion a great tool for editing Audio and supports a wide variety of file formats. A great and free alternative is Audacity. I did find it a tiny bit less user friendly though.
As usual, we recommend you to go to the developers website to download the latest version there, but you can also download it here:
Trimming your a Ringtone
While I originally started this article having MP3’s in mind, I quickly found out that other audio and even video formats do work with this trick as well when using WavePad. WavePad can extract the Audio track from a Movie, so we can use a movie fragment as a ringtone as well.
Is Trimming Needed?
Trimming your Audio file is optional: if your file is already at the desired length then you can skip this step – for example when you downloaded a ringtone from Zedge. The file format doesn’t matter.
Trimming your Video or Movie is needed since we need to extract the Audio before we can use it as a ringtone, not to mention that most movies are much too long for a ringtone. If you’d like to use the Audio of a DVD or BluRay then you’ll have to convert it first with an application like Handbrake (DVD) or MakeMKV (BluRay).
Step 1 – Open a copy of the Audio or Video file with WavePad
First make a copy of the file you’d like to use, just to make sure we don’t damage the original by accident. This is highly recommended but optional of course. If you follow the steps correctly, the original file should not be damaged.
Next open the file using the “Open File” button, or the “Open File” option in the “File” menu (or press CTRL+O).
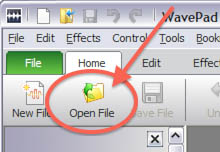
WavePad – Open file
Note : You can open a video file, like an AVI, MKV, or MP4 as well, but WavePad will then first extract the Audio track first for you.
Step 2 – Make a trim selection of the Audio or Video file
Once you’ve opened the MP3, Movie file or other Audio file, you’ll see the window divided in two major areas:
Song overview (A) which shows the sound wave of the entire song or audio track, and the Zoomed section (B) where we see the sound wave of the zoomed in part.
By default, the audio is displayed as a mono track, but this is only for display purposes. You can switch the view to stereo or multichannel if you’d like.
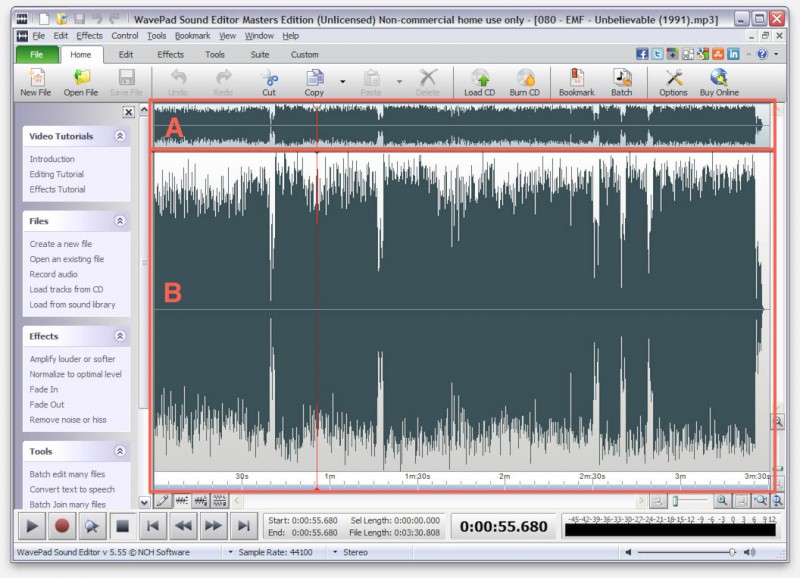
WavePad – Song or Audio track visible
Since seeing the entire sound wave is not very helpful when selecting a particular section, we can zoom the sound wave in section B and make our selection. Clicking on the play button (left, at the bottom) plays the entire wave or the selection (if you made one).
Note that when you’ve made a selection (the blue selection below), that you can use the mouse the move the start and end positions as indicated with the red arrows below. I personally like it that way, since it allows me to zoom, and fine tine my selection by just using the mouse.
Tips to find the proper positions:
– The “gaps” you see in the audio track indicate a less loud or even quiet moment in the song or movie audio.
– During playback a vertical red line will move along indicating the position in the song.
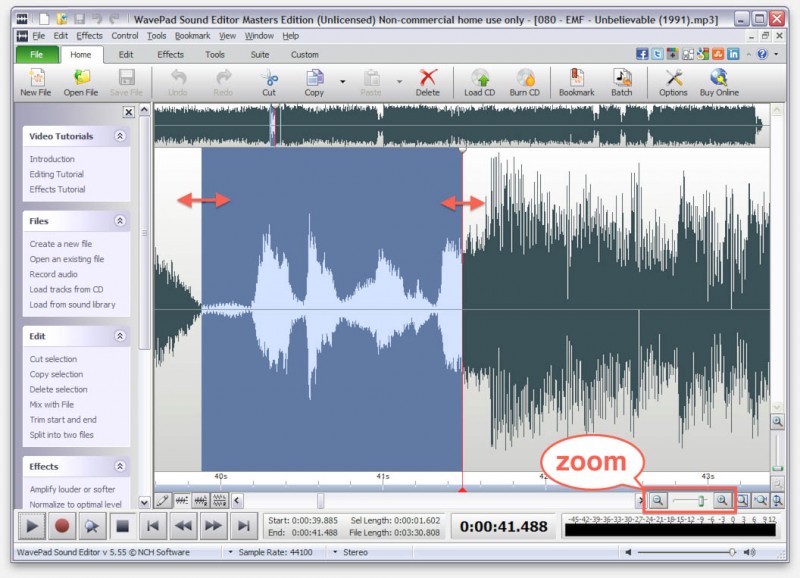
WavePad – Selection and Zoom
Once you have finalized you selection, click the menu “Edit” “Save Select Region As…“.
Note that I’m referring to the menu and not to the “Edit” section in the button bar.
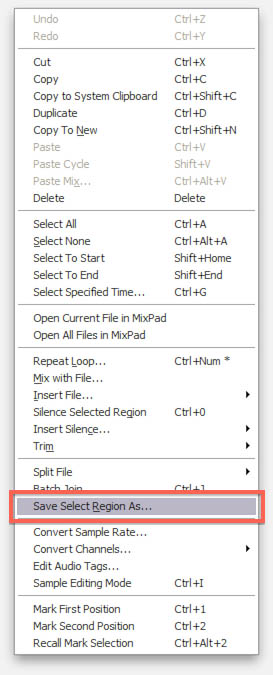
WavePad – Save selection
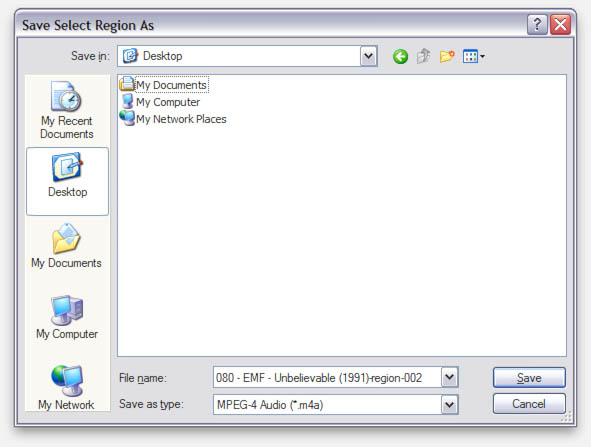
Once you clicked the “Save Select Region As…” option a file save dialog appears, where you can determine location and filename.
Here we can also set the file format – for an iPhone ringtone I recommend using “Save as type:” set to “MPEG-4 Audio (*.m4a)” – it will save us time in the next step.
Other formats like MP3 can be selected as well of course (practical if you’d like to use the ringtone on other non-Apple phones as well).
M4A vs M4R
An iPhone uses M4R files for ringtones, so what is the difference between M4A and M4R?
Both are in essence the same, and use AAC as the Audio codec. The only difference is the file extension.
It is however recommended to keep a ringtone shorter than 40 seconds.
WavePad – Save Dialog
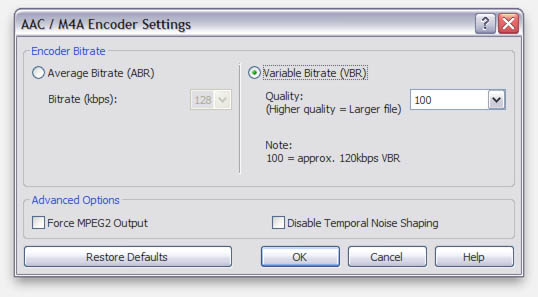
Once you click “Save” another dialog opens with details on the file format.
Match the settings below if you’re using the suggested MPEG-4 Audio format.
If you decided to use MP3 instead, select VBR 32 kbps to 320 kbps with a quality of “0” (highest).
WavePad – Audio Format
Installing a Ringtone on your iPhone
The following method supports quite a few different audio formats. All these formats (M4A, MP3, etc) will automatically be converted to the M4R format used by your iPhone. This conversion however will only work for Audio files!
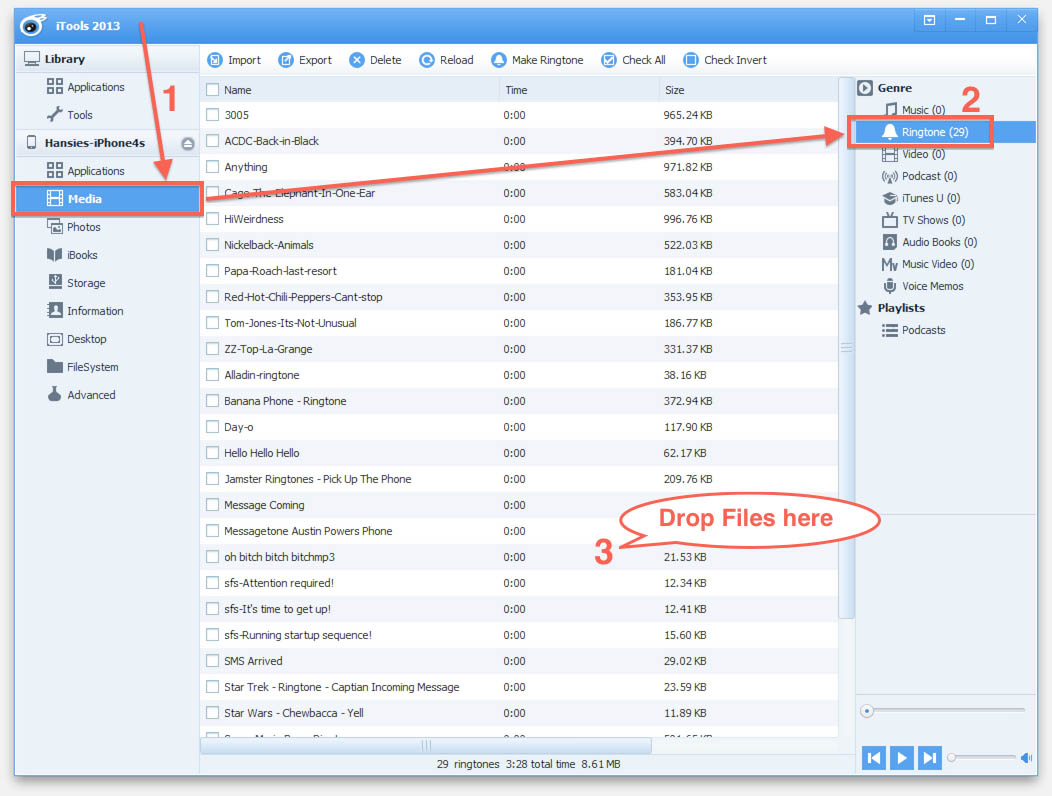
To install our ringtone, we’ll be using iTools, as mentioned before. Connect your phone with the USB cable to your computer and start iTools.
You should see your iPhone on the left hand side with the item “Media” underneath it (1). Click “Media“.
On the right hand side (2) you’ll now see a list called “Genre” where we select “Ringtones” after which a list of ringtones will appear (which of course could be empty).
The file(s) you just created can now be dropped on the list (3) so iTools will install them on your iPhone.
iTools – Bring ringtones to your iPhone
Dropping the M4A file on iTools will quickly “convert” (rename M4A to M4R) and install the ringtone on your iPhone.
MP3’s will work fine as well, but conversion might take a few more extra seconds – it’s very fast though.
On your iPhone go to “Settings” – “Sounds” where you can change the ringtones for calls, text messages, emails, etc.
In the list of available ringtones you’ll now see your newly made ringtone(s):
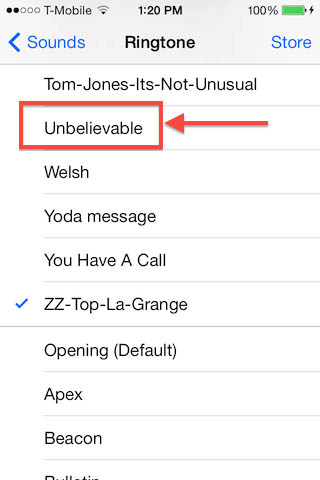
Your new Ringtone on your iPhone


Comments
There are no comments yet.
You can post your own comments by using the form below, or reply to existing comments by using the "Reply" button.