There are a lot of reasons why one would want to make their own audio CD.
Not everybody has a car with an audio system that is MP3 capable, not all audio CD albums have that particular mix of songs that you like, and most CD’s do not do well when exposed to the temperatures in your car on a sunny day.
I’m not a fan of iTunes, so for this article we are going to use a tiny, but great program, called “Burn“, which allows you to quickly burn our own audio CD, with little to no effort.
Burning a CD from MP3’s
We are going to compile our own audio CD based on MP3’s we have at hand. So make sure you have MP3’s  .
.
Next determine with media kind you’d like to use, typically this will be a CD Recordable (CDR).
TIP
For more details on different kind of media, speeds, labeling, etc. please read this article.
Downloading and Installing “Burn”
Burn is a tiny Open Source and Free program, you can get it at their homepage, even a PowerPC version is available.
If you are not sure what you need: if your computer is not too old pick the 64-bit version!
Alternatively (although I recommend going to their website to make sure you have the latest version) you can download it here:
Installation is straight forward and your download results in a “burnXYZ-64bit.zip” file in your Downloads folder, where XYZ represents the version number.
Unzip it, with your favorite unzipper (I love Entropy since it can create RAR file, but it’s far from cheap – or get the very good, and free, alternative Keka), or use the system unarchiver (= double click the file).
Next drag the file called “Burn” into your “Applications” or “Utilities” folder (your password may be asked, specially when you’re dragging it into the utilities folder). If you do not see a file, but a folder, then open this folder first, you file is most likely in there.
Prepare Burn for an Audio CD …
Start “Burn” by double clicking the application icon in your “Applications” folder.
Burn Icon
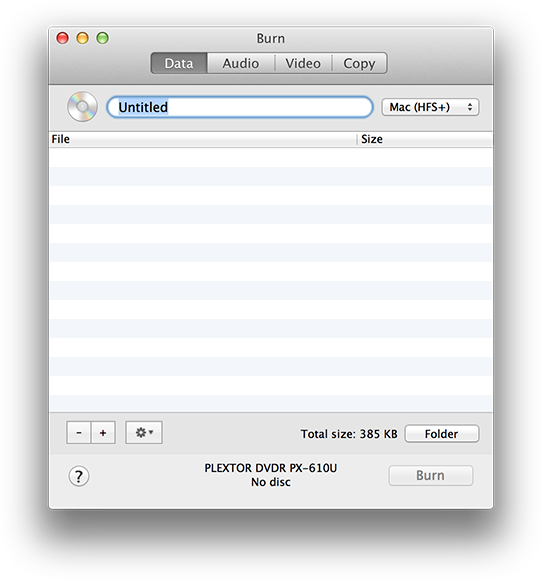
Burn Start Screen
As you can see; it detected my CD/DVD Burner (Plextor DVDR PX-610U) and it sees that there is no disc inserted (bottom of the window).
Now click the “Audio” button, enter a title, and make sure it says “Audio CD” next to the title, as shown below:
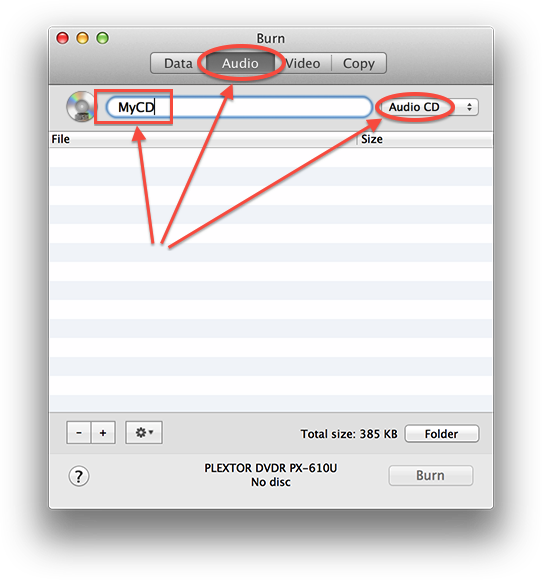
Burn – Audio CD Mode and a title
Now insert an empty CD (CDR or CDRW), wait a few a seconds and your Mac will ask you what to do with it … click “Ignore“.
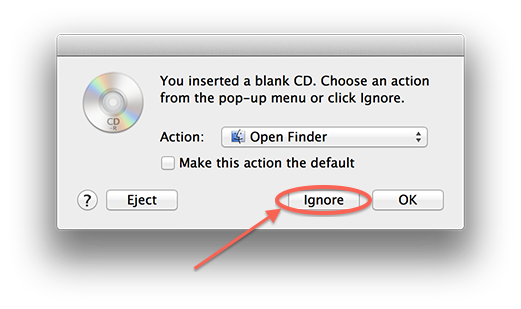
Finder sees inserted CDR
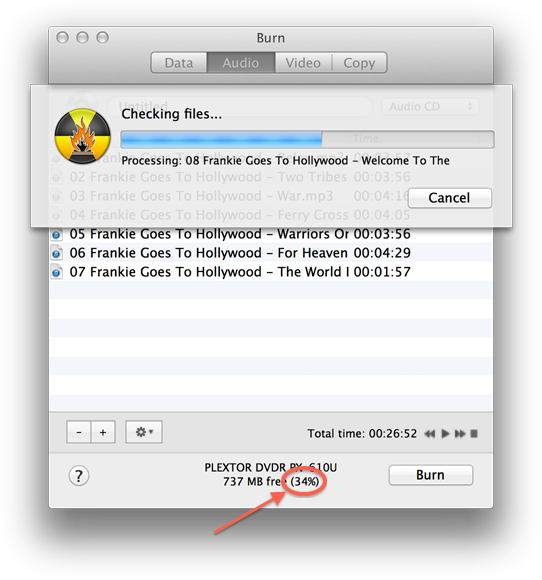
You will now see that “Burn” shows, just below the brand and model of your CD/DVD burner, at the bottom of the window, what the capacity of the newly inserted disc is in Mb – in my case 737 Mb – and an indicator how much % of the disc will be used (0%).
Drag and Drop
CAUTION
Keep in mind that the rule GIGO (“Garbage In, Garbage Out”) applies.
So if you have really poor quality MP3’s, then the Audio CD version of those MP3’s will sound crappy as well!
Start dragging and dropping your MP3’s onto the Burn window. You will see that Burn starts processing the MP3’s.
- Keep and eye on the percentage indicator, keep it lower or equal to 100%!
- If you don’t like the order: Drag and Drop within Burn allows you to change the order.
- You can remove songs from Burn (original file remains untouched) by selecting the song and clicking the minus button.
Burn – Adding MP’3
TIP
Consider using CD-TEXT. CD-TEXT stores additional information on the Audio CD, like titles, album name, etc.
CD-TEXT is enabled by clicking the little cog wheel button in the lower left corner.
Click the “Create CD-Text discs” option (if it’s not already checked).
The advantage of CD-TEXT is that some CD players and applications (I noticed it mostly with iTunes and car radio’s) actually read this information and display it when available.
Burning your Disc
Well, all the had work is pretty much done. Click the “Burn” button when you’re sure about the order of the songs, and that you did not exceed the capacity of the CDR (or in other words: more than 100% is indicated).
Keep in mind that the in the upcoming screen “Allow more sessions” is NOT checked! Multisession (ie. you can add music later) works OK on a computer, but quite a lot of audio equipment will very likely not work properly with such a disc. So don’t do it … 
(Audio CD’s should always be burned in so called “Disc-At-Once” mode)

Burn Ready to Burn
If you feel everything is set right (correct burner if you have more than 1, correct speed, and again NOT allowing more sessions) then click “Burn” and Burn will start burning your Audio CD.
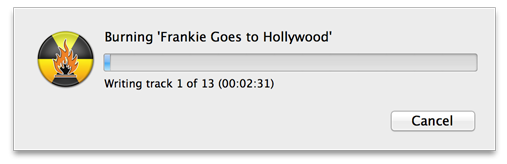
Burn Burning your Audio CD
Once Burn is done, it will return to the screen displaying the MP3’s you added to the list. – your first Audio CD done! 
p.s. iTunes might actually open up since it thinks you just inserted an Audio CD.


Comments
There are no comments yet.
You can post your own comments by using the form below, or reply to existing comments by using the "Reply" button.