For those who need a cheat sheet on XTerm colors, here a quick and short reference overview.
These colors should work for anything that supports the XTerm color-scheme, so this includes several Terminal emulators and several Shell variants like Z-Shell.
I needed this while customizing my Z-Shell prompt, and I hope this is useful to others as well as a reference sheet.
I’ve split it up in the 16 basic colors, 24 greyscale “colors”, and 256 colors.
Ad Blocking Detected Please consider disabling your ad blocker for our website.
We rely on these ads to be able to run our website.
You can of course support us in other ways (see Support Us on the left).
Sometimes we need a Certificate so we can encrypt and decrypt network communication, for example for all kinds of network devices (eg. NAS, IoT devices, local web server, etc).
Unfortunately, for some of these applications, we cannot obtain a legit certificate from a CA (Certificate Authority), due to certain limitations.
In this article I’ll show you how to create such a free Self-Signed (self-created) certificate yourself, for Windows, macOS and Linux.
I’ll also briefly point out limitations and potential problems that come with a Self-Signed certificate or CERT.
Since one of my WordPress plugins seems to have been ghosted by it’s developer, I had to develop my own plugin. Not a big deal, just a lot of work.
For this I wanted to use Ajax calls to retrieve data.
Reading up on WordPress and using Ajax, I found it difficult to find a complete and working example.
Even the WordPress Codex example produced a “400 (Bad Request)” (you can see this in the console of your web browser).
So, once I figured it all out, and got it to work, I decided to dedicate a short article on a quick and easy working example on how to get started with Ajax in WordPress by using PHP, JavaScript and jQuery.
I hope others benefit from this, potentially saving you a lot of time to get started.
For those of you working with JavaScript, and the ability to store some data on the client side (browser) with the help of Cookies; here a short description what cookies are, what kinds there are, and how to work with them.
Since I rarely use it, I keep forgetting the details, so I figured; well, put it on my website so I can find it again when I need it in the future and maybe others will benefit from this as well.
It really is an easy process, and I’m honestly surprised that JavaScript and jQuery do not offer some simple functions for this right out of the box. For jQuery several cookie plugins can be found – just too bad it’s not right away included.
Ad Blocking Detected Please consider disabling your ad blocker for our website.
We rely on these ads to be able to run our website.
You can of course support us in other ways (see Support Us on the left).
For most of us, working in Linux or in a shell is not necessarily a daily activity, and that’s totally OK.
I’m not daily working with it either, but occasionally I use one of those funny commands to set the access rights to certain files and/or directories.
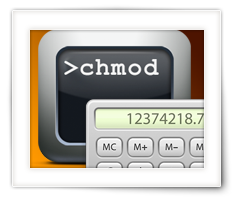
This command, chmod, is not super complicated to work with, and is commonly used when working in a shell or terminal on both the MacOS X and Linux platforms. But we need a “magic number” to set these rights. The “magic number” for chmod is also commonly used with FTP programs.
Whenever I use this command, I need to refresh my mind on how to calculate the “magic number”, and I find myself looking for a chmod calculator.
Since I’m lazy at times, I figured: why not have one on my own website?
So I started playing with JavaScript and created this chmod calculator.
For those of you writing articles or blog posts, you’ll find that it takes a lot of work to write a good article. Even a tiny post can take up a lot of time.
And what is the most annoying part? Folks just bluntly copying your work, without even asking or giving credit (there are a very few exceptions). It seems that the majority on the Internet is replicated that way. Copy, and Paste.
For WordPress users (and if you only take out the JavaScript part, this might work for others as well) can, with a little trick, automatically add a “source” link below what has been copied. Not only will this be a reminder for the “copier”, but (if left intact) a good way to boost SEO for your website.
Wouldn’t it be nice to have a widget to place an advertisement, for example from Google Adsense, into the sidebar of your WordPress website?
After all; the layout of your sidebar(s) could be managed from the WordPress admin pages, and allows you to place ads in the sidebar where and as many times as you see fit.
There are probably plenty plugins for this, but I dislike plugins.
So here the simple code for the “functions.php” that creates your own WordPress Ad Widget.
Ad Blocking Detected Please consider disabling your ad blocker for our website.
We rely on these ads to be able to run our website.
You can of course support us in other ways (see Support Us on the left).
Unfortunately, when running a website, some kind of income is needed to cover the hosting expenses. Often this is done by placing ads.
Like most other websites, even Tweaking4All has to resort to placing ads, although I’d rather have zero adds, but donations alone isn’t covering the costs.
The downside of ads, besides being annoying at times, is that they only generate revenue when placed strategically, so folks will click on them (hint!).
Now, I will not claim to be the right person to ask where you should place ads, but in my opinion there are 3 reasonably “good” locations.
At the beginning and end of an article, and … in the smack middle of an article.
In this article, I’ll show you how you can automatically have an ad placed in your content, on the fly. With this code you can place an ad just before the nth <H2> tag. We will not use a plugin, and the code is simply added to the “functions.php” file of your theme.
I’ve been asked several times in the past, on how to take screenshot and annotate them afterwards, or how to do a so called “print-screen” to a printer for a hardcopy.
Some users, use screenshots for illustrating manuals, or articles for their website. Some use it to print error messages or odd things happening on their screen. And as with regular paper, some of us would like to annotate the images – add notes, comments, arrows, numbers or circle the important part of the image.
Annotating images is relatively easy, once you know where to find the tools to do this.
So in this article, for Mac OS X users: How to take screenshots, how to add annotations, and some additional related tips and tricks.

Preserve backslashes in WordPress brings us to one of the annoying features of WordPress: it strips backslashes.
It has it’s place an reason of course, but it can be a PITA when you’re trying to post code examples.
In this very short article, I’ll show you how to preserve your backslashes with a very small function which replaces each backslash with an HTML entity, which should make it safe to work with in your database and not loose the backslash. Even my code highlighter does not seem to be bothered by it and displays the code correctly (ie. not showing the HTML entity, but rather show the desired backslash).
Note that manually entering the HTML entity in the HTML code of your article (Text view) works only once! When loaded again in the tinyMCE editor, the HTML entity will be converted to a backslash again and posting an update would remove that backslash again. This function prevents the loss of the backslash by doing it’s work each time you save your work.
Ad Blocking Detected Please consider disabling your ad blocker for our website.
We rely on these ads to be able to run our website.
You can of course support us in other ways (see Support Us on the left).
For whatever reason you can think of, for the fun of it, or to show off how well your website is doing; displaying the Google pagerank and/or the Alexa ranking of your website is kind-a nice to have. This article is an updated version of a previous article I wrote, but since the Alexa link no longer works, the official (free up to 1,000 queries a month) Amazon AWIS API needs to be used and we won’t be exceeding the 1,000 free queries per month with this method.
I have seen several useful PHP scripts that can help with that, but they all kind-a rely on the fact that a page is being loaded, and while loading the Google Rank and Alexa Rank are begin retrieved, over an over again. This is not only causing an unneeded load on the Google and Alexa servers, but it’s also slowing down the loading of your website (even though it might not be noticeable by the end-user).
Both Google Rank and Alexa do not refresh multiple times per day, so a once a day refresh would be good enough.
In this article I’ll show you how I have implemented this in WordPress.
P.s. for those who’d like to see this as a video training, Webucator was kind enough to make this article available as a video as well, you can find it at the end of this article.
In the world of WordPress, this situation does not seem uncommon;
A user posts a comment, and instead of actually posting the comment, gets redirected to the main page of your website. Not just annoying for webmasters, but a very unpleasant experience for visitors that like to actively contribute.
Quite often, with WordPress, this is caused by a false-positive being triggered by mod_security.
In this short article, I’ll show you what might be causing this issue, how to identify it, and how we can fix it.

This is one of those funny little things you run into when writing a longer post or article.
You’d like to present an overview in the beginning of that particular WordPress post, so users have the ability to see at a glance what to expect and, if needed, quickly jump to the location where they’d like to be.
Things get even crazier when you have a topic, say a course of some sorts, that covers multiple posts, where you would still like to show the user where to find what in a content overview of the entire “course” or group of articles. I’ve grouped them in this case in a dedicated category …
If you’ve ran into something like this before, then you’ll know the cumbersome experience of keeping everything correct and nicely ordered.
Since this seems a good task for a computer to solve, I figured; why not write some code that does this for me (yes, I know there re plugins that do something similar, but not quite to my licking). Before I knew it, this got quite out of hand and I created some code for using a WordPress shortcode in my posts for just this purpose.
Ad Blocking Detected Please consider disabling your ad blocker for our website.
We rely on these ads to be able to run our website.
You can of course support us in other ways (see Support Us on the left).
For whatever reason you can think of, for the fun of it, or to show off how well your website is doing; displaying the Google pagerank and/or the Alexa ranking of your website is kind-a nice to have.
I have seen several useful PHP scripts that can help with that, but they all kind-a rely on the fact that a page is being loaded, and while loading the Google Rank and Alexa Rank are begin retrieved, over an over again. This is not only causing an unneeded load on the Google and Alexa servers, but it’s also slowing down the loading of your website (even though it might not be noticeable by the end-user).
Both Google Rank and Alexa do not refresh multiple times per day, so a once a day refresh would be good enough.
In this article I’ll show you how I have implemented this in WordPress.
The past few days I have been working on setting up a second QNAP NAS as a backup for my files on my primary QNAP, using realtime syncing – which works ridiculously smooth. I have some MySQL databases on my primary QNAP as well, but syncing the data doesn’t seem to be part of the plan of the backup tools provided by QNAP.
Lucky me: MySQL has a great replication mechanism build in, so you can replicate one database (master) to another (slave). The setup is easy, albeit confusing when you just start looking into this. Synchronisation is done asynchronous, meaning: changes in the data on the master will be applied to the data on the slave, but the slave doesn’t need to be permanently connected. Missed changes, when not connected, will be “saved” and when a connection is established again, will be applied.
In this article I’ll show you how to do this for two MySQL setups (QNAP), where one serves as Master (Original) and the other as Slave (Backup).