Mac OS X Lion is the first version of the Mac OS X Operating System that can be downloaded through the App Store application.
On itself great, and the price (as usual) is definitely not a reason to not do it ($29.99).
But if you’re like me, then you really want a installation disk … for whatever reason (you don’t want to download it again for your other machine, you’d like to have a backup, installation through the App Store didn’t work, etc).
So here a short and quick explanation on how to do just that.
UPDATE: This trick works for other Mac OS X versions as well, even with MacOS X Maverick (free!)!
Tip before we begin
Before you start this entire process of creating a bootable DVD or USB drive (8Gb): Take a look at “Lion Disk Maker” (it’s free, donations are appreciated) – it pretty much fully automates this entire process.
Start with the App Store
First you will need to purchase Mac OS X Lion of course, and you’ll have to do that in the App Store application (make sure you are running Mac OS X 10.6.8). It’s a 3.49 Gb download so if your connection is like mine (embarrassing 1.5 Mb down, which is the max you can ge out here) then let that run over night.
The setup will start automatically … but it will wait for your input before it actually proceeds;
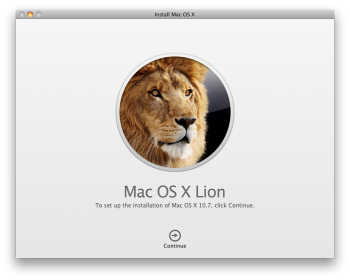
Mac OS X Lion – Install screen
Tip:Already downloaded and installed Lion? Redownload it with the following trick
might work:
1. Launch the App Store application
2. While holding down the OPTION key (ALT on a Windows keyboard), click “Purchases” section
The “OS X Lion” should now show a dark gray “INSTALL” button: 
Keep in mind:This is article was
NOT written so you can copy this for your friends and family members so they can save $29.99 – come’on, it’s really cheap compared to certain other Operating Systems for example the big one from Redmond (I don’t want to mention any names here – cough-micro-cough-soft

) who rip you off with a half baked system.
Also: Rumor has it that the download you have has been digitally signed with your Apple ID – so reconsider “sharing”.
Abort … Abort … Abort …
Once you see the screen shown above: Do NOT proceed with the installation!
After completing the installation, the App Store will remove the installation files, and we really need those to create an installation DVD or USB drive.
There are several ways to abort.
1. Press COMMAND + Q (on a Windows keyboard: left WINDOWS + Q)
2. Use the menu “Mac OS X Lion Install” and select the option “Quit Mac OS X Lion Install“;
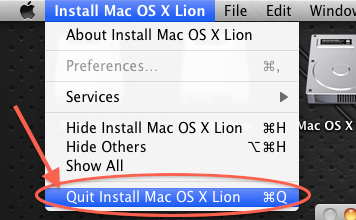
Quit Mac OS X Lion Install (menu)
3. Right click (or CTRL + left click) the dock icon and select “Quit“;
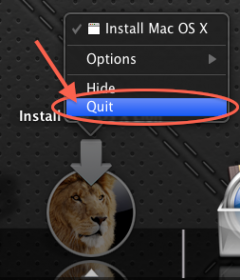
Quit Mac OS X Lion Install (dock)
Now that you canceled the installation, you’ll find the setup files in your Applications folder:
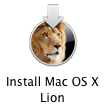
Installation Icon
Extract the Installation “Image” (DMG)
Once you have located the “Install Mac OS X Lion” icon in you Applications folder, right click it and select “Show Package Content“.
A new Finder window will open in which you will see a folder called “Contents“. Open this folder.
Now open the folder “Shared Support” which is located in the “Contents” folder that you just opened.
You will find a file called “InstallESD.dmg” – This is the disk image of the installation DVD or USB drive.
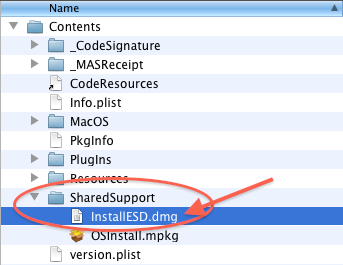
Lion Installation Disk image
Select this file (InstallESD.dmg) and drag it to (for example) your desktop.
If you plan on installing Lion on this computer then you could consider copying it instead of moving it.
Option 1: Create a bootable USB drive/pen
If you have an USB drive available larger than 4Gb (an 8Gb pen drive is perfect) then you can install the disk image on that – which allows you to install Mac OS X Lion from the USB drive.
CAUTIONThe drive will be completely wiped in this process!
Open Disk Utility (you can find in the “Utilities” folder of your “Applications” folder, or you can use Spotlight to find it).
First we must find our USB drive on the left side of the Disk Utility window – make very sure that you’re picking the right device, since the drive will be completely erased! In my example I’m using a 64Gb Kanguru eFlash (very fast USB pen drives and great customer service!).
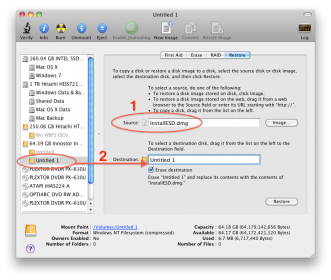
First select the correct drive and partition. As you can see in the image below; I selected a partition of the 64.39 Gb drive.
Next select the “Restore” section and click the “Image…” button next to the “Source” input field.
A window will open in which you have to select the previously copied or moved “InstallESD.dmg“, and then click “Open“.
You’ll see something similar to the image below just under point “1“.
Now drag the partition of the flash drive onto the input field of the “Destination” until a green “+” appears.
The name of the partition (see “2” below) should appear.
You’ll also notice that the “Restore” button in the lower right corner now becomes active (clickable).
Make sure “Erase destination” is checked and click the “Restore” button.
Your Mac will ask for your password and after that it will write the image to your USB drive.
Lion DMG to USB
Once this task is completed, you can install Mac OS X Lion from this USB drive – either when logged in, or during boot – keep the OPTION (or ALT) key pressed to be able to select the USB drive to boot from.
Option 2: Create an Install DVD
In this case a normal single layer DVD will work just fine – make sure you have a blank disk available.
Open Disk Utility (you can find in the “Utilities” folder of your “Applications” folder, or you can use Spotlight to find it).
Click the radioactive button (“Burn“), which will open up a window where you will have to select the “InstallESD.dmg” that you previously moved or copied.
Once you click “Open” Disk Utility will show a simple dialog as shown below, and the tray of your DVD burner will open.
Insert the disk, click “Close” (tray closes), and after a few seconds you will be able to click “Burn“.
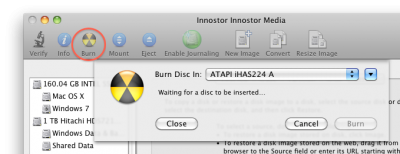
Burn a Lion Installation DVD
During this process the installation disk will be written to DVD and verified and a notification at the end will indicate that you’re good to go.
Now you can use the created DVD to boot your Mac from (press OPTION or ALT key to select the DVD to boot from) or install Lion on your system while you’re logged in.


Comments
There are 3 comments. You can read them below.
You can post your own comments by using the form below, or reply to existing comments by using the "Reply" button.
For Mavericks:
If the above method fails, abort installation, format a 8Gb USB stick and name is MAVERICKS, using Disk Utility.
In Terminal (one line!):
hans
I have been having a nightmare since I bought a second hand MacBook pro that had its HD removed. Its an older machine but for what I will use it for it would be OK. Its an A1181. I had tried everything to get MAC OS X onto the machine from my iMac to no avail.
I eventually searched Disk image and came across this thread. Straight forward no nonsense and it worked. Thank You!
Chris
Hi Chris!
Thank you for taking the time to post a “Thank You” note – great to hear this was helpful to you and that you managed to breathe some life back into an older Mac.
It is always amazing to see how well even older Macs still work with the latest macOS.
p.s. if you have macOS on a DVD (unlikely), then Target Disk mode can be helpful as well by using a Firewire or Thunderbolt cable connecting the 2 Macs (an older method I have used in the past for a similar situation).
Hans