Making your own Ringtone isn’t difficult, but it can be a bit daunting at times how to exactly do it.
In this article I’ll show you how you can create your own ringtones, from music files like MP3’s or even from movie files like AVI, MP4, etc. For this we will use WavePad which is available for Windows and MacOS X for free (for home use).
Note that if you only want to create ringtones from an MP3 that’s already on your Android phone, an app like RingDroid (free) can do the editing right on your phone as well.
iPhone users can read these 2 articles for doing exactly the same: Windows and MacOS X make Ringtones from MP3 or Movies.
MP3 or Movie Audio as Ringtones for your Android
Audio and music files are widely available:
These Audio files (songs for example) however, are often longer than desired, so they would need some trimming.
WavePad
For editing (trimming) Audio files and extracting Audio from Movies, we’ll be using WavePad, which is a free application (for home use) and offers quite a lot of options to play with. One of the options we will use is to extract movie audio, so we can take a movie fragment (audio) as a ringtone.
WavePad is in my opinion a great tool for editing Audio and supports a wide variety of file formats. A great and free alternative is Audacity. I did find it a tiny bit less user friendly though when trimming a file.
As usual, we recommend you to go to the developers website to download the latest version there, but you can also download it here for either Windows or MacOS X (unfortunately no Linux version):
Trimming your a Ringtone
While I originally started this article having MP3’s in mind, I quickly found out that other audio and even video formats do work with this trick as well when using WavePad. WavePad can extract the Audio track from a Movie, so we can use a movie fragment as a ringtone as well.
Note : Screenshots of WavePad are Windows based, but the screens look very similar for the Mac.
Is Trimming Needed?
Trimming your Audio file is optional: if your file is already at the desired length then you can skip this step – for example when you downloaded a ringtone from Zedge. The file format doesn’t matter.
Trimming your Video or Movie is needed since we need to extract the Audio before we can use it as a ringtone, not to mention that most movies are much too long for a ringtone. If you’d like to use the Audio of a DVD or BluRay then you’ll have to convert it first with an application like Handbrake for DVD’s (Windows, MacOS X, Linux) or MakeMKV for BluRay discs.
Step 1 – Open a copy of the Audio or Video file with WavePad
First make a copy of the file you’d like to use, just to make sure we don’t damage the original by accident. This is highly recommended but optional of course. If you follow the steps correctly, the original file should not be damaged.
Next open the file using the “Open File” button, or the “Open File” option in the “File” menu (or press CTRL+O).
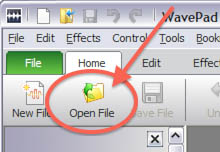
WavePad – Open file
Note : You can open a video file, like an AVI, MKV, or MP4 as well, but WavePad will then first extract the Audio track first for you so it will take a little longer to open a file.
Step 2 – Make a trim selection of the Audio or Video file
Once you’ve opened the MP3, Movie file or other Audio file, you’ll see the window divided in two major areas:
Song overview (A) which shows the sound wave of the entire song or audio track, and the Zoomed section (B) where we see the sound wave of the zoomed in part.
Note that Mac users will see the button bar and the wave window as two separate windows – but everything works exactly the same. For Mac users the zoom buttons will also be slightly different, they are located in the same area but instead of horizontal it’s displayed vertical.
By default, the audio is displayed as a mono track, but this is only for display purposes. You can switch the view to stereo or multichannel if you’d like.
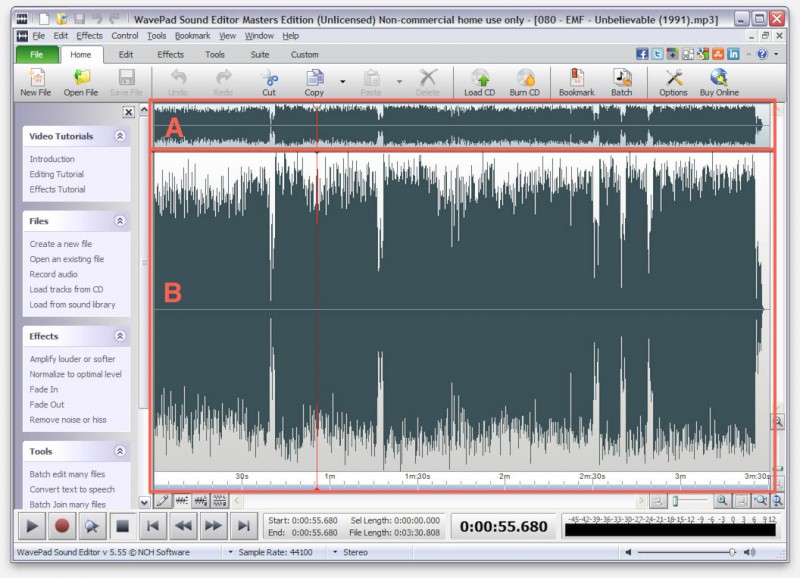
WavePad – Song or Audio track visible
Since seeing the entire sound wave is not very helpful when selecting a particular section, we can zoom the sound wave in section B and make our selection. Clicking on the play button (left, at the bottom) plays the entire wave or the selection (if you made one).
Note that when you’ve made a selection (the blue selection below), that you can use the mouse the move the start and end positions as indicated with the red arrows below. I personally like it that way, since it allows me to zoom, and fine tine my selection by just using the mouse.
Tips to find the proper positions:
– The “gaps” you see in the audio track indicate a less loud or even quiet moment in the song or movie audio.
– During playback a vertical red line will move along indicating the position in the song.
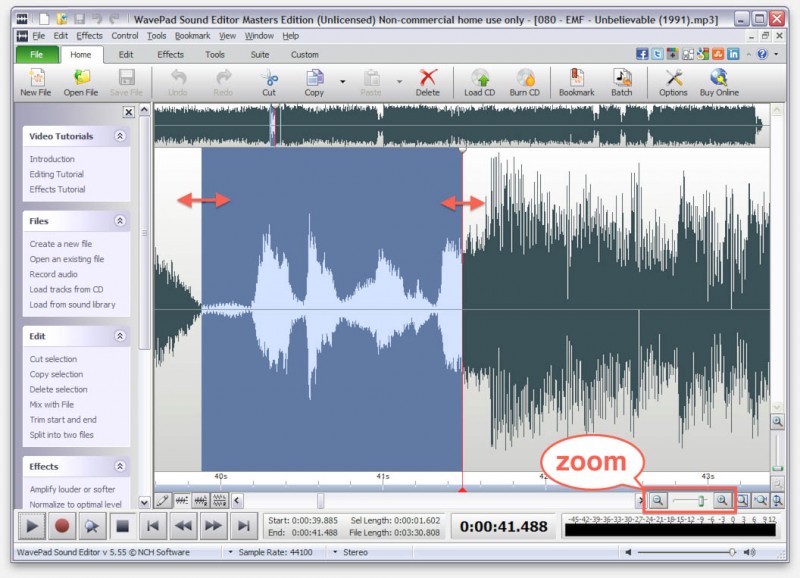
WavePad – Selection and Zoom
Once you have finalized you selection, click the menu “Edit” “Save Select Region As…“.
Note that I’m referring to the menu and not to the “Edit” section in the button bar.
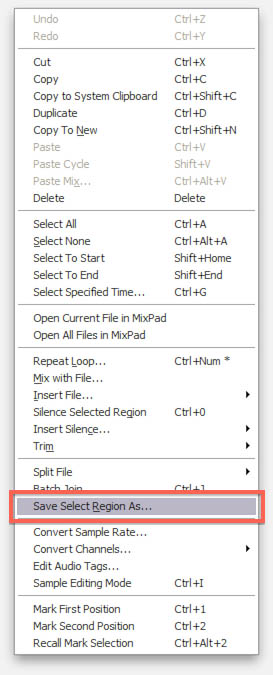
WavePad – Save selection
Once you clicked the “Save Select Region As…” option a file save dialog appears, where you can determine location and filename.
Here we can also set the file format – for an Android ringtone I recommend using “Save as type:” set to “MPEG Layer-3 (*.mp3)“.
Other formats, like MPEG-4 Audio (M4A), can be selected as well of course but I have no guarantee that your particular Android phone will support it (although it should support it according to the tech specs of Android).
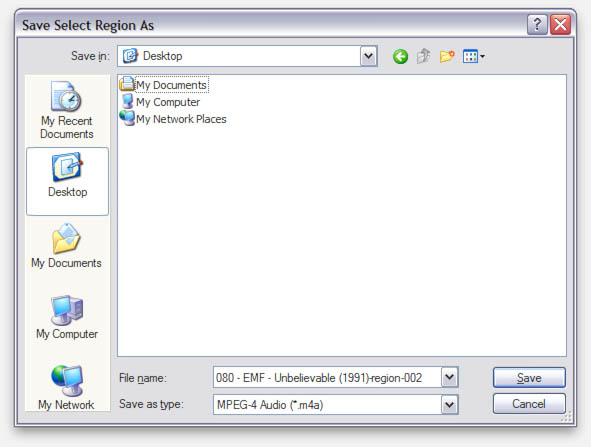
WavePad – Save Dialog
Once you click “Save” another dialog opens with details on the file format.
Match the settings below if you’re using the suggested MP3 Audio format.
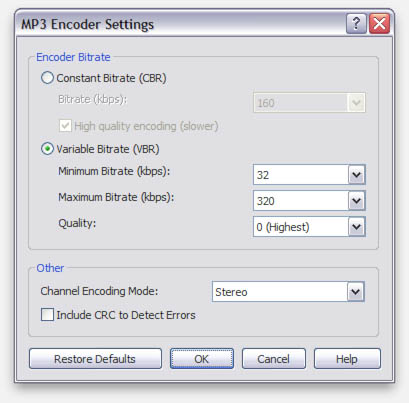
WavePad – MP3 settings
Transferring the Ringtone to your Android phone
Transferring your new ringtone to your Android phone can be done in numerous ways and depends on factors like what Operating System you’re using (Mac, Windows, Linux) and what Android version is installed on your phone.
For details on how to connect read this article: How to transfer files to your Android device.
Once connected, locate the “Ringtones” folder in the root of your Android device.
If it doesn’t exist, then simply make a new folder and name it “Ringtones” (without the quotes of course).
Copy your new ringtone in the “Ringtones” folder and disconnect your phone once done.
You’ll now find your ringtone on your phone (under “Settings” “Sound” “Phone ringtone“):
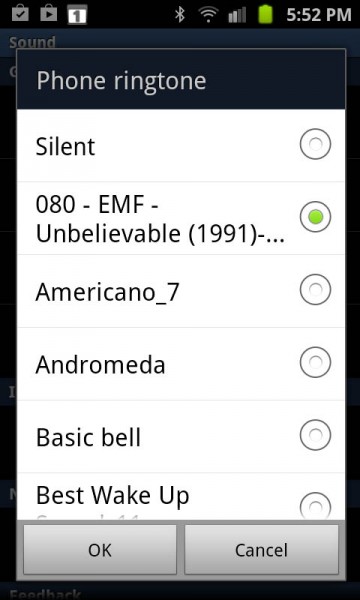
Android Ringtone


Comments
There are no comments yet.
You can post your own comments by using the form below, or reply to existing comments by using the "Reply" button.