If you’re a Mac user, and you’re enjoying the newer MacOS X versions, then you might have noticed that Apple’s own implementation of SMB simply sucks … it just doesn’t work and for a company like Apple to just leave it this way is beyond me.
SMB is a network protocol, commonly know as “Microsoft Windows Network” or Samba, which allows sharing of files and devices over a network. Most of us use this on our Windows computers and theoretically (it seems) MacOS X should support this as well.
For me it’s to share files with family, friends, or to share media files with my XBMC/Kodi setup.
In this article, I’ll show you how to quickly get started with a working Samba implementation, instead of using Apple’s broken implementation – for this we will make use of SMBUp.
Ad Blocking Detected Please consider disabling your ad blocker for our website.
We rely on these ads to be able to run our website.
You can of course support us in other ways (see Support Us on the left).
I’ve been playing with ambient light for my TV for a while now, as you can see in the “Ambient TV lighting with XBMC Boblight, OpenElec and WS2811/WS2812 LEDs“, to make colorful lights (LEDs) light up matching the video you’re seeing on your TV.
The downside of that project is that it only works for a dedicated HTPC running for example Kodi (XBMC).
But what if I’d like to see this with video from my XBox 360, XBox One, Wii, or … Blu-ray player or cable box?
Besides the fact that we need to grab this video, and all it’s technical complications, we will be running into a copy protection issue called HDCP, a HDMI feature nobody really asked for.
Please note that I’m not writing this article to promote pirating content! This article is solely aimed at using non-HDCP compliant equipment with equipment that seems to require HDCP. So I’m looking at older HDMI LCD/LED/Plasma TV’s, HDMI Projectors, Game Recording (PS3), taking screenshots for documentation and/or articles, and of course my own little project to generate ambient light behind my TV! Please keep this in mind.
I’ve always loved Kodi, formerly known as XBMC. I’ve installed it on regular PC’s and Mac’s, tiny PC’s, AppleTV’s (1st and 2nd generation), Boxee Box, etc. With the arrival of Amazon’s Fire TV, it was just a matter of time when I’d buy one.
I did look at numerous Android based devices before, just for the purpose of running Kodi (XBMC), but so far all the horror stories have kept me from doing so. Amazon’s Fire TV however has been reviewed and always seemed to score high when it comes to performance.u
However, … one downside of Amazon’s Android based devices is that Amazon feels the need to force their rules, their app-store and their interface on you and will not allow you to tinker with non-Amazon approved apps – like Kodi (XBMC).
So in this article I’ll show you how easy it is to install Kodi on Amazon’s Fire TV, and some additional Tips & Tricks.
It’s quick, it’s easy and the end result is awesome.
I honestly had zero use for a XBox 360 Controller on my Mac, since I’m a keyboard/mouse gamer … but I was toying with another article (Kodi on Amazon Fire TV) and was looking for a Game Controller for the Amazon Fire TV.
Looking around I noticed that the Microsoft XBox 360 wireless controller for Windows should work with the Amazon Fire TV and with MacOS X. Since I do play the occasional game on my Mac (yes: that is possible!) with Steam, I figured why not give it a try. The controller, with receiver, isn’t all that expensive.
So in this article: How to connect and use an Xbox 360 Controller on MacOS X …
TIP: For those of you who are trying to get this to work with an XBox One Controller, please read the “Bluetooth XBox One controller on a Mac” article as well.
Ad Blocking Detected Please consider disabling your ad blocker for our website.
We rely on these ads to be able to run our website.
You can of course support us in other ways (see Support Us on the left).
This week I was asked numerous times about Wireless Encryption (encrypted WiFi), asking if they should enable it, which method to use and why this encryption was needed. Since some aspects regarding this topic seemed puzzling at best for those who asked the questions, I decided to write a short article about it.
In this article I’ll explain the different encryption standards (WEP, WPA, WPA2), show you which one to use, and why you should use it. The short version: Enable WPA2 and use a strong (long) password.
While working on my DD-WRT project for my NetGear R7000 router, I ran some tests to see what the ideal connection setup for my router would be.
During the testing you’d typically want to see the speed of your WiFi connection, possibly including noise, RSSI, channel, country code, used frequency, etc. and initially it can be a bit daunting where to find this information. But … surprise: this info is readily available on your Mac, no extra software is needed, you just need to know where it’s hidden …
Therefor in this article 4 methods to figure this out on your Mac, without the need to install specific software for the task.

This week was an interesting week – I travel quite often between my home in the USA and family and friends in Europe. With a world that has become smaller due to the Internet, you’d expect that services you’re used to are still available when traveling … well that’s not the case. I guess the movie industry still hasn’t gotten the message that region limitations is simply ridiculous. So my NetFlix suddenly got neutered and forced to the Dutch version.
I didn’t ask for this, and I most certainly did not pay for this … why not simply link content to your account, which has an address and therefor determines where you reside? Or even better: Just drop the nonsense with regions entirely … I’m sure it will reduce piracy as well.
Anyhow, long story short: to get to my real account (US) I could spoof my location by using well known VPN service like Astrill. Works great, looks a little suspicious, slows down your connection due to encryption and it’s not always “cheap” or easy to use.
Along comes UnoTelly (and I’m sure there are other services like that) offering to try their DNS service for free (8 day trial). This article is about my findings with their services (DNS and VPN) … in short: it’s worth it!
Ad Blocking Detected Please consider disabling your ad blocker for our website.
We rely on these ads to be able to run our website.
You can of course support us in other ways (see Support Us on the left).
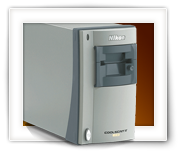
The last few months I’ve spend an absurd amount of time scanning family negatives. Over 12,000!
For this I used the excellent Nikon CoolScan LS-50, also known as the Nikon CoolScan V ED. These scanners perform superb, even though Nikon stopped producing them. Even support has been stopped or reduced. If you need one, eBay is the place to go.
In the process of scanning all these negatives, I ran into the problem that it had swallowed the film strip, and the entire scanner refused operation right after that.
This article shows you how you can remedy this with only a phillips screwdriver and some patience …
Please note that this article was written with the LS-50/V ED in mind, but it seems that other Nikon CoolScan models might be fixable in the same fashion (i.e. 4000 [IV] and 5000, and other models that look similar).
I usually work on a Mac, and when working under Linux or Windows, I resort to Virtual Machines (VMWare Fusion / Parallels Desktop).
Sometimes however, a virtual machine is not up to the task. For this purpose, I have a cheap Acer laptop that came with Windows 8.1. But that is just Windows. So how do I make this laptop dual boot Windows 8 and Ubuntu using Ubuntu 14.x and Windows 8.1?
These are the few easy steps I took to make my laptop dual boot Windows 8.1 and Ubuntu 14.x.
The described method can also be used to run Ubuntu from a USB stick, which works very well when using USB 3.0.
To remotely control my Windows machines, I always prefer to use RDP (Remote Desktop Protocol) as it performs much nicer than VNC (Virtual Network Computing). VNC has this streak of “JPEG” quality and slow behavior, whereas RDP is fast and crystal clear.
RDP is however a proprietary protocol from Microsoft. So how can we use RDP to control our Ubuntu box remotely?
This is where xRDP comes in play, an open source remote desktop protocol (RDP) server. It actually runs VNC protocol over RDP as far as I understand, yet if behaves much better than VNC by itself (possibly because of the used desktop manager). Since Ubuntu 12.10 (if I’m not mistaken), xRDP doesn’t seem to work with the Ubuntu desktop anymore … unless you use an alternative desktop manager. This seems related to 3D acceleration and nobody seems to care (since 2011, according to bug reports).
Note : if you really need Copy/Paste functionality between the two machines, then please use Ubuntu’s default installed “Desktop Sharing” instead (MacOS X users read this forum post).
Ad Blocking Detected Please consider disabling your ad blocker for our website.
We rely on these ads to be able to run our website.
You can of course support us in other ways (see Support Us on the left).
SickRage is a tool that allows you to automatically download TV-Series and it can run on several systems, including QNAP NAS devices.
For those that have used SickBeard, SickRage (or: SickBeard-TVRage) is derived from SickBeard. Both allow automatic download of TV-Series and are pretty good at it. SickRage however adds some really cool features that SickBeard (with all respect) is lacking. For example better support for Torrents and support for subtitles, dating episode filenames to the air date, etc.
I’ve written this article after migrating from SickBeard to SickRage on an Intel based QNAP. Having SickBeard installed is not required though and experience with SickBeard, although helpful, is not required either.
So you erased the internal disk of your AppleTV and want to restore AppleTV OS?
It happened to me; playing with a 1st generation AppleTV, installing (and thus wiping) a AppleTV suitable Ubuntu version. Only to find out that I goofed up and had to go back to the original OS to change some video settings. Yes I was playing with CrystalBuntu and OpenElec … (highly recommend both!)
In a previous article I described a method that uses a Windows tool from StmLabs, which needs Windows and a network connection.
In this article however I will show you how to do it without a network connection, for Windows, Linux and MacOS X.

ApplePi-Baker, the application I developed for Mac OS X user that like to work with the Raspberry Pi, is now available in version 1.6.
With ApplePi-Baker, you can write an IMG file to an SD-Card, prepare an SD-Card for NOOBS use, and make a backup of an SD-Card.
This new version adds on the fly reading (restore) and writing (backup) of compressed IMG files.
Supported compression formats are ZIP, 7ZIP and GZIP.
Additionally, I’ve implemented an “Abort” button, so you can abort your restore or backup process when needed.
Unfortunately, doing compression while reading/writing prevents me from using the authentication dialog provided by Apple, and I had to resort to SUDO usage. On all my Mac’s this did not present a problem, but you, the user, need to be part of the Admin user group for this to work. I’m unsure if this is done by default or not. If users run into issues with this, please report it in the comments (here on the ApplePi-Baker article).
For this reason v1.5.1 will remain available in the downloads – for those users that run into a problem.
See the ApplePi-Baker article or the Downloads Page for download and details.
Also: many many thanks to the people that did a generous donation to support my work, it’s highly appreciated!
Enjoy  …
…
Ad Blocking Detected Please consider disabling your ad blocker for our website.
We rely on these ads to be able to run our website.
You can of course support us in other ways (see Support Us on the left).
Those of us who use a NAS like those awesome QNAP devices possibly recognize this situation:
You have a lot of shared folders, but as an Admin you’d like to access them all from one single share, so instead of mounting an X number of “drives”, you mount just one.
When looking at the directory structure on your QNAP, this could be the “root” of all your shares, but opening this as a shared folder comes with it’s own set of little issues. Using the QTS 4.x function called “Shared Folder Aggregation” doesn’t work all that well either, and even worse: it’s limited so Samba shares.
Instead I’ll show you a way to do QNAP Shared folder aggregation with symbolic links …
Note : This makes moving files between shares also significantly faster … no matter how big the file!
ApplePi-Baker, the application I developed for Mac OS X user that like to work with the Raspberry Pi, is now available in version 1.5.
With ApplePi-Baker, you can write an IMG file to an SD-Card, prepare an SD-Card for NOOBS use, and make a backup of an SD-Card.
This new release allows ZIP compression of the IMG file after creating a backup.
This release will now also recognize USB sticks or SD-Cards that are not formatted in a format recognized by your Mac – for example ext3 or ext4, and will be able to make a backup of that as well.
See the ApplePi-Baker article or the Downloads Page for download and details. Enjoy …