Rename My TV Series, a tool to rename tv series episodes, has been around for a while now, and it’s time for an update (the “old one” can still be found here). So I proudly present: Rename My TV Series 2 (RMTV).
Two of the main reasons for this new version are the needed update of the user interface and support for the new API of TheTVDB.com. But there is more; macOS users wanted a 64 bit version to avoid the 32 bit complaining and having the application signed was on the wishlist for them as well. Support for SSL (since theTVDB.com API requires this), the use of notifications and the support for a dark theme, the merging of 2 episodes, caching results, are a few of other desired or needed items.
I’m still striving to do as much cross-platform development as possible, so macOS, Windows and Linux users can use my tools, which means that this new version will be available for all these 3 platforms.
Ad Blocking Detected Please consider disabling your ad blocker for our website.
We rely on these ads to be able to run our website.
You can of course support us in other ways (see Support Us on the left).
For most of us, working in Linux or in a shell is not necessarily a daily activity, and that’s totally OK.
I’m not daily working with it either, but occasionally I use one of those funny commands to set the access rights to certain files and/or directories.
This command, chmod, is not super complicated to work with, and is commonly used when working in a shell or terminal on both the MacOS X and Linux platforms. But we need a “magic number” to set these rights. The “magic number” for chmod is also commonly used with FTP programs.
Whenever I use this command, I need to refresh my mind on how to calculate the “magic number”, and I find myself looking for a chmod calculator.
Since I’m lazy at times, I figured: why not have one on my own website?
So I started playing with JavaScript and created this chmod calculator.
Wake On Lan, the Ethernet standard for waking up (switching them ON) network enabled devices remotely, has (again) gained popularity, especially under NAS/Server users, who use their server or NAS only a few hours a day. Wether it’s to save on your Power bill, reduce your Carbon-Footprint, or to spare your equipment, Wake On Lan is here to stay …
Now come these question though,… how do I enable Wake On Lan on my network enabled device, and how do I send a “wake up” call to my device?
In this article, I’ll try to cover as much as I can – since it can be a pretty hairy process to setup Wake On Lan. It very strongly depends on the hardware and software capabilities of your device. Even though I cannot every device on the planet, I sure will try to help you get started with Wake On Lan.

I had not used the good old Wake On LAN option in a while, until my brother-in-law (Jean-Pierre) was looking for something like that to wake up his NAS.
Most of the Wake On LAN applications I found for him were just too extensive, too complicated, or not free. I wanted just a simple menu in the System Tray (Windows: next to the clock, lower-left corner of your screen) or Menu-bar (MacOS X – top of your screen). Well, after quite a bit of searching I could not find anything suitable or to my liking and I decided to just write something myself.
Timing couldn’t be better, since I just wanted to implemented Wake On LAN in another application – ConnectMeNow (for MacOS X).
Reusing the code, making it suitable for Windows and MacOS X, and wrapping it in a small application was done relatively quickly.
This application has been tested under MacOS X 10.11 (El Capitan) and Windows 10 and it’s FREE.
Ad Blocking Detected Please consider disabling your ad blocker for our website.
We rely on these ads to be able to run our website.
You can of course support us in other ways (see Support Us on the left).
I’ve been asked several times in the past, on how to take screenshot and annotate them afterwards, or how to do a so called “print-screen” to a printer for a hardcopy.
Some users, use screenshots for illustrating manuals, or articles for their website. Some use it to print error messages or odd things happening on their screen. And as with regular paper, some of us would like to annotate the images – add notes, comments, arrows, numbers or circle the important part of the image.
Annotating images is relatively easy, once you know where to find the tools to do this.
So in this article, for Mac OS X users: How to take screenshots, how to add annotations, and some additional related tips and tricks.

In this day and age we are more network connected than ever before – at home and at work. Some of us have network shares on their computers, want to access company network shares, or have a dedicated file server or NAS (Network Attached Storage) to store our shared information or make our backups.
Unfortunately, at times anyway, it can be rather cumbersome under Mac OS X to connect to those “shares” (also known as the so called mounted “Volumes“). In Finder, a server doesn’t always appear right away, we need to go through a list of shares on a given “server”, get confused if we need SMB, CIFS, FTP, SSH, WebDAV, NFS or AFP, and I’m not even mentioning the need to enter a username and password on protected shares.
Additionally, Wake On Lan is being supported as well.
I do have a NAS and I do have several shares on that device and … I just got freakin’ tired of going through each step over and over again. So, instead of complaining, I started looking for an application that would just that – and didn’t find one to my liking. So I just created one … free for all … enjoy!
If you’re a Mac user, and you’re enjoying the newer MacOS X versions, then you might have noticed that Apple’s own implementation of SMB simply sucks … it just doesn’t work and for a company like Apple to just leave it this way is beyond me.
SMB is a network protocol, commonly know as “Microsoft Windows Network” or Samba, which allows sharing of files and devices over a network. Most of us use this on our Windows computers and theoretically (it seems) MacOS X should support this as well.
For me it’s to share files with family, friends, or to share media files with my XBMC/Kodi setup.
In this article, I’ll show you how to quickly get started with a working Samba implementation, instead of using Apple’s broken implementation – for this we will make use of SMBUp.
Ad Blocking Detected Please consider disabling your ad blocker for our website.
We rely on these ads to be able to run our website.
You can of course support us in other ways (see Support Us on the left).
I honestly had zero use for a XBox 360 Controller on my Mac, since I’m a keyboard/mouse gamer … but I was toying with another article (Kodi on Amazon Fire TV) and was looking for a Game Controller for the Amazon Fire TV.
Looking around I noticed that the Microsoft XBox 360 wireless controller for Windows should work with the Amazon Fire TV and with MacOS X. Since I do play the occasional game on my Mac (yes: that is possible!) with Steam, I figured why not give it a try. The controller, with receiver, isn’t all that expensive.
So in this article: How to connect and use an Xbox 360 Controller on MacOS X …
TIP: For those of you who are trying to get this to work with an XBox One Controller, please read the “Bluetooth XBox One controller on a Mac” article as well.
While working on my DD-WRT project for my NetGear R7000 router, I ran some tests to see what the ideal connection setup for my router would be.
During the testing you’d typically want to see the speed of your WiFi connection, possibly including noise, RSSI, channel, country code, used frequency, etc. and initially it can be a bit daunting where to find this information. But … surprise: this info is readily available on your Mac, no extra software is needed, you just need to know where it’s hidden …
Therefor in this article 4 methods to figure this out on your Mac, without the need to install specific software for the task.
For those of us coming from the Windows platform, that have used the Image Resizer PowerToys for Windows XP (yeah I know: from way back in the day), here a free application for MacOS X users to have that same functionality as well.
Simply right click an image, choose the desired size and your images will be resized automatically without modifying the original file.
I’ve expanded the functionality a little bit, by adding the option to convert a Retina image straight to “classic” (50% size reduction) and after resizing the option to automatically attach the resized images to an email, ready to be send to friends and family …
Ad Blocking Detected Please consider disabling your ad blocker for our website.
We rely on these ads to be able to run our website.
You can of course support us in other ways (see Support Us on the left).
Most mobile devices can display PDF documents just fine. Some mobile devices, or at least the apps on these devices, show things just tad nicer when the document is formatted in the ePUB format.
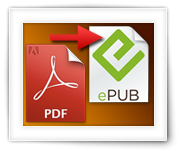
In this article, for Windows, MacOS X and Linux, we will show you how to easily convert a PDF document to a ePUB document for use with your mobile device (Android, iPhone, iPad, etc) or computer.
Note : The tools used in this article also support other formats (Kindle, Doc, TXT, HTML, MOBI, etc.).
After writing the article on “How to get an Operating System on a SD-Card“, I realized that the existing methods and tools were not to my liking. Of course the existing tools are most certainly not bad and work just fine. I just didn’t like how they worked.
So instead of complaining, I decided to write my own program: The ApplePi-Baker  …
…
This application is for MacOS X only and allows you to prepare an SD-Card for use with Raspberry Pi’s NOOBS, and it allows you to “flash” and IMG file to an SD-Card. ApplePi-Baker can now also be found on AlternativeTo.net and eLinux.org.
Note : This application is also very suitable for creating or restoring an IMG backup of USB drives!
Update : ApplePi-Baker v2 has been released, you can get it here.
The new version offers a lot options including shrinking and expanding of IMG’s, writing to multiple disks, a better speed and improved stability compared to the old version (1.x) mentioned in this article.
MAME, the Multiple Arcade Machine Emulator, has been around for a while and is readily available from the MAME website for Windows users.
MAME is an emulator that allows you to run the ROMs (games) of the old Arcade Hall machines, like Pac-Man, Out-Run, Scramble, Donkey Kong, etc.
Installation on MacOS X is unfortunately not very obvious. There are some precompiled MAME versions out there and in this article I’ll show you how to install and use MAME under MacOS X Mavericks (will probably work for older and newer Intel based MacOS X versions as well).
Ad Blocking Detected Please consider disabling your ad blocker for our website.
We rely on these ads to be able to run our website.
You can of course support us in other ways (see Support Us on the left).
Messages in MacOS X has the ability to combine multiple chat services. Facebook Chat however does not seem to appear in the list.
This trick will probably also work for other Jabber capable clients on different Operating Systems as well, simply use the same settings.
With this little guide, I’ll show you how to add Facebook Chat to Messages so that you do not need to open the Facebook website every time you get a message.
In this article I will demonstrate how to put your signature on computer documents (PDF) without the need to print the document first, sign it with a pen, and scan it back to a PDF file.
Most modern PDF readers actually allow you to add a digitized image of your signature and common PDF readers even assist you with the scanning, either through a scanner or webcam.
For this purpose we will use Apple’s Preview (MacOS X), Adobe Acrobat Reader (MacOS X, Windows) or Xournal (Linux). All these applications are of course available for free.


