As a hobby developer, when testing dark theme vs light theme under MacOS X, I have those moments where I have to switch back and forth between both themes quite often.
Going into the System Preferences to toggle theme, choosing the Appearance option, and then selecting the desired theme, does indeed work, but I wanted just a “one click” theme toggle.
To help myself with that, I created a small application that does exactly this: it toggles to “the other” theme, with just a simple click.
So when Dark Theme is active, it switches to the Light (Aqua) Theme. If however the Light Theme is active, it switches to Dark Theme.
The application is super simple, and has no interface. Just start the App and it changes theme and then closes itself.
Normally, this App would just sit in your Applications directory, with the optional shortcut in your Dock or even on the Touch Bar (if your Mac has one).
Ad Blocking Detected Please consider disabling your ad blocker for our website.
We rely on these ads to be able to run our website.
You can of course support us in other ways (see Support Us on the left).

ApplePi-Baker has become well known amongst Raspberry Pi users, with a Mac running macOS, to backup and restore SD-cards. Users do not just use ApplePi-Baker for this purpose anymore – I have seen users use it for backup and restore of pretty much anything not Raspberry Pi related.
Late 2013, I created ApplePi-Baker for my own use – I just got tired of looking up the proper command-line statements.
This way, ApplePi-Baker became my personal frontend for command-line tools like “dd“, “diskutil“, “mount” etc.
Over time, the use of command-line tools came with some problems; thanks Apple for changing command-line tool output with every new version of macOS. Besides that, having to enter your “sudo” password each time was a pain as well, and came with the occasional problems for a small group of users, so that had to go as well.
About 2 years ago I decided to rebuild ApplePi-Baker from scratch, no longer using any of the command-line tools. This came with quite a few challenges, especially since Apple increased security for macOS, not allowing me to do certain things straight from my program (see also SMJobBless: Elevated Privileges in Lazarus Pascal). I’m not even mentioning the drama when it comes to supporting the different compression formats, signing applications, and 64-bit requirements.
Almost 2 years later, I proudly present ApplePi-Baker v2.  – special thanks to Jeff and Mark for testing!
UPDATE: ApplePi-Baker now also support shrinking and expanding of Linux partitions!
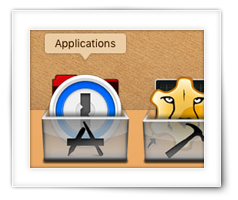
Apple has done a pretty good job with the Dock in MacOS. There is just one thing that I do not like though; the way it stacks icons when you add a folder to your Dock.
A smart guy from Japan (2007 – Yasushi Chida) actually came with a neat idea for that, by introducing “buckets” (or better said: Stack Overlays) placed over the folders in your Dock. All that without the need to install any extra applications!
Unfortunately, his website at Yahoo!/Geocities has been gone for quite a while now.
The few steps you have to take can be a little bit challenging for MacOS beginners (even though it is pretty easy – as usual; once you know how it works). So in the article I’ll show you how to use buckets (a.k.a. Stack Overlays) in your MacOS Dock. This seems to work as of MacOS X Leopard and still works in Mojave (and I do expect this to work in future versions as well).
Some of you may be familiar with the problem … no sleep button on your keyboard.
You have a really nice Mac, but you’re using a Windows keyboard since there is no MacOS keyboard that you really like.
I’m using a keyboard from Havit (you can find it here).
One of the things I hate about this setup is that I have no key or key-shortcut to put my computer to sleep.
When you look at the Apple reference, you’ll only find keys that cannot be found on your Windows keyboard, like the Eject key, or the Power key.
So in this article, I’ll show you, without the use of special software, how I have created a keyboard shortcut to put my Mac Pro to sleep, using a Windows keyboard.
Ad Blocking Detected Please consider disabling your ad blocker for our website.
We rely on these ads to be able to run our website.
You can of course support us in other ways (see Support Us on the left).
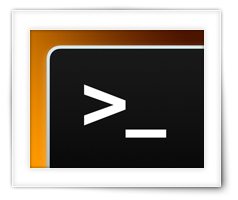
In this article I’ll describe what I have used to create a “Press Any Key to Continue” in a Bash script (Linux/MacOS X).
Working with scripts in Bash (Terminal or Shell) isn’t what I do daily. The day I had to create a script to help me do an SVN update followed by a massive recompile. I wanted to see the SVN result first before proceeding with recompile, so I had to add a “Press Any Key To Continue” option in the script.
Since it took me a little effort, I figured; let’s describe this in an article. After all, it may be good reference for myself and for others.
These methods work for Linux and MacOS.

Waking up devices that are network connected, can be done with the so called “Wake On LAN” feature provided by certain devices (like for example a NAS, FileServer, or even a PC). A while back I created a simple application for this – miniWOL – keeping in mind that the user may not be too familiar with all the configuration details (see: previous miniWOL versions).
I wanted just a simple menu in the System Tray (Windows: next to the clock, usually the lower-right corner of your screen) or Menubar (MacOS X – top of your screen, Linux often at the bottom of your screen). Well, after a bit of searching I could not find anything suitable or to my liking and I decided to just write something myself.
The old miniWOL has been good so far, and plenty folks seem to have a good use for it privately and professionally. However, Apple had to change a few things (moving to 64 bit, using Cocoa instead of Carbon, and the need to sign and notarize applications – I suspect Microsoft will probably follow soon) so while revamping the Mac version, I revamped the Windows version as well, and added a 64-bit Linux version as well (by request).

Rename My TV Series, a tool to rename tv series episodes, has been around for a while now, and it’s time for an update (the “old one” can still be found here). So I proudly present: Rename My TV Series 2 (RMTV).
Two of the main reasons for this new version are the needed update of the user interface and support for the new API of TheTVDB.com. But there is more; macOS users wanted a 64 bit version to avoid the 32 bit complaining and having the application signed was on the wishlist for them as well. Support for SSL (since theTVDB.com API requires this), the use of notifications and the support for a dark theme, the merging of 2 episodes, caching results, are a few of other desired or needed items.
I’m still striving to do as much cross-platform development as possible, so macOS, Windows and Linux users can use my tools, which means that this new version will be available for all these 3 platforms.
Ad Blocking Detected Please consider disabling your ad blocker for our website.
We rely on these ads to be able to run our website.
You can of course support us in other ways (see Support Us on the left).

Ever needed to help a friend or family with their computer issues with remote access? Quick Assist is the way to go for Windows 10 users for remote assistance!
If you’re reading this, then there is a good chance that you’re looking at the same challenge I have every now and then; a friend or family member is having issue with their PC and if you can please help them … like right now! In that case (or when you live on a different continent) remote access is the way to go, unless you’re pretty close by.
In the past I used LogMeIn, it was probably the best tool I’ve every used for remote access, but unfortunately it’s no longer free or affordable.
For a while I’ve used TeamViewer, but in all honesty – I really dislike how the tool works even though it is free. The fact that both parties need to install software and those funny codes, weird screens, and sometimes confusing settings – well, it’s just not for me.
This weekend I had to assist my nephews, both of them using Windows 10. And again I was stuck with the same question: what tool to use?
Well not entirely … seems Windows 10 is equipped with everything we need and in this article I’ll show you how it’s done.
For most of us, working in Linux or in a shell is not necessarily a daily activity, and that’s totally OK.
I’m not daily working with it either, but occasionally I use one of those funny commands to set the access rights to certain files and/or directories.
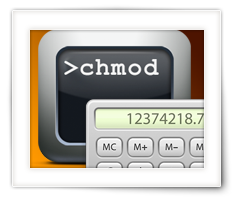
This command, chmod, is not super complicated to work with, and is commonly used when working in a shell or terminal on both the MacOS X and Linux platforms. But we need a “magic number” to set these rights. The “magic number” for chmod is also commonly used with FTP programs.
Whenever I use this command, I need to refresh my mind on how to calculate the “magic number”, and I find myself looking for a chmod calculator.
Since I’m lazy at times, I figured: why not have one on my own website?
So I started playing with JavaScript and created this chmod calculator.
When running Windows on your Mac through BootCamp, you might be searching for the CD/DVD Eject button every now and then, and back in the day (2009) I wrote a little application for that for my own use: BootCamp CD Eject.
This application works with all Windows version as of Windows XP – and you can use this without BootCamp as well.
This little application lives in the Windows Systray and allows you to eject a CD/DVD from a menu or through a key combination. There is also a key combination to quickly put your Windows in standby.
I’m posting the application (free!) since I recently ran into some users that actually had a use for it even 7 years after developing it.
Ad Blocking Detected Please consider disabling your ad blocker for our website.
We rely on these ads to be able to run our website.
You can of course support us in other ways (see Support Us on the left).
Wake On Lan, the Ethernet standard for waking up (switching them ON) network enabled devices remotely, has (again) gained popularity, especially under NAS/Server users, who use their server or NAS only a few hours a day. Wether it’s to save on your Power bill, reduce your Carbon-Footprint, or to spare your equipment, Wake On Lan is here to stay …
Now come these question though,… how do I enable Wake On Lan on my network enabled device, and how do I send a “wake up” call to my device?
In this article, I’ll try to cover as much as I can – since it can be a pretty hairy process to setup Wake On Lan. It very strongly depends on the hardware and software capabilities of your device. Even though I cannot every device on the planet, I sure will try to help you get started with Wake On Lan.
I had not used the good old Wake On LAN option in a while, until my brother-in-law (Jean-Pierre) was looking for something like that to wake up his NAS.
Most of the Wake On LAN applications I found for him were just too extensive, too complicated, or not free. I wanted just a simple menu in the System Tray (Windows: next to the clock, lower-left corner of your screen) or Menu-bar (MacOS X – top of your screen). Well, after quite a bit of searching I could not find anything suitable or to my liking and I decided to just write something myself.
Timing couldn’t be better, since I just wanted to implemented Wake On LAN in another application – ConnectMeNow (for MacOS X).
Reusing the code, making it suitable for Windows and MacOS X, and wrapping it in a small application was done relatively quickly.
This application has been tested under MacOS X 10.11 (El Capitan) and Windows 10 and it’s FREE.
I’ve been asked several times in the past, on how to take screenshot and annotate them afterwards, or how to do a so called “print-screen” to a printer for a hardcopy.
Some users, use screenshots for illustrating manuals, or articles for their website. Some use it to print error messages or odd things happening on their screen. And as with regular paper, some of us would like to annotate the images – add notes, comments, arrows, numbers or circle the important part of the image.
Annotating images is relatively easy, once you know where to find the tools to do this.
So in this article, for Mac OS X users: How to take screenshots, how to add annotations, and some additional related tips and tricks.
Ad Blocking Detected Please consider disabling your ad blocker for our website.
We rely on these ads to be able to run our website.
You can of course support us in other ways (see Support Us on the left).
In the past few weeks, I’ve ran into the need to find out what the hardware or system specifications are of one or the other Linux machine.
I use it every now and then, either on my QNAP, HTPC, Ubuntu machine or even my DD-WRT router.
Earlier this week I even needed it to checkout my old web-server specs versus the new web-server.
Well, with Operating Systems like Mac OS X and Windows, it’s relatively easy to find the specification with the help of system build-in tools that come with a proper user interface. Under Linux this can be more challenging though, especially when there is no graphical user interface – ie. you only have shell access.
In this article I’ll try to go through a few relatively standard commands to checkout your system specs like memory, CPU, video card, disks, etc.

In this day and age we are more network connected than ever before – at home and at work. Some of us have network shares on their computers, want to access company network shares, or have a dedicated file server or NAS (Network Attached Storage) to store our shared information or make our backups.
Unfortunately, at times anyway, it can be rather cumbersome under Mac OS X to connect to those “shares” (also known as the so called mounted “Volumes“). In Finder, a server doesn’t always appear right away, we need to go through a list of shares on a given “server”, get confused if we need SMB, CIFS, FTP, SSH, WebDAV, NFS or AFP, and I’m not even mentioning the need to enter a username and password on protected shares.
Additionally, Wake On Lan is being supported as well.
I do have a NAS and I do have several shares on that device and … I just got freakin’ tired of going through each step over and over again. So, instead of complaining, I started looking for an application that would just that – and didn’t find one to my liking. So I just created one … free for all … enjoy!