Page 2 of 4

Arduino Programming for Beginners – Part 3: Working with Data

Arduino Programming for Beginners – Part 3: Working with Data
14

In this article we will talk about “data”, after all, a computer can do pretty much only one thing: handle data in a way we dictate. For this we need what is called “data types”, “variables” and “constants”.

This is the third part of a series of articles I’ve written to get beginners started with Arduino Programming in the programming language C, which I’ve written with the intend to teach my 13 year old nephew (Bram) to get started with the Arduino. After all, he wants to build a robot, but without some basic knowledge about programming, he won’t get far ….

Besides an introduction into the language C, the default language used for Arduino Programming, “Arduino Programming for Beginners” will also touch topics like how to setup an Arduino, get a developers environment running, and look at a few basic electronic parts which we connect to our Arduino.

Arduino Programming for Beginners – Part 2: Output

Arduino Programming for Beginners – Part 2: Output
2

In this article we will go a little deeper into Arduino Programming, by exploring the developer tools, also knows as the Arduino IDE and how we can output information of the Arduino to our computer.

This is the second part of a series of articles I’ve written to get beginners started with Arduino Programming in the programming language C, which I’ve written with the intend to teach my 13 year old nephew (Bram) to get started with the Arduino. After all, he wants to build a robot, but without some basic knowledge about programming, he won’t get far ….

Besides an introduction into the language C, the default language used for Arduino Programming, “Arduino Programming for Beginners” will also touch topics like how to setup an Arduino, get a developers environment running, and look at a few basic electronic parts which we connect to our Arduino.

Arduino Programming for Beginners – Part 1: Setup

Arduino Programming for Beginners – Part 1: Setup
2

This is the first part of a series of articles I’ve written to get beginners started with Arduino Programming in the programming language C, which I’ve written with the intend to teach my 13 year old nephew Bram Knuit (and his 10 year old brother Max Knuit) to get started with the Arduino. After all, he wants to build a robot, but without some basic knowledge about programming, he won’t get very far ….

In this article we will show you how to get started with our little Arduino Programming course, by selecting an Arduino and setup the developer tools so we can actually try some of the examples that will be discussing in the next chapters.

Besides an introduction into the language C, the default language used for Arduino Programming, “Arduino Programming for Beginners” will also touch topics like how to setup an Arduino, get a developers environment running, and look at a few basic electronic parts which we connect to our Arduino. The lack of basic knowledge should hopefully not be a problem … so I’ll be trying to keep everyone in mind.

The last Boblight Config Maker …

The last Boblight Config Maker …
12

After many iterations of Boblight Config Maker, I’ve decided to finally release v2 … keep in mind that I have the feeling it’s not quite finished yet, so it’s released as a beta, by request of many v1 users.

V2 has been rebuild complete from scratch, and (in my opinion) is not been quite perfect yet, but some will see benefit in this version as it adds a lot of new features.

Since building and maintaining this application is simply taking way too much time, this will, unfortunately, most likely be the last version as well. As with many free or open source projects, this project is taking just too much time, and unfortunately, I do have to make a living as well.

Note that for now the source will not be made public.

UPDATE: For Windows and MacOS X I have fixed several bugs, a new version (beta 3) is available.

Arduino – LEDStrip effects for NeoPixel and FastLED

Arduino – LEDStrip effects for NeoPixel and FastLED
1077

For those who have read the article “Arduino – Controlling a WS2812 LED strand with NeoPixel or FastLED” might have gotten infected by urge to get more effects, after all … some of these LEDStrip effects look pretty slick!

With the holiday coming up real soon, I figured this would be a great opportunity to create and post some cool effects for your LED strips. Maybe you can be your own Griswold (National Lampoon’s Christmas Vacation) with these! 

You’ve got to check out the Fire effect with toilet paper – looks pretty cool!

Please read the article Arduino – Controlling a WS2812 LED first, as it will show you some of the basics.
Also note that you’re invited to post your own effects or ideas in the comment section or in the Arduino/WS2811/WS2812 – Share you lighting effects and patterns here … forum topic.

Arduino – Playing with a light sensitive resistor (LDR)

Arduino – Playing with a light sensitive resistor (LDR)
28

After building my own Ambient Light for my TV (Boblight project), several users asked how to control the light intensity of the LEDs based on the ambient light.

So the LEDs should be brighter during the day, and more dimm at night.

This brought me to explore the use of different light sensors on an Arduino, where the cheapest and most common one is a so called LDR (Light Dependent Resistor). An LDR decreases in it’s resistance as light increases.

Looking at what I could find online, I did find that there is enough information available when using an Analog pin of the Arduino. In this article however, we will also look at using a Digital pin to read an ON/OFF state. So in this article I’ll show you some of the basics on how to use an LDR with your Arduino.

In this article I’ll discuss both options.

Linux System Specifications from the Command Line

Linux System Specifications from the Command Line
4

In the past few weeks, I’ve ran into the need to find out what the hardware or system specifications are of one or the other Linux machine.

I use it every now and then, either on my QNAP, HTPC, Ubuntu machine or even my DD-WRT router.
Earlier this week I even needed it to checkout my old web-server specs versus the new web-server.

Well, with Operating Systems like Mac OS X and Windows, it’s relatively easy to find the specification with the help of system build-in tools that come with a proper user interface. Under Linux this can be more challenging though, especially when there is no graphical user interface – ie. you only have shell access.

In this article I’ll try to go through a few relatively standard commands to checkout your system specs like memory, CPU, video card, disks, etc.

XBox 360 – Duplicate XBox 360 content

XBox 360 – Duplicate XBox 360 content
21

Alright, this was the problem I ran into …

I have two XBox 360’s; an old Phat one and a new XBox 360E (looked better next to my Xbox One and was for $149 on sale at the time). On both I had the same DLC (Downloadable Content).
On the old one however, the harddrive died, so I replaced it with a new one (cheap 500Gb from AliExpress).

Now normally you can re-download the DLC content onto the new disk, but there are reasons why you’d rather do it this way …

For one, my Internet connection is horrendously slow, so downloading 34 games was not an option – I gave up after having it sit there, downloading content for more than 48 hours and quite often failing.

A possible other reason: The DLC you paid for is no longer available.

Yet another reason (for me): You moved to another country and the DLC is no longer available for that region, yet you still have the DLC on your other XBox 360.

You could also use this method to make a backup of your XBox 360’s hard drive, just in case it dies in the future.

All methods I have found online refer to a special cable you can purchase, or hooking up the drives to your PC. The latter is not always practical, especially when you’re only using laptops and do not have a SATA to USB adapter.

Anyhow, in this method we COPY the content, unlike what the XBox 360 likes to do. It standard MOVES content so it can reside on only one device or drive. Or can it …?

The only thing needed for this process is a USB drive or stick and of course access to a XBox 360 or two.

Note : This method will not allow you to illegally copy DLC from a buddy to your XBox 360, and that is not the intended of this article any way. You will need to be using the same XBox Live account on the other XBox 360, otherwise you will have to transfer the license.

High-Speed Data Transfers between two Macs with Thunderbolt

High-Speed Data Transfers between two Macs with Thunderbolt
11

Back in the day, when Firewire was a standard for any Mac, we could use Firewire to directly connect one Mac to another and transfer files at a very respectable speed – the so called “Target Disk Mode” or “IP over Firewire”.

This did not only help us in sharing files between 2 Mac’s, it even allowed you to boot one Mac from the DVD or CDRom drive on the other Mac, which is great when you have only one Mac with a CD or DVD drive.

Unfortunately, Firewire has gone out of the graces of Apple and has been replaced with Thunderbolt (and USB 3.x), and the trick to connect 2 Mac to each other over a Firewire cable have been lost and forgotten.

Please keep in mind, in case you’re having old Mac’s that have Firewire: this works exactly the same as with FireWire, you’d just use a Firewire cable instead. The firewire trick works under Windows as well (see this old WeetHet.nl Article).

In this article, I’ll show you how you can have a very fast data transfer between two Mac’s, using a Thunderbolt cable.

Testing and Playing with PIR sensors (motion sensor)

Testing and Playing with PIR sensors (motion sensor)
168

In one of my current projects, I’d like to use a few motion or proximity sensors, also known as PIR sensors.

PIR sensors, or Passive Infra Red sensors, can be great for Arduino and Raspberry Pi projects, and can be bought really cheap – I only paid about a dollar per sensors in bundle of 10 PIR sensors from eBay, but you can get them really cheap at places like Amazon or AliExpress as well.

In this short article we will see how we these sensors work, how the can be used, how we can test them, and possible fine tine them a little bit.

No Arduino, Raspberry Pi or anything like that is needed. Just a PIR, a LED, a battery and a resistor.

How to install Lazarus Pascal on Raspberry Pi 2 (Raspbian)

How to install Lazarus Pascal on Raspberry Pi 2 (Raspbian)
290

For those of you who have visited Tweaking4All more often, you might have noticed that I really like Lazarus Pascal. I use it to develop little freeware applications for multiple platforms (if possible), like for Windows, MacOS X and Linux.

So why not on a Raspberry Pi (Raspbian)? Lazarus allows Rapid Application Development in the good old Delphi style which would be ideal for a platform like the Raspberry Pi. Specially since the Raspberry Pi  2 Model B seems to be fast enough as well.

Now me and my brother-in-law (Jean-Pierre) are planning to build an Alarm system based on a Raspberry Pi 2, use a TouchScreen and plenty of sensor. Lazarus Pascal could be ideal for this purpose.

To my disappointment, it took me a lot of time to get Lazarus to run on my new Raspberry Pi 2 Model B … so that’s why I wrote this article, which is basically a compilation of a lot of steps that I found scattered all over the Internet.

Mac OS X SMB Fix, or How to install SMBUp

Mac OS X SMB Fix, or How to install SMBUp
135

If you’re a Mac user, and you’re enjoying the newer MacOS X versions, then you might have noticed that Apple’s own implementation of SMB simply sucks … it just doesn’t work and for a company like Apple to just leave it this way is beyond me.

SMB is a network protocol, commonly know as “Microsoft Windows Network” or Samba, which allows sharing of files and devices over a network. Most of us use this on our Windows computers and theoretically (it seems) MacOS X should support this as well.

For me it’s to share files with family, friends, or to share media files with my XBMC/Kodi setup.

In this article, I’ll show you how to quickly get started with a working Samba implementation, instead of using Apple’s broken implementation – for this we will make use of SMBUp.

MacOS X – How to use a XBox 360 Controller on Mac

MacOS X – How to use a XBox 360 Controller on Mac
194

I honestly had zero use for a XBox 360 Controller on my Mac, since I’m a keyboard/mouse gamer … but I was toying with another article (Kodi on Amazon Fire TV) and was looking for a Game Controller for the Amazon Fire TV.

Looking around I noticed that the Microsoft XBox 360 wireless controller for Windows should work with the Amazon Fire TV and with MacOS X. Since I do play the occasional game on my Mac (yes: that is possible!) with Steam, I figured why not give it a try. The controller, with receiver, isn’t all that expensive.

So in this article: How to connect and use an Xbox 360 Controller on MacOS X …
TIP: For those of you who are trying to get this to work with an XBox One Controller, please read the “Bluetooth XBox One controller on a Mac” article as well.

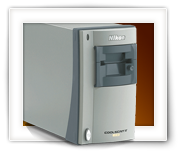
Fix Film Strip Stuck inside Nikon Coolscan V ED (LS-50)

Fix Film Strip Stuck inside Nikon Coolscan V ED (LS-50)
117

The last few months I’ve spend an absurd amount of time scanning family negatives. Over 12,000!

For this I used the excellent Nikon CoolScan LS-50, also known as the Nikon CoolScan V ED. These scanners perform superb, even though Nikon stopped producing them. Even support has been stopped or reduced. If you need one, eBay is the place to go.

In the process of scanning all these negatives, I ran into the problem that it had swallowed the film strip, and the entire scanner refused operation right after that.

This article shows you how you can remedy this with only a phillips screwdriver and some patience …

Please note that this article was written with the LS-50/V ED in mind, but it seems that other Nikon CoolScan models might be fixable in the same fashion (i.e. 4000 [IV] and 5000, and other models that look similar).

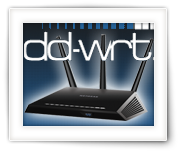
NetGear R7000 – How to install DD-WRT …

NetGear R7000 – How to install DD-WRT …
312

I recently purchased a NetGear R7000 Nighthawk WiFi router capable of 2.4Ghz and 5Ghz Wifi. This router so far has been awesome – compared to my old ActionTec WiFi router: it right away gave met a 10% speed increase on my downloads and it supports 5Ghz WiFi (great for Apple products).

Now I wanted to try something different: DD-WRT.
DD-WRT is an open source firmware available for numerous routers, offering a vast amount of features that you will not find on normal routers. For me the main reason to try this was: Support for DNSMasq, so I can assign multiple hostnames to the same IP address for my Test Webserver, and build-in VPN. Not just VPN support as most routers claim (meaning: pass through of VPN traffic)! No, we’re talking real OpenVPN build in so the router actually maintains the VPN connection.

In this guide I will use Kong’s DD-WRT firmware and go through the steps and go back to stock if needed.

1 2 3 4