ApplePi-Baker, the application I developed for Mac OS X user that like to work with the Raspberry Pi, is now available in version 1.3.
With ApplePi-Baker, you can write an IMG file to an SD-Card, prepare an SD-Card for NOOBS use, and make a backup of an SD-Card.
The changes are mostly cosmetic. Wider window, more aligning with your average screen, removal of the resize icon, and the application is now more Retinizer compatible.
Also a minor bug in SD-Card and SD-Card reader detection has been fixed.
See the ApplePi-Baker article or the Downloads Page for download and details.
Ad Blocking Detected Please consider disabling your ad blocker for our website.
We rely on these ads to be able to run our website.
You can of course support us in other ways (see Support Us on the left).
After writing the article on “How to get an Operating System on a SD-Card“, I realized that the existing methods and tools were not to my liking. Of course the existing tools are most certainly not bad and work just fine. I just didn’t like how they worked.
So instead of complaining, I decided to write my own program: The ApplePi-Baker  …
…
This application is for MacOS X only and allows you to prepare an SD-Card for use with Raspberry Pi’s NOOBS, and it allows you to “flash” and IMG file to an SD-Card. ApplePi-Baker can now also be found on AlternativeTo.net and eLinux.org.
Note : This application is also very suitable for creating or restoring an IMG backup of USB drives!
Update : ApplePi-Baker v2 has been released, you can get it here.
The new version offers a lot options including shrinking and expanding of IMG’s, writing to multiple disks, a better speed and improved stability compared to the old version (1.x) mentioned in this article.
In certain scenarios, it can be a timesaver, and avoid mistakes, to have one or more templates for common emails.
Unfortunately, Apple Mail, that comes with macOS, doesn’t have a template mechanism … or does it?
With a simple trick we can use “templates” in Apple Mail under macOS and in this article I’ll show you how …
For those of you who have visited Tweaking4All more often, you might have noticed that I really like Lazarus Pascal. I use it to develop little freeware applications for multiple platforms (if possible), like for Windows, MacOS X and Linux.
So why not on a Raspberry Pi (Raspbian)? Lazarus allows Rapid Application Development in the good old Delphi style which would be ideal for a platform like the Raspberry Pi. Specially since the Raspberry Pi 2 Model B seems to be fast enough as well.
Now me and my brother-in-law (Jean-Pierre) are planning to build an Alarm system based on a Raspberry Pi 2, use a TouchScreen and plenty of sensor. Lazarus Pascal could be ideal for this purpose.
To my disappointment, it took me a lot of time to get Lazarus to run on my new Raspberry Pi 2 Model B … so that’s why I wrote this article, which is basically a compilation of a lot of steps that I found scattered all over the Internet.
Ad Blocking Detected Please consider disabling your ad blocker for our website.
We rely on these ads to be able to run our website.
You can of course support us in other ways (see Support Us on the left).
So you erased the internal disk of your AppleTV and want to restore AppleTV OS?
It happened to me; playing with a 1st generation AppleTV, installing (and thus wiping) a AppleTV suitable Ubuntu version. Only to find out that I goofed up and had to go back to the original OS to change some video settings. Yes I was playing with CrystalBuntu and OpenElec … (highly recommend both!)
In a previous article I described a method that uses a Windows tool from StmLabs, which needs Windows and a network connection.
In this article however I will show you how to do it without a network connection, for Windows, Linux and MacOS X.
As part of a small series of iPad/iPhone tips and tricks, an article that covers some tips and tricks related taking pictures including remote camera control for selfies, Copy and Paste pictures, iPad as Photo-frame, Ringtones, Home-Sharing, screenshots, AirPlay, iTunes Radio, etc. … features we all might overlook!
Please note that some of these features are just cool, and others are really helpful,…
The Raspberry Pi is one fun little computer perfectly capable of emulation Classic Computers like the Commodore 64, ZX-81, ZX-Spectrum, Apple ][, Atari ST and even DOS/Windows 3.1. Emulation on the Raspberry Pi however is not limited to classic computers. Emulation of Classic Game Consoles like the Atari 2600, SEGA Genesis, Super Nintendo, Nintendo Entertainment System (or: NES) and Gameboy handheld work great as well.
My favorite in this however remains the emulation of classic Arcade Games with MAME.
Unfortunately, I did not find an emulator for one of my childhood consoles, the Magnavox Odyssey² (a.k.a. Philips VideoPac G7000).
In this article an introduction to CHAMELEONPI, an awesome distribution by Carles Oriol, which can be downloaded for free. It offers all of these emulators, with a beautiful interface and an easy way to upload ROMs and applications for the Classic Computers, Game Consoles, and Arcade Emulator (MAME).
Ad Blocking Detected Please consider disabling your ad blocker for our website.
We rely on these ads to be able to run our website.
You can of course support us in other ways (see Support Us on the left).
When I first started working with the Raspberry Pi just after the first model A was released, my first issue was: How to get an Operating System on an SD-Card?
I mean: you just purchased a Raspberry Pi – you want to see it in action right away right?
After figuring that out, others have asked me the same question on how to create a SD-Cards for the Raspberry Pi. So here a guide on how to get it done in a few simple steps for Windows, MacOS X and Linux.
The Raspberry Pi, for those unaware, is a $35 computer, equipped with all you need (network, USB, etc), capable of running an Operating Systems like Linux, RiscOS, etc. and can even run XBMC (OpenElec for example) out of the box producing 1080p video through HDMI.
The main reason why I bought my first Arduino board was to be able to play with LED strips with applications like BobLight and LightPack that offer colored backlighting to your TV comparable to what Philips offers with it’s beautiful AmbiLight TV’s.
I like really Philips, and I like Ambilight, so why not buy a Philips AmbiLight TV?
Well, pretty simple … first of all Philips does not carry 80″ AmbiLight enabled TV’s, smaller models are significantly more expensive than non-AmbiLight models, and it appears that these AmbiLight TV’s are hard to find in the US.
In this article we will be using an Arduino Uno connected to a strip of WS2812/WS2811 LEDs.
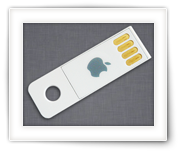
Certain Apple models, like the MacBook Air, have been delivered with a convenient 8Gb USB stick for a system restore.
Obviously, after upgrading to a newer Mac OS X version, this stick has become kind off useless.
When trying to format the Apple USB Restore stick however, you’ll notice that it’s a Read-Only stick, so how can we format this USB stick for normal use … Or to store the image of your current Mac OS X version on?
Ad Blocking Detected Please consider disabling your ad blocker for our website.
We rely on these ads to be able to run our website.
You can of course support us in other ways (see Support Us on the left).
While writing an article on how 3D movies work, I couldn’t help thinking back about the red and blue 3D pictures from back in the day (anaglyph). They were considered pretty cool and how difficult would it be to make them yourselves? Sure, you might not want to stare at them the whole day, but cool none the less.
After figuring that out, I was started to wonder if it would be possible and how difficult it would be to create 3D pictures for 3D capable TV’s (see also: How 3D Movies work).
So in this article I’ll show you how to make a 3D picture with your own digital photo camera for either the good old red and blue 3D glasses, or for use on a 3D capable TV in full color.
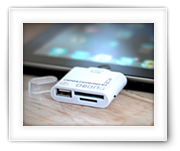
So you’d like to play a movie on your iPad but you really don’t want to use or an application like iTunes or iTools?
No problem … In this article, I’ll explain how to use an unexpected tool, the Camera Connection Kit, to actually copy a movie to your iPad device without iTunes.
This trick actually works for any operating system, so Linux users are in luck as well, and works for JPEG/JPG images as well.
So you erased the internal disk of your AppleTV and want to restore AppleTV OS?
It happened to me; playing with a 1st generation AppleTV, installing (and thus wiping) a AppleTV suitable Ubuntu version. Only to find out that I goofed up and had to go back to the original OS to change some video settings. Yes I was playing with CrystalBuntu and OpenElec … (highly recommend both!)
Now it appeared that restoring back to the original AppleTV OS wasn’t all that simple – since I literally wiped the entire disk – until I bumped into v1.1 of StmLabs’ Windows Installer UI.
UPDATE: There is an easier method available in this article “Restore AppleTV OS after erasing disk (Offline Method)“.
Ad Blocking Detected Please consider disabling your ad blocker for our website.
We rely on these ads to be able to run our website.
You can of course support us in other ways (see Support Us on the left).
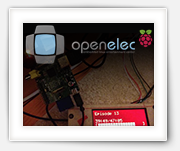
You might be familiar with XBMC, one of the best Media Center like systems/applications out there. You also might know about the $35 computer called Raspberry Pi, and that some folks managed to got XBMC to run on this little guy; RaspBMC and my favorite: OpenELEC.
Well, in this article I’ll show you how I got an LCD display (Hitachi HD44780 based) combined with LCD2USB for use with the Raspberry Pi running OpenELEC XBMC.
RaspBMC user might find this article useful as well.
If you want to use a HD44780 based display without LCD2USB then you might want to read this post that uses the GPIO port directly. The lcdproc manual pages show more details on how to configure lcdproc to use the HD44780.
Note: These instructions should be very similar for other OpenELEC systems (Generic, ATV, Fusion, ION, etc).
With macOS Tahoe, Apple came with quite a few cosmetic changes in the UI.
Some love the changes, some hate it, and some do not care either way.
The one thing that really annoyed me, besides Tahoe feeling a little sluggish and some of those cosmetic bugs, was the “squircle jail” applied to application icons that do not seem to match Apple’s new icon design desires, where a grey squircle was drawn behind the icons that used to look great.
To fix this, there is not a single option in the OS to be found to undo this unwanted change.
So I ended up figuring out the “new” icon, and how to override it, is all controlled with Extended Attributes and created a little application, SquircleNoMore, to strip those ugly icons and reset applications to their native icon.